DIY Pirate Costume for Kids | Easy Halloween Costume Tutorial
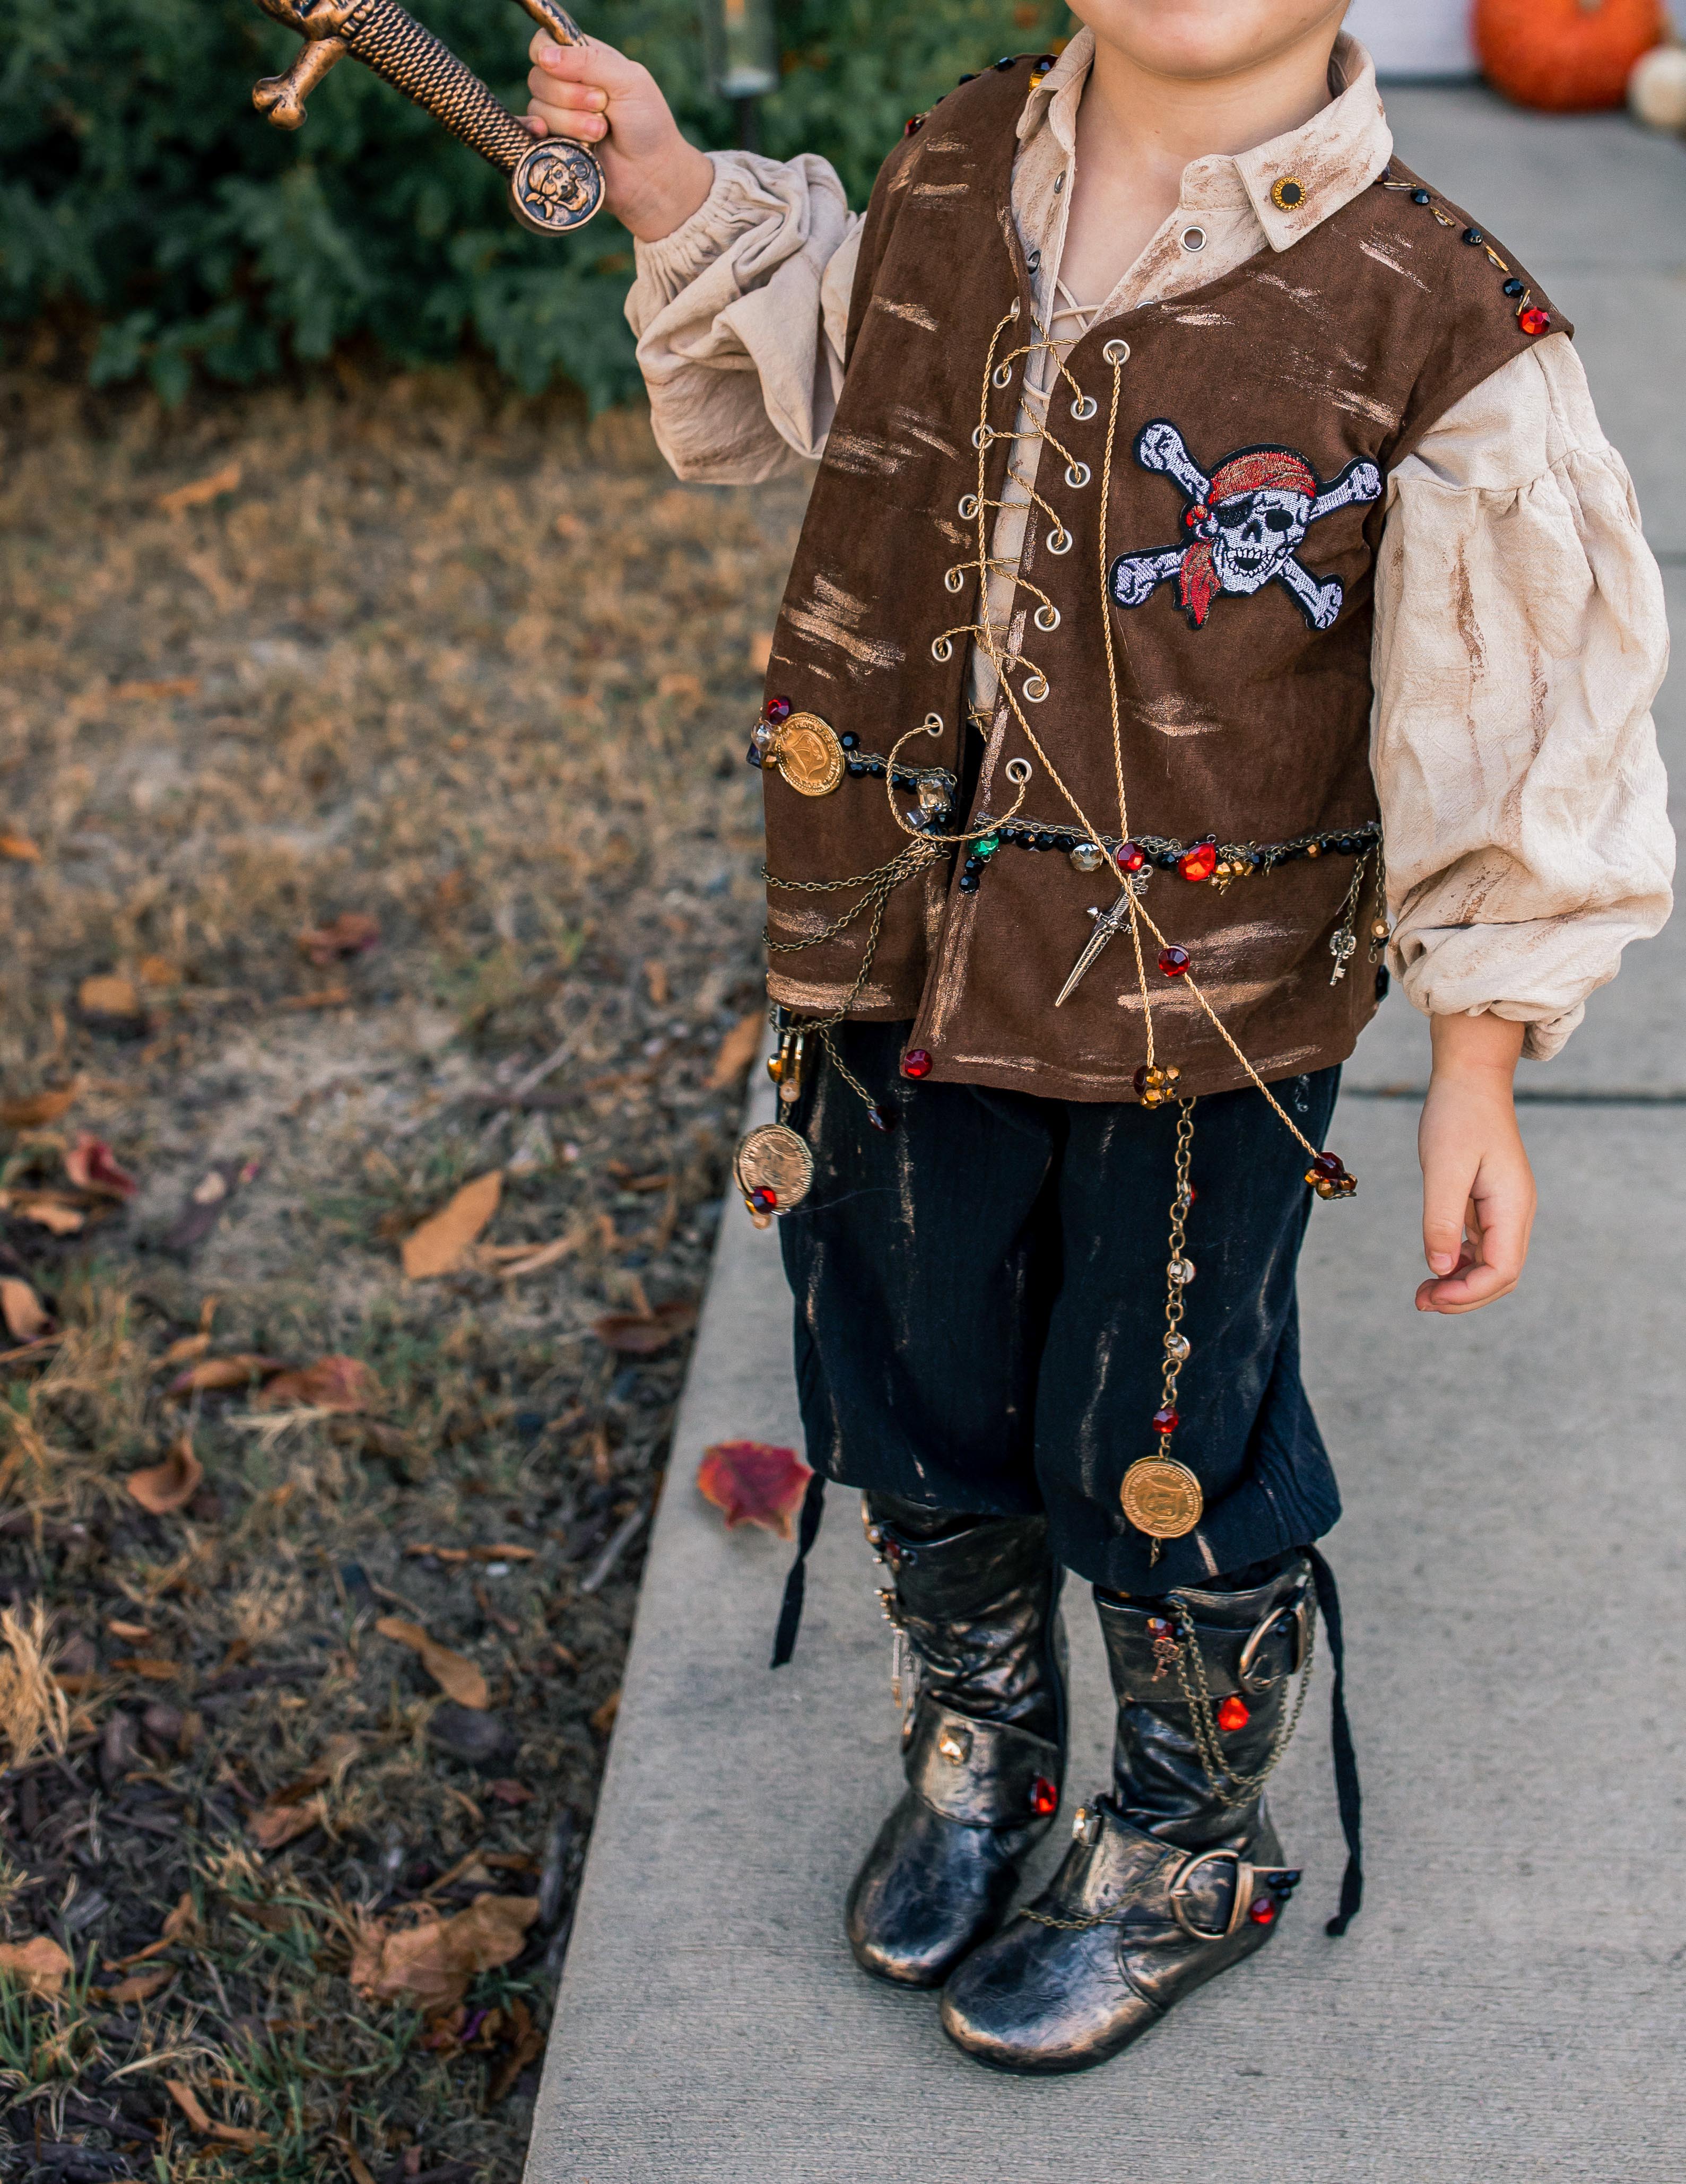
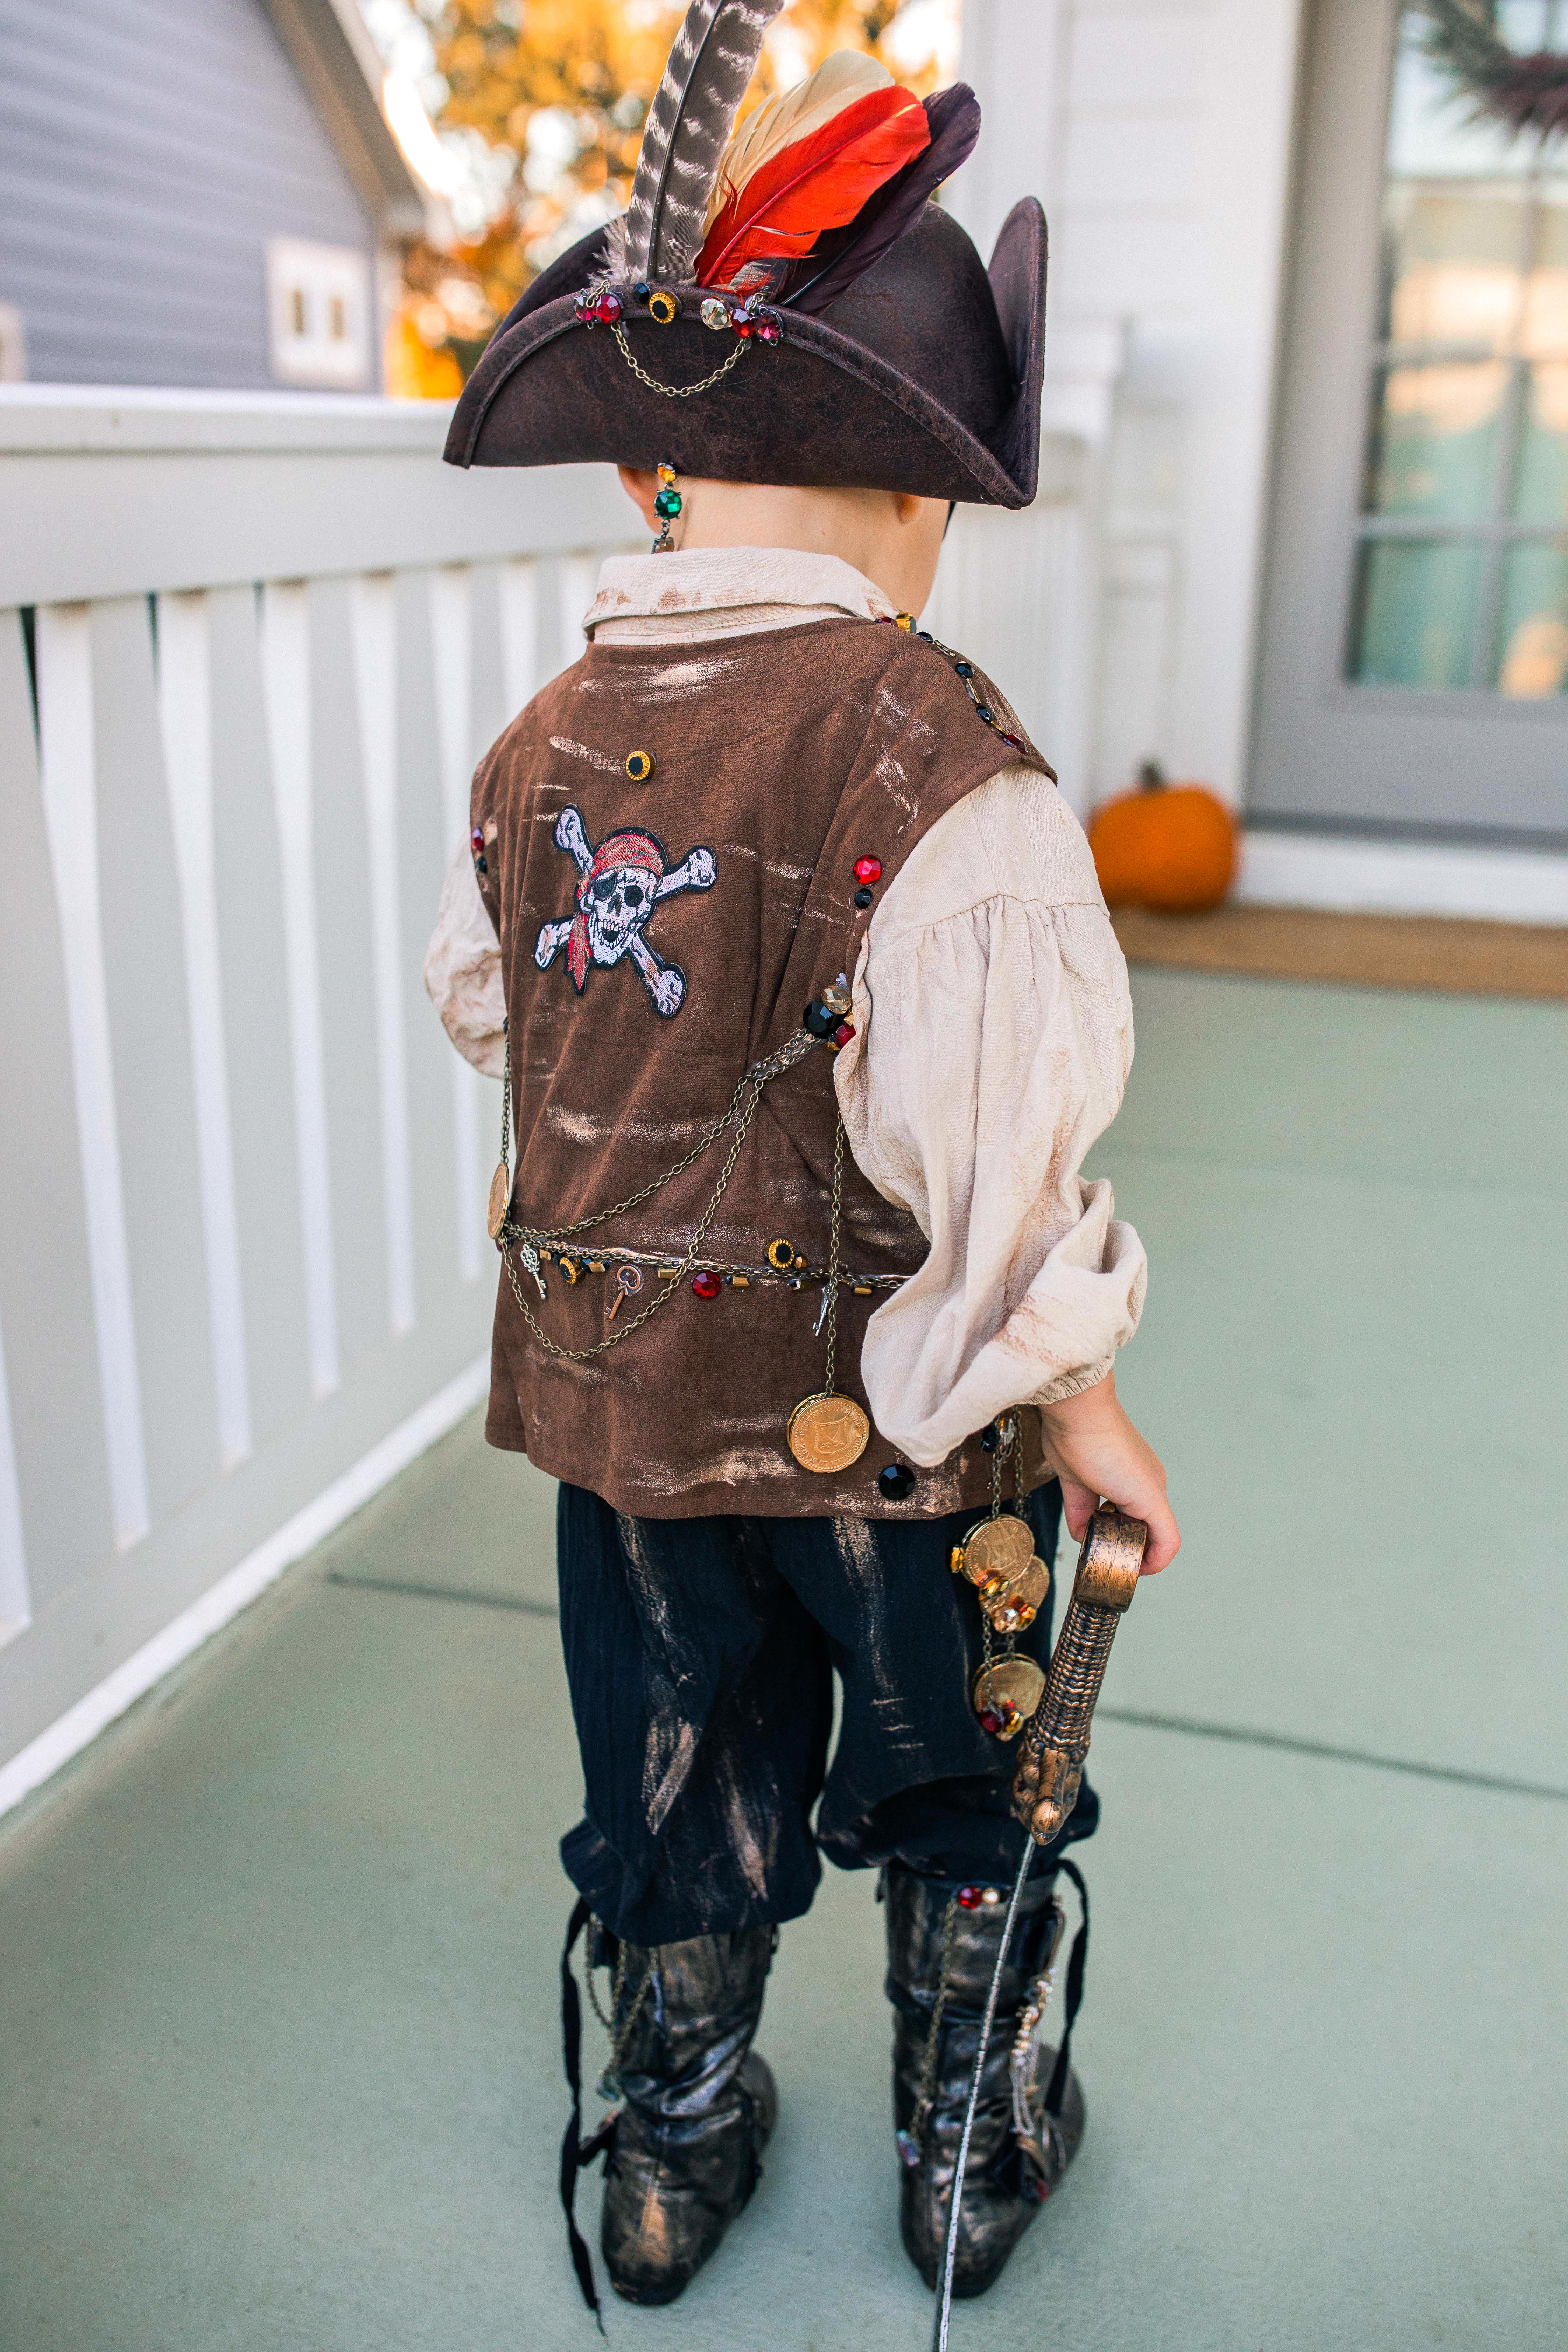
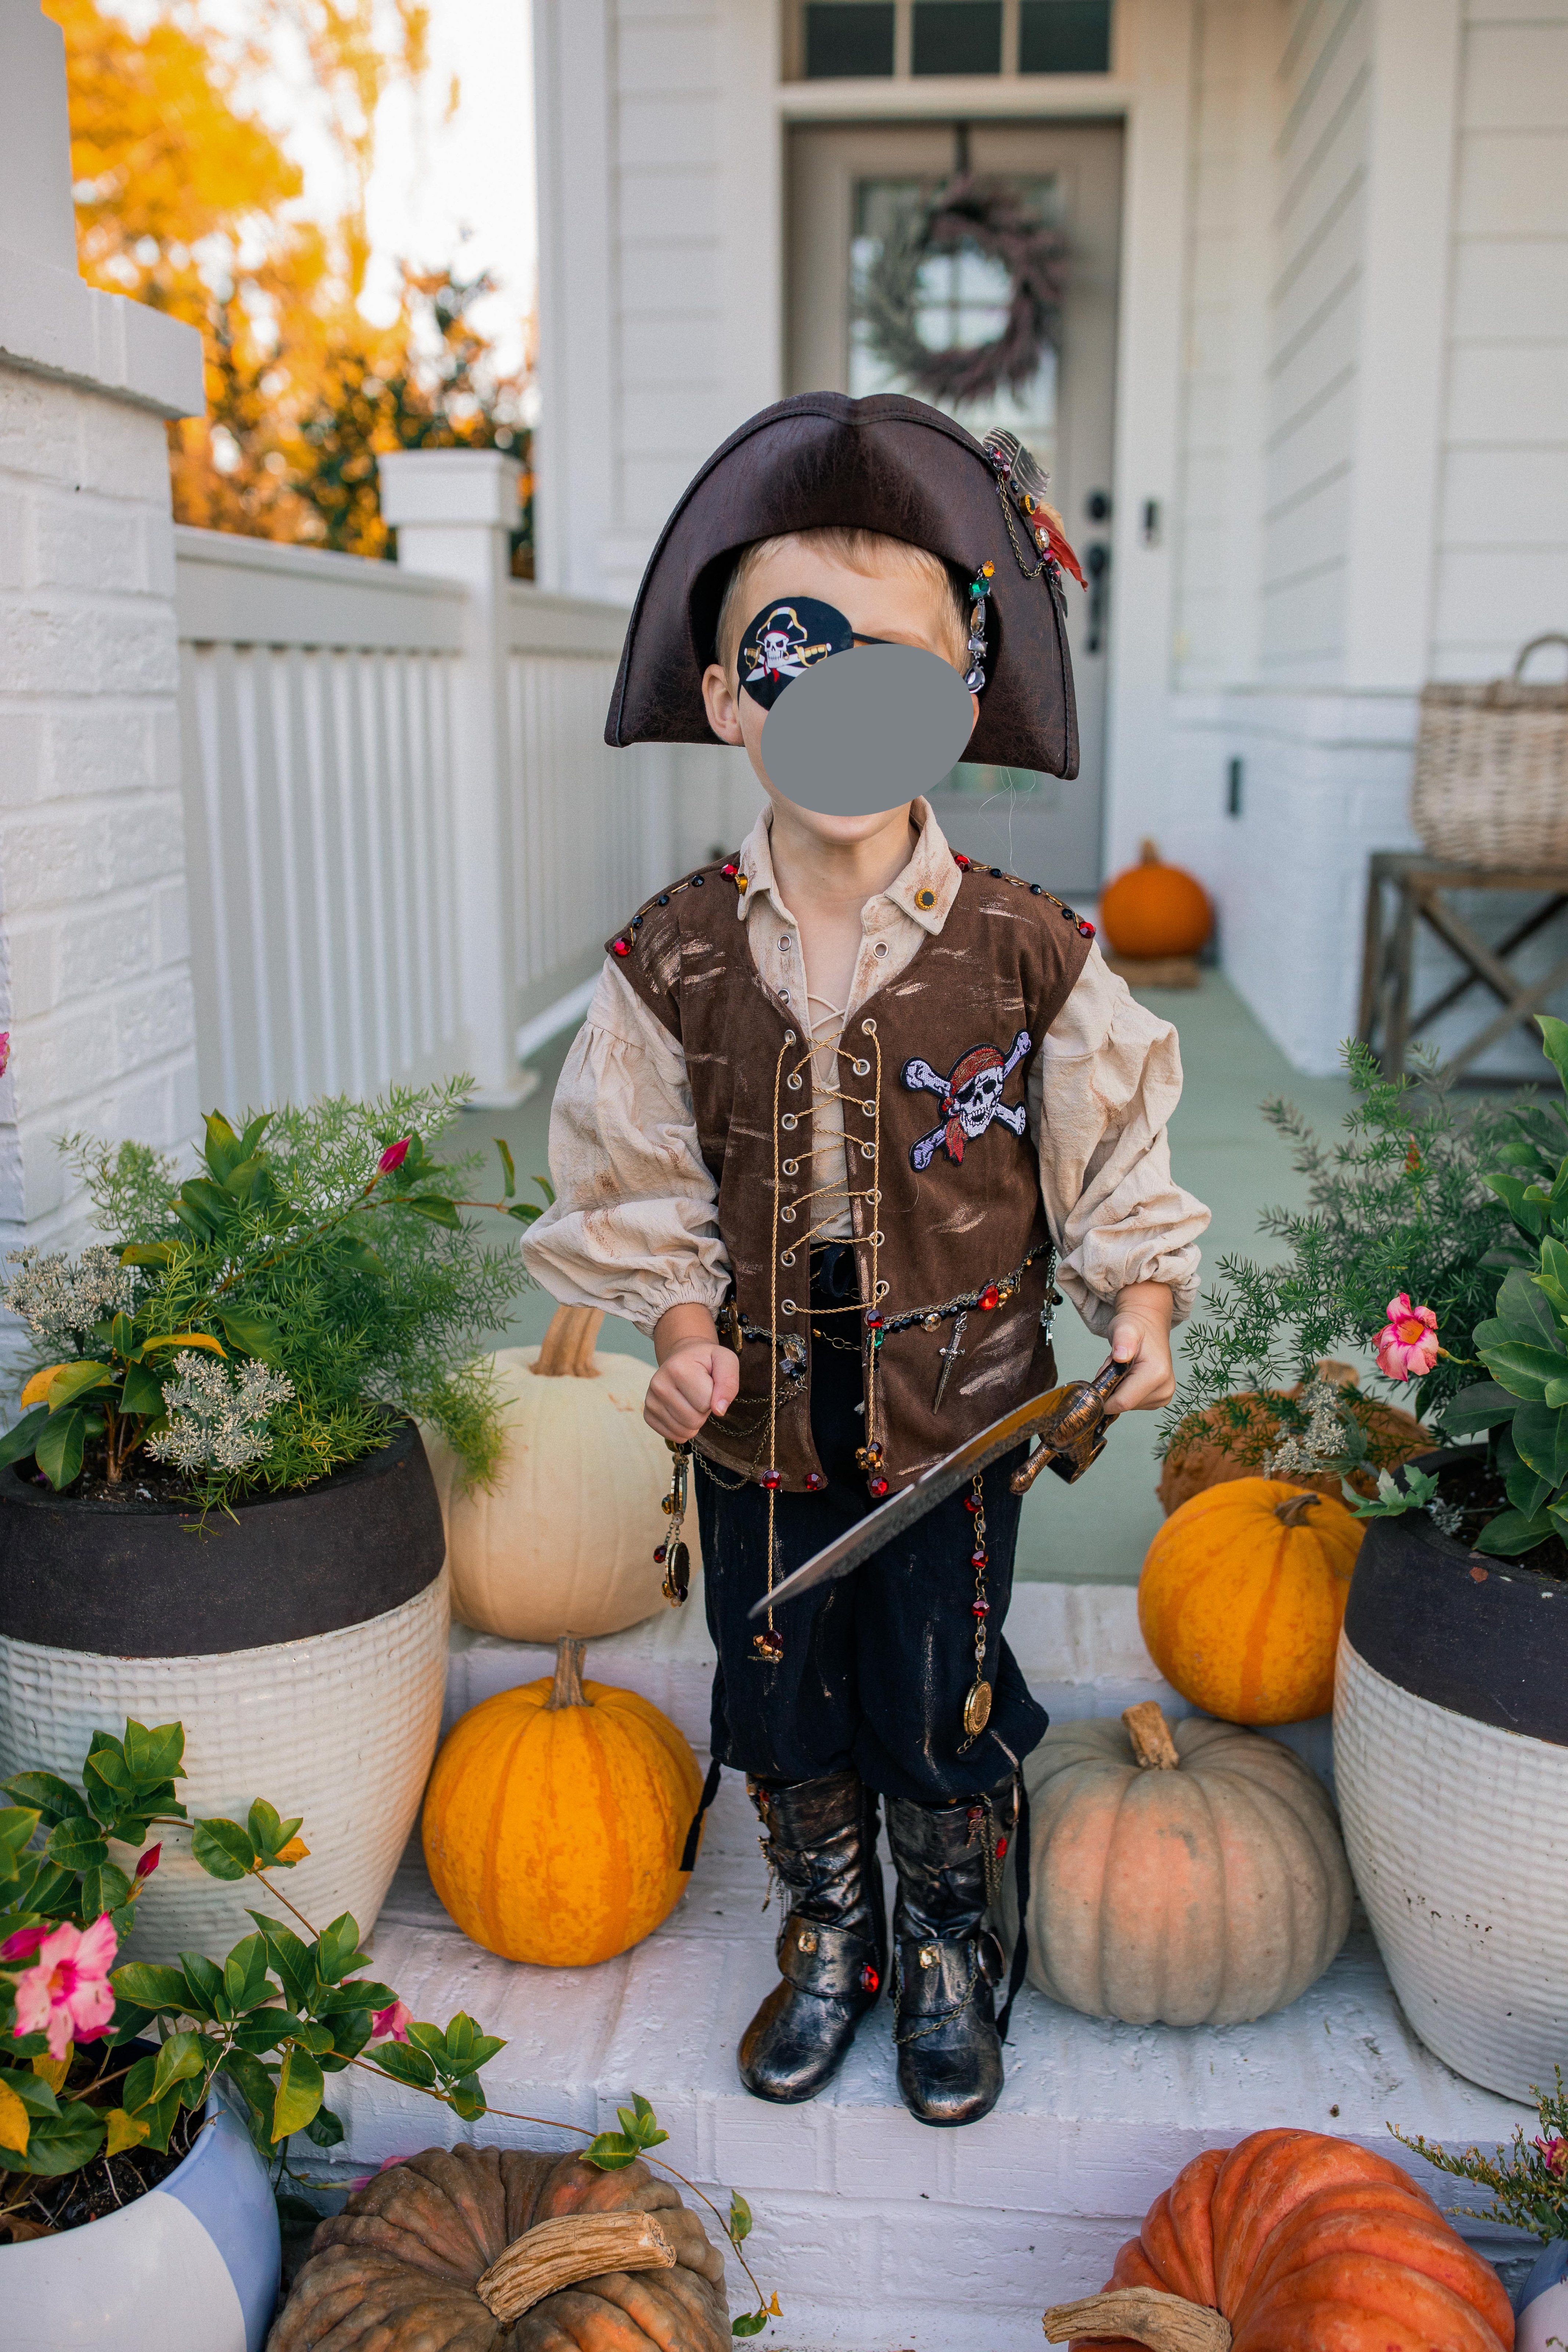
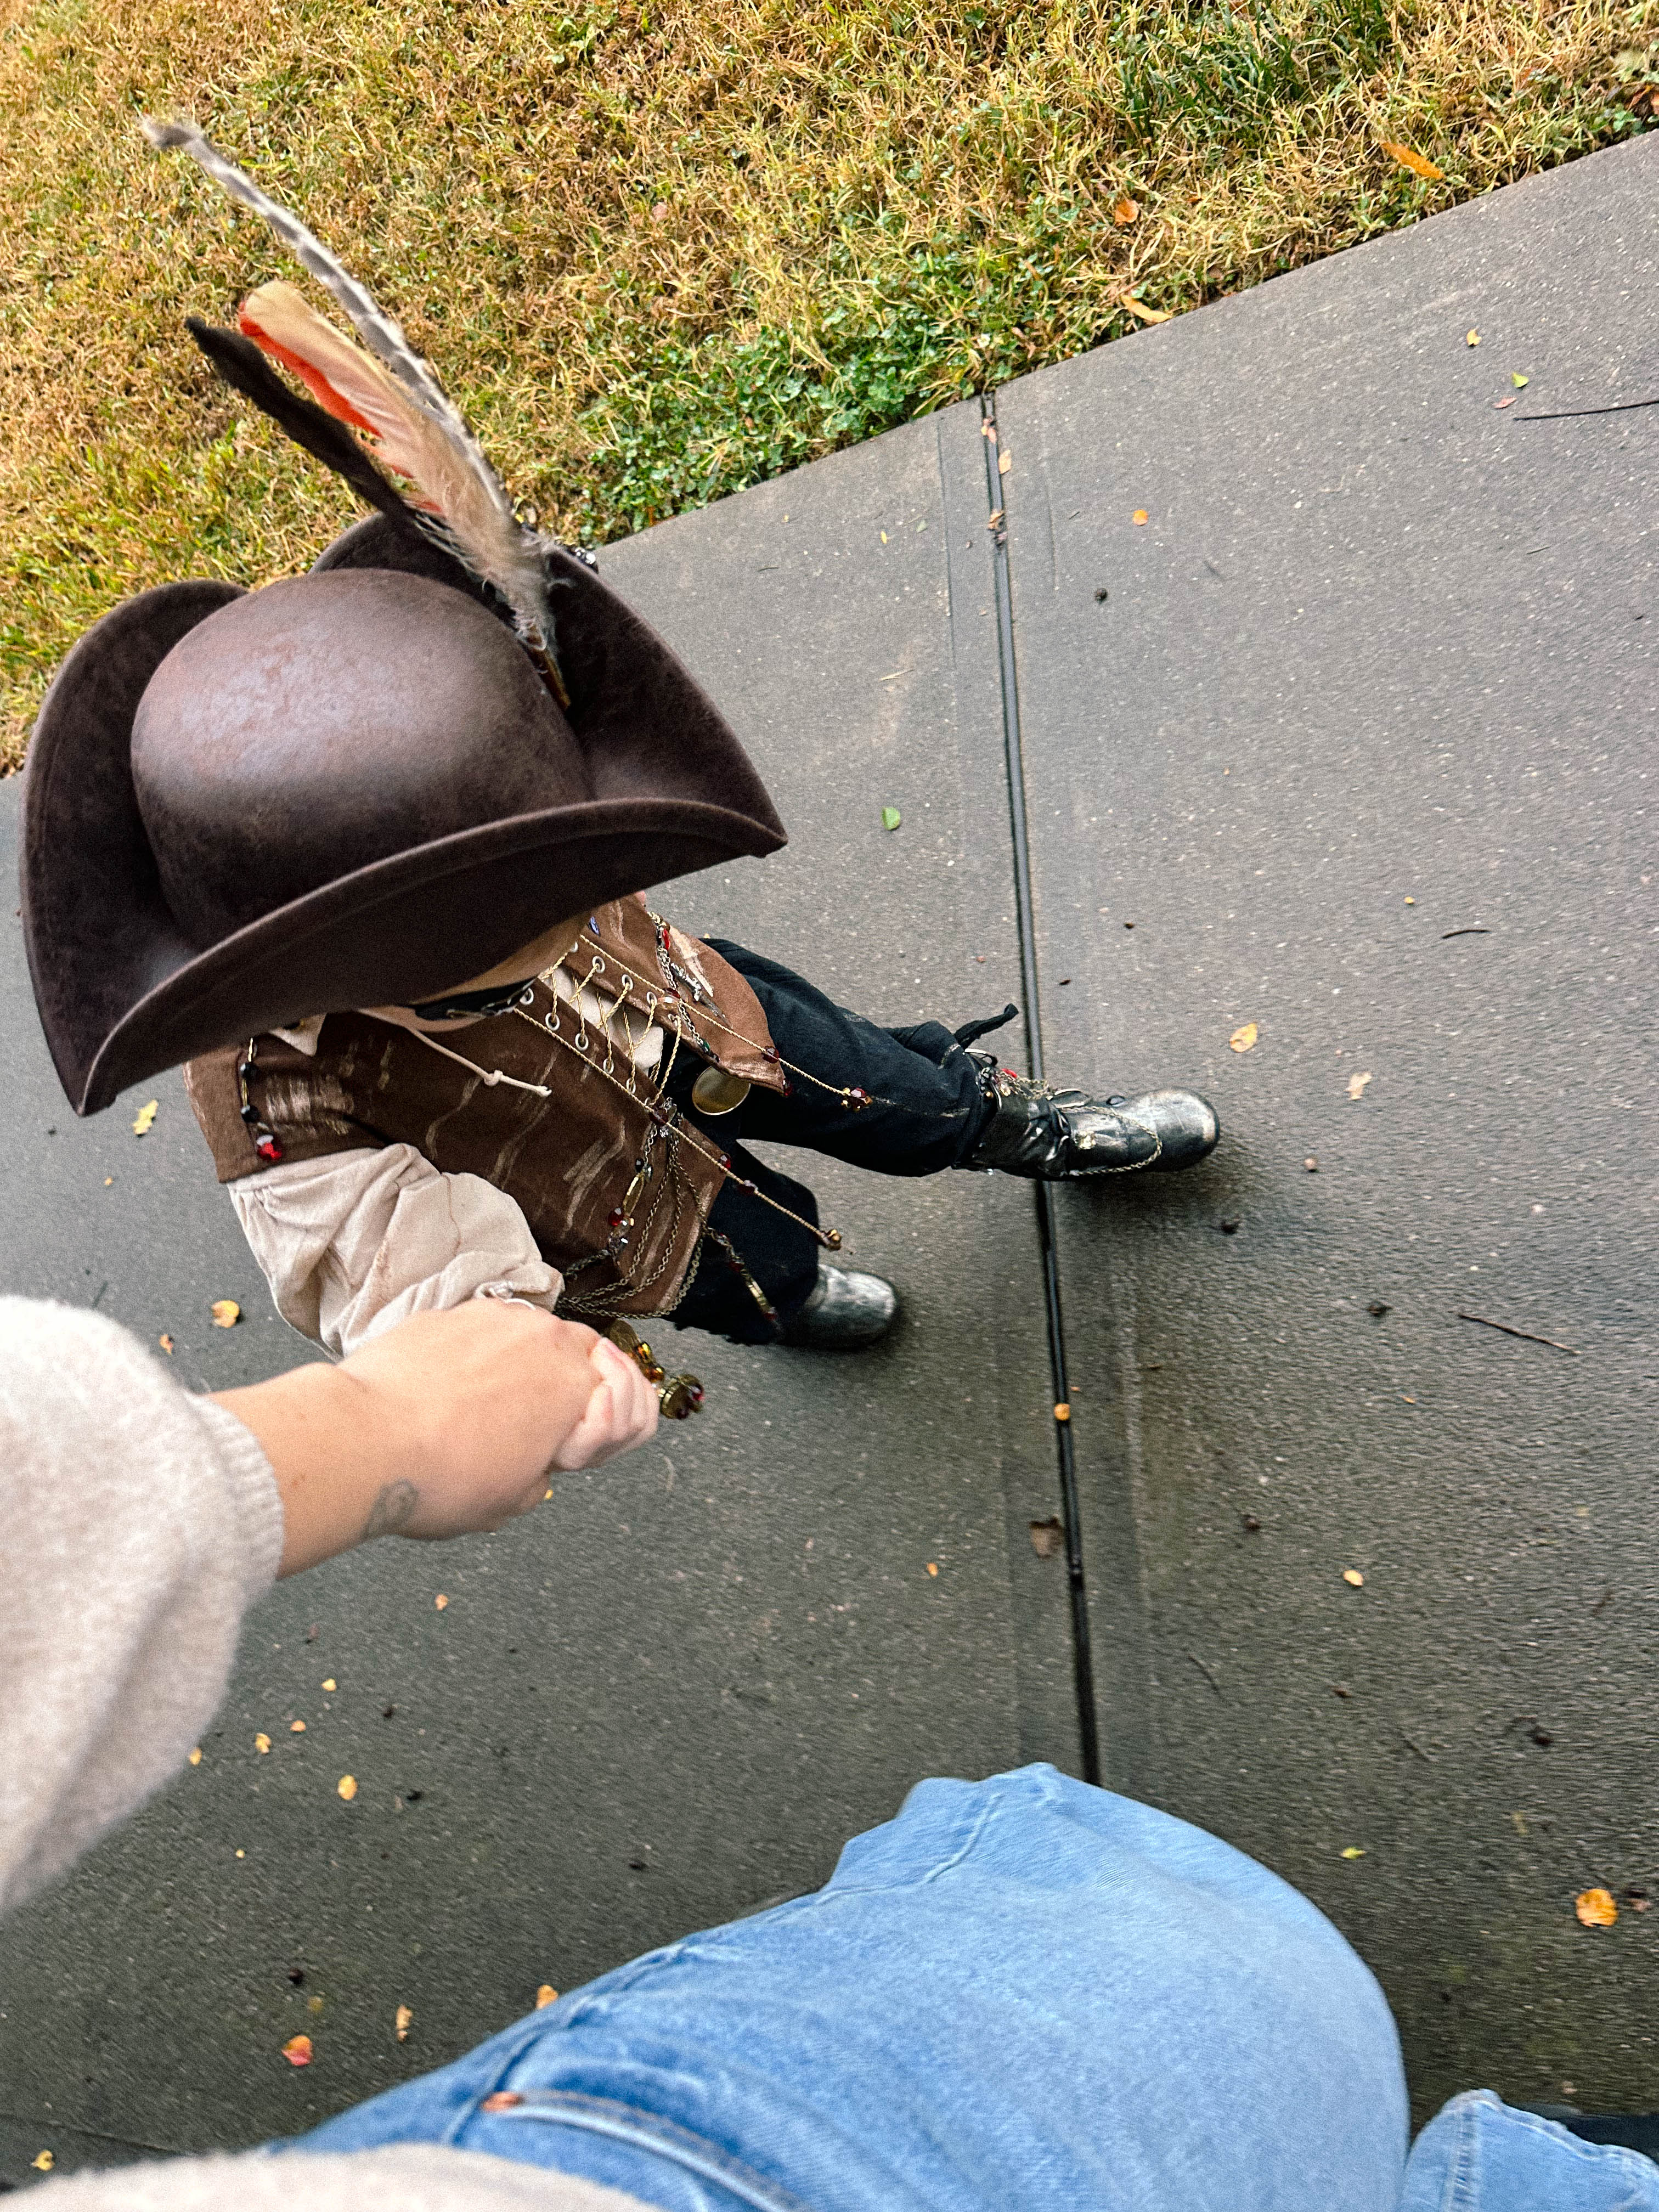
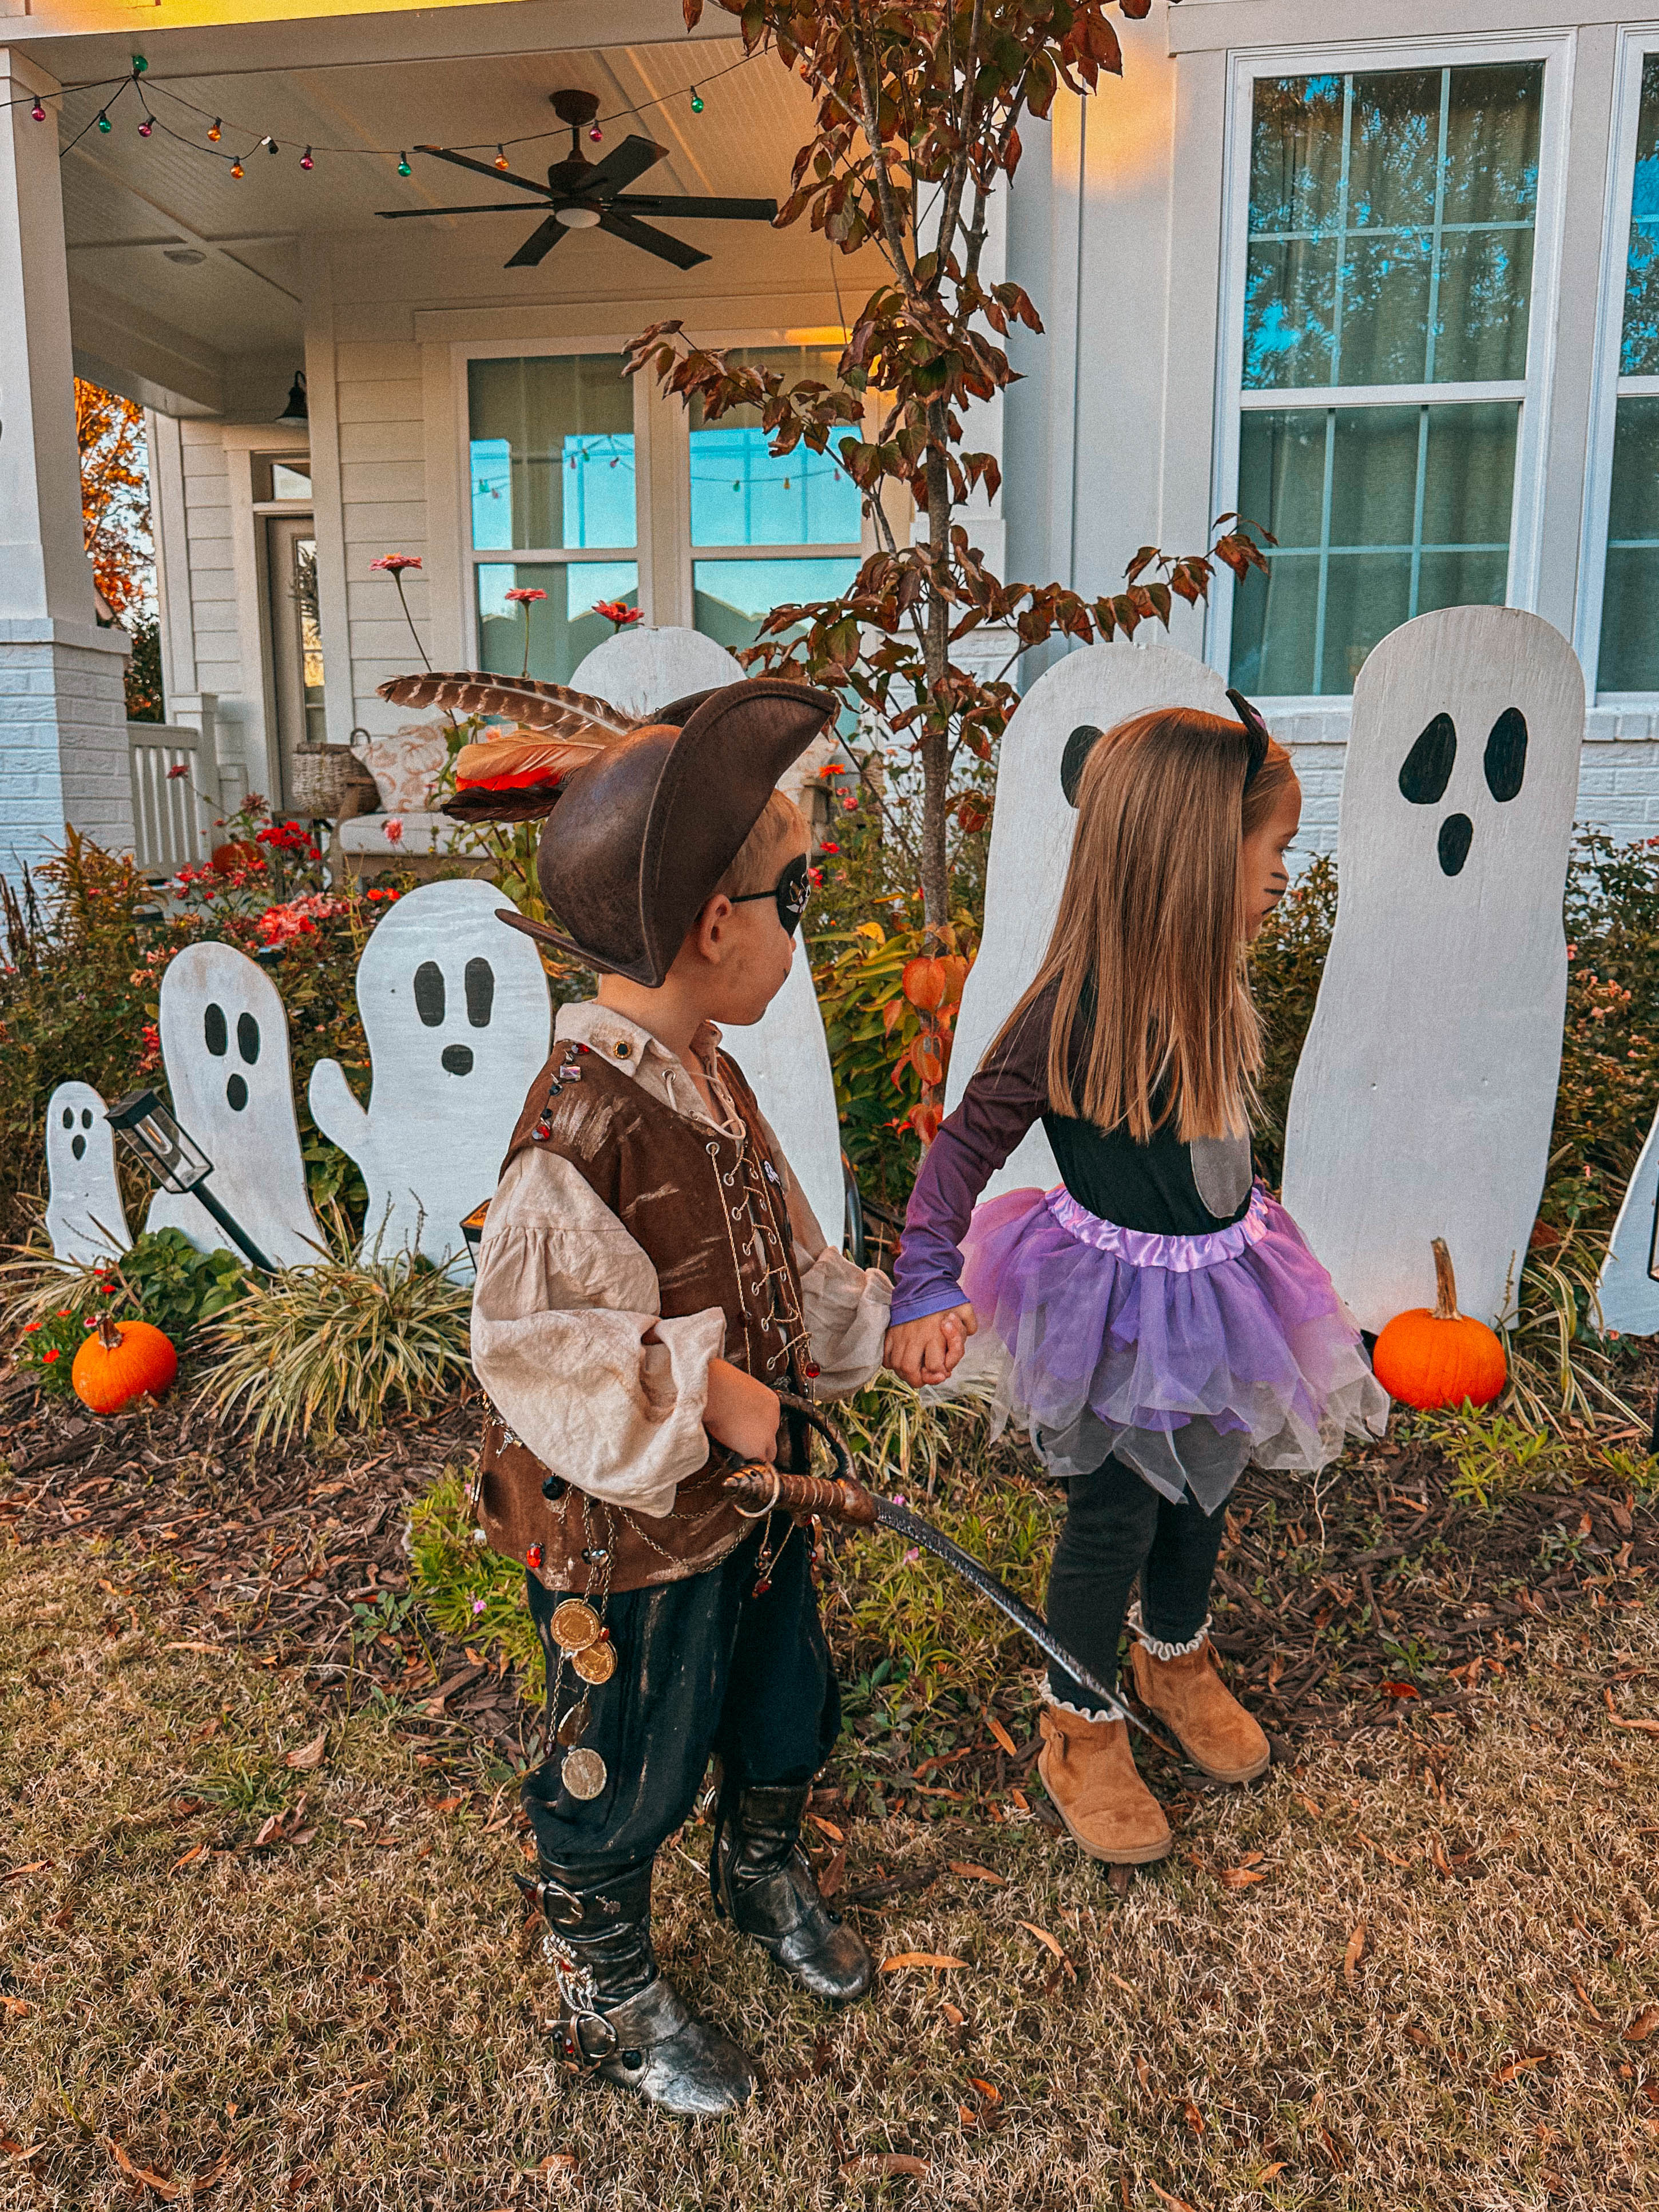
Every year, I have so much fun putting together my son’s Halloween costumes, but this little rustic pirate costume might be one of my favorites yet!
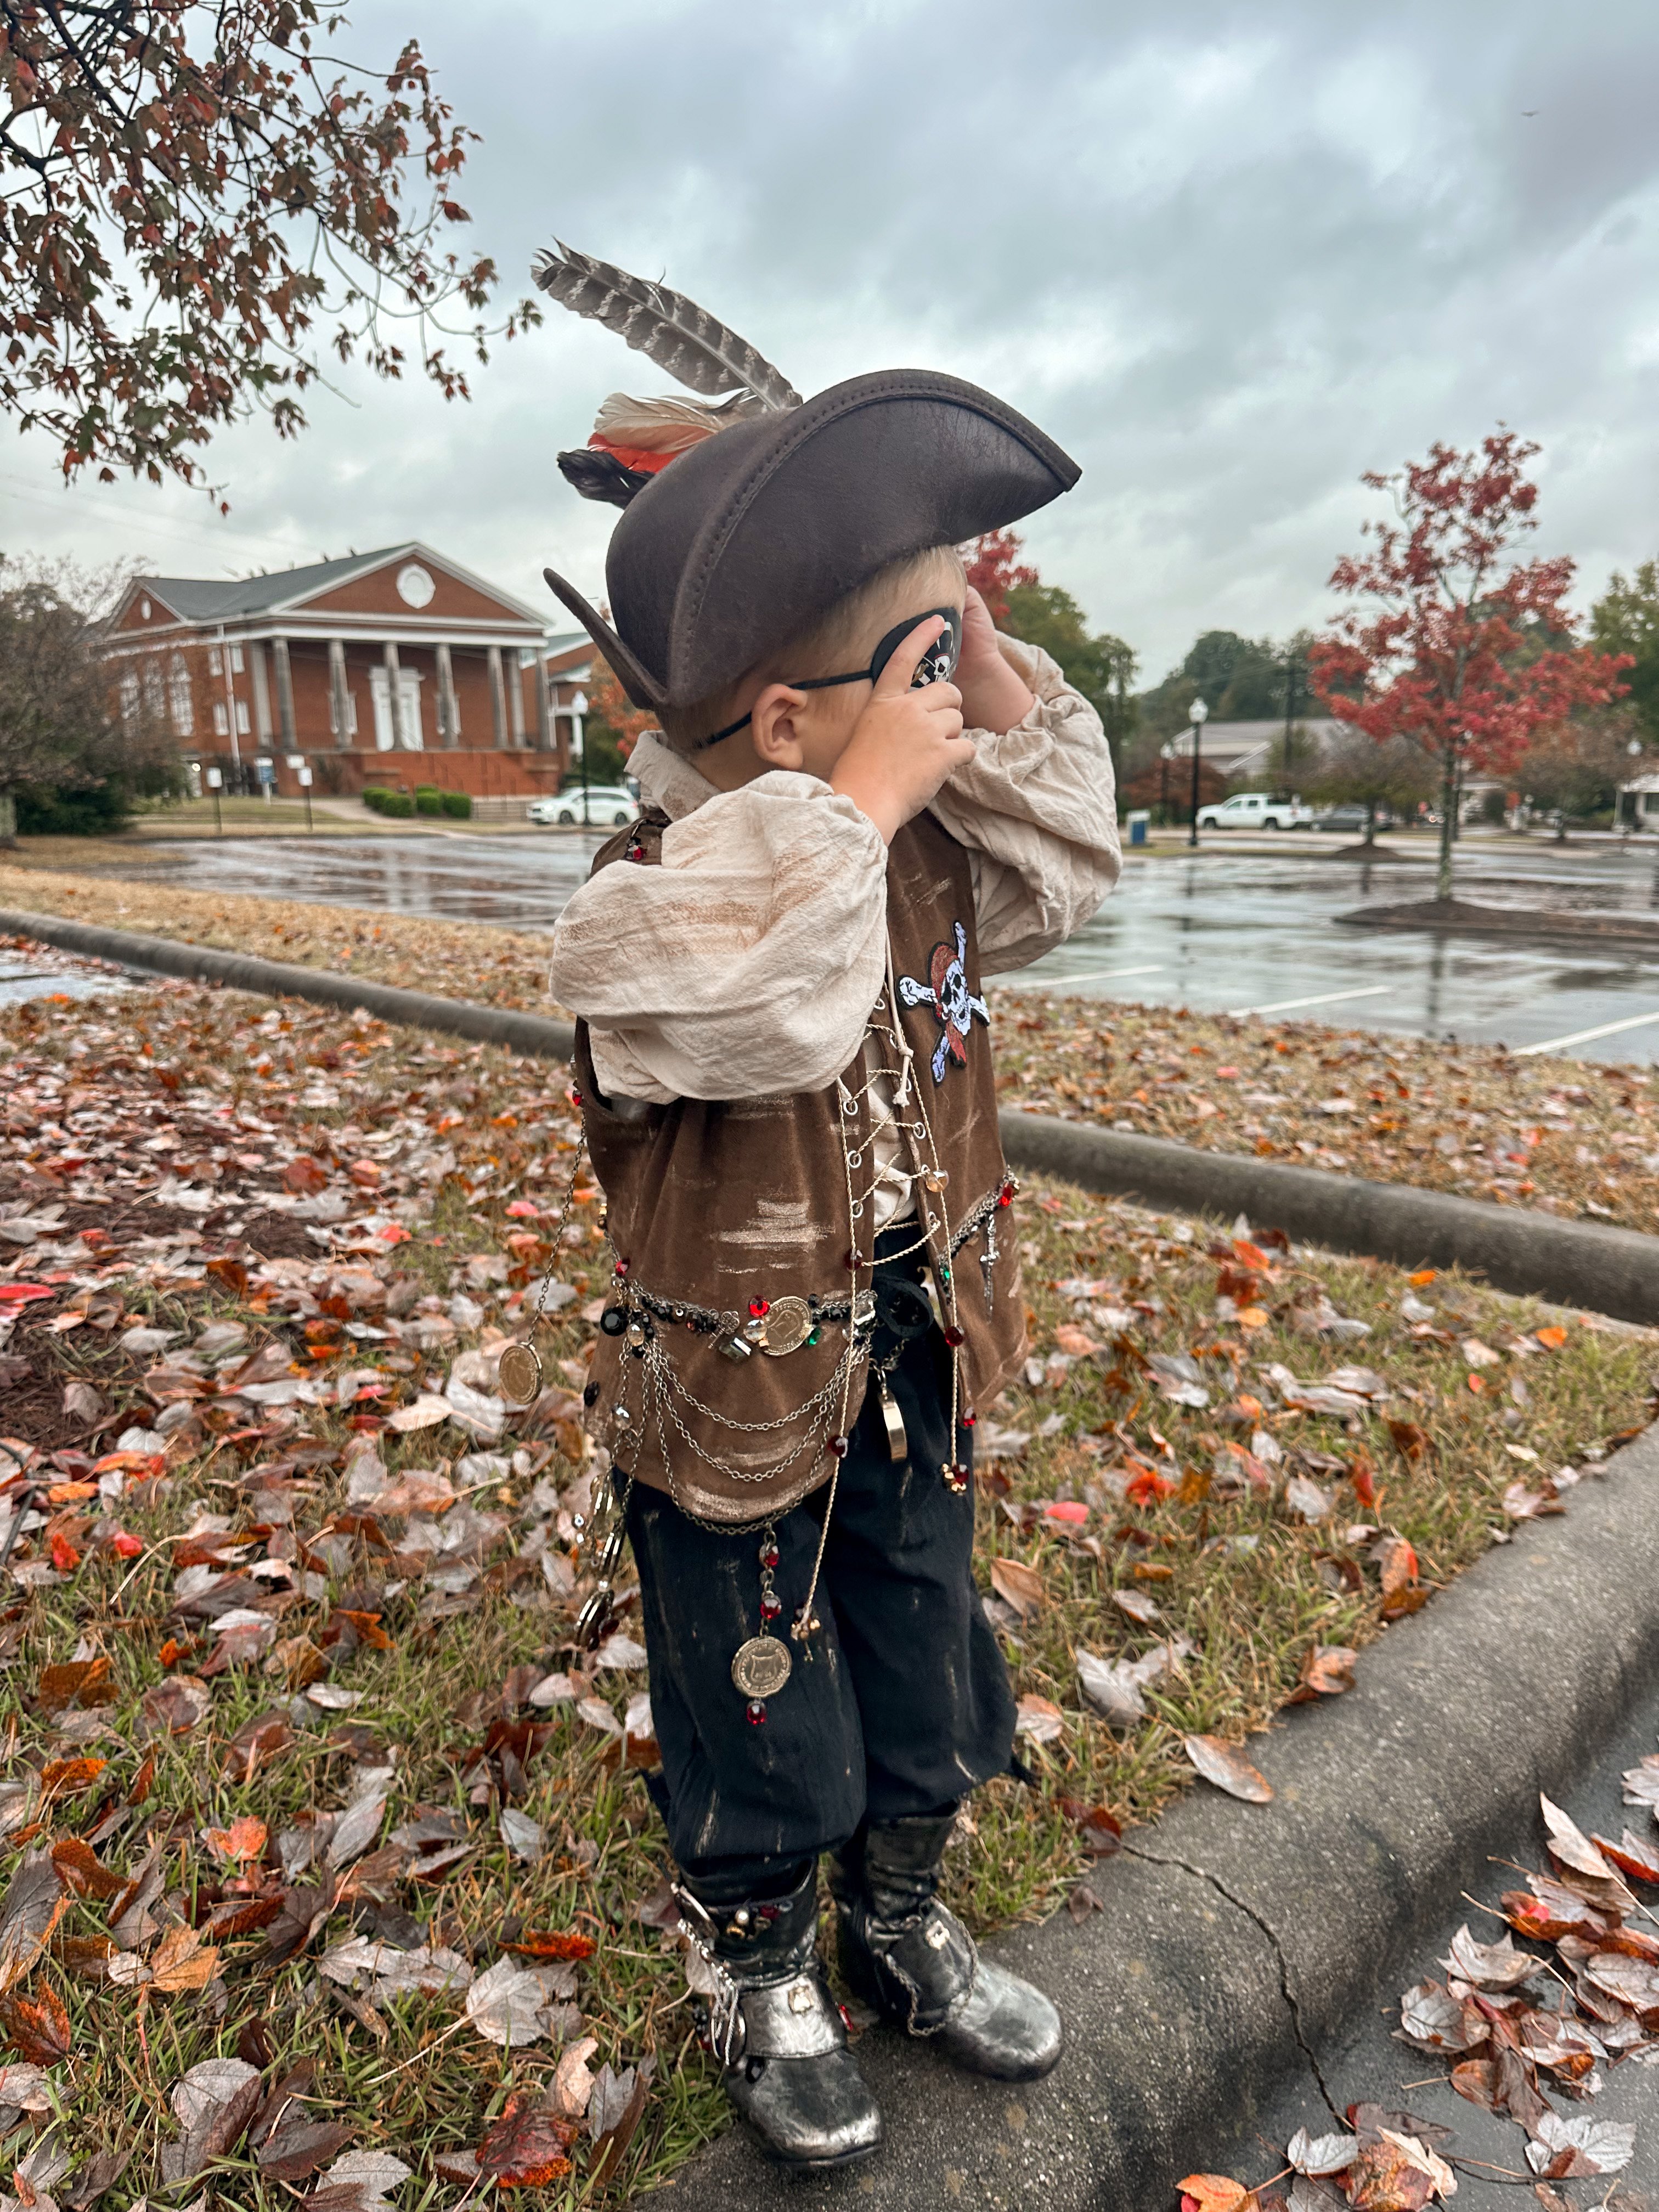
I knew I wanted his pirate costume to feel a little more worn in, weathered and homemade instead of looking like a costume straight out of a package. Think old pirate ship, buried treasure, mismatched jewels, tarnished gold and clothes that have seen a few adventures at sea.
The best part? I started with a few really simple costume pieces and completely transformed them with paint, chains, beads, patches, feathers and inexpensive little treasures. You don’t have to know how to sew either, just be able to handle a hot glue gun.
And while I definitely got a little carried away once I started adding the details, none of the individual steps were difficult. This is one of those DIY Halloween costumes where you really can’t mess it up. The more imperfect, distressed and mismatched everything looks, the better!
WATCH THE VIDEO BELOW TO SEE HOW COOL THIS COSTUME WAS WHEN IT CAME TO LIFE!
VIDEO
More Halloween Costume Ideas:
Easy DIY Toddler Halloween Costume Idea | Ace Ventura Pet Detective
Easy DIY Toddler Halloween Costume Idea | Chucky Costume
U.S.A Tennis Player Baby
What I Used for the Pirate Costume
I found almost everything I needed at Hobby Lobby and Amazon!
You can absolutely recreate this costume with pieces you already own, thrifted finds or inexpensive costume basics. Don’t worry about finding the exact same items I used. The fun part is taking basic pieces and making them look like they belong to a tiny pirate who has been sailing the seas for years.
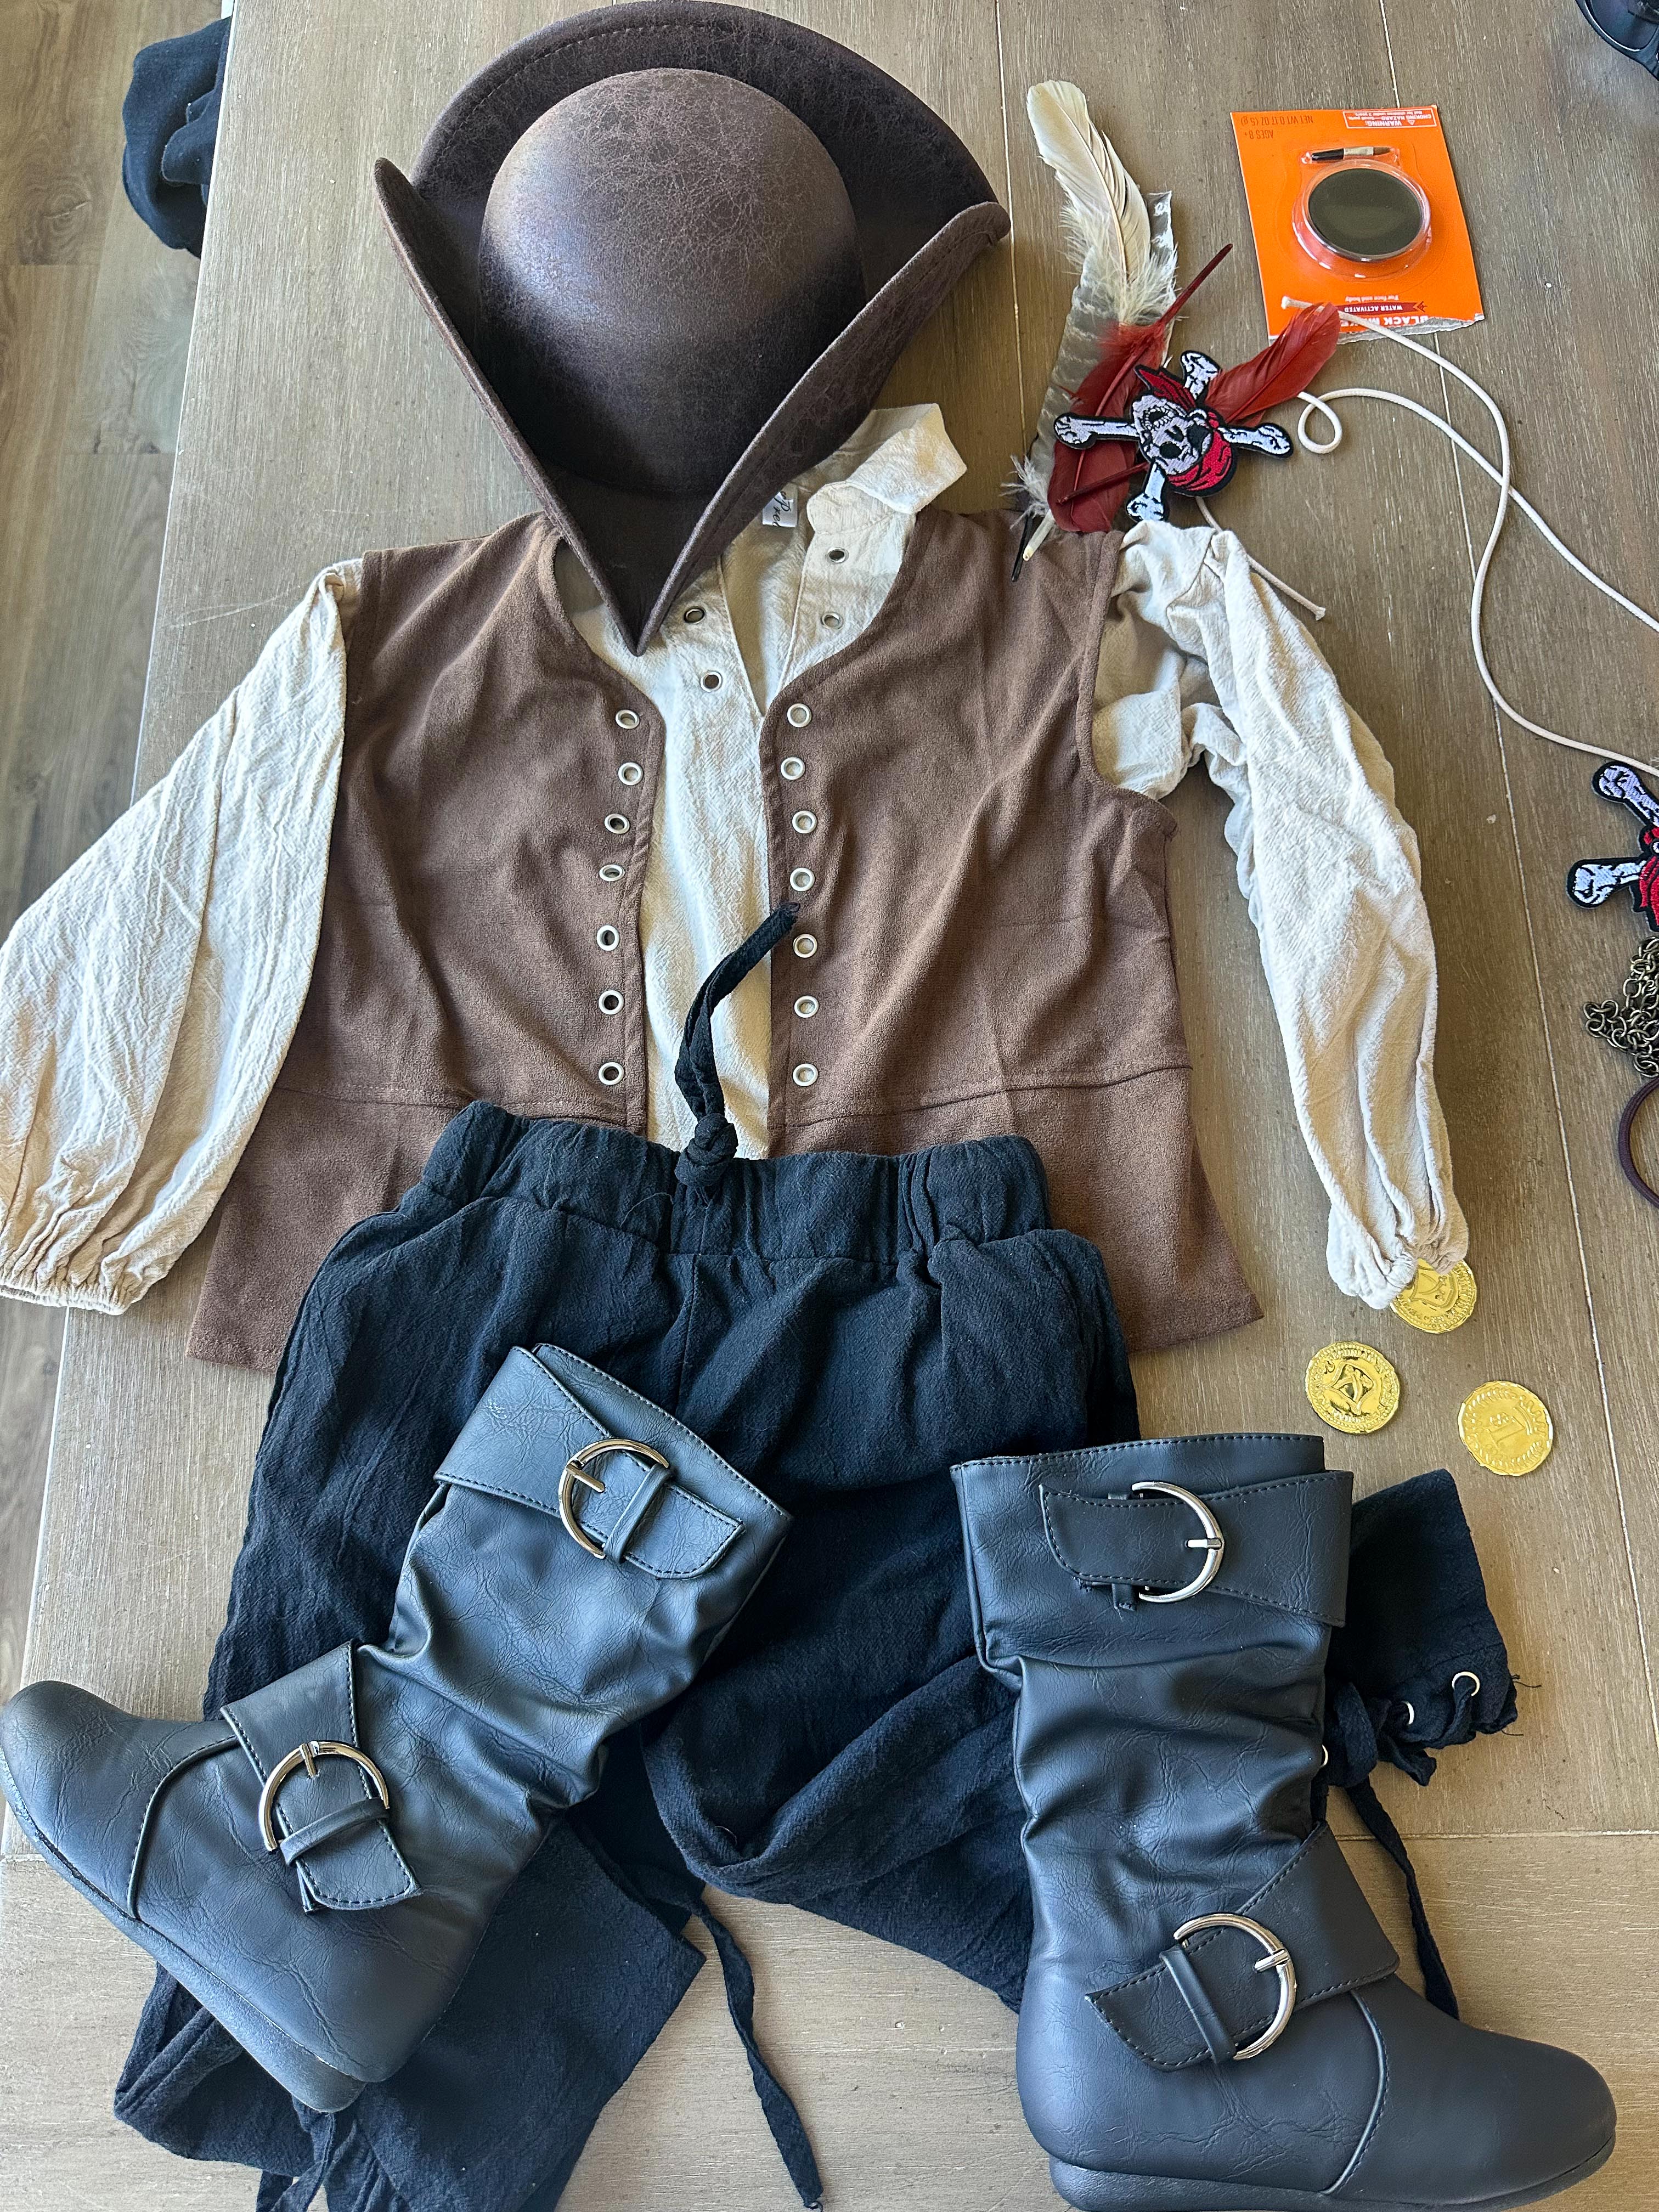
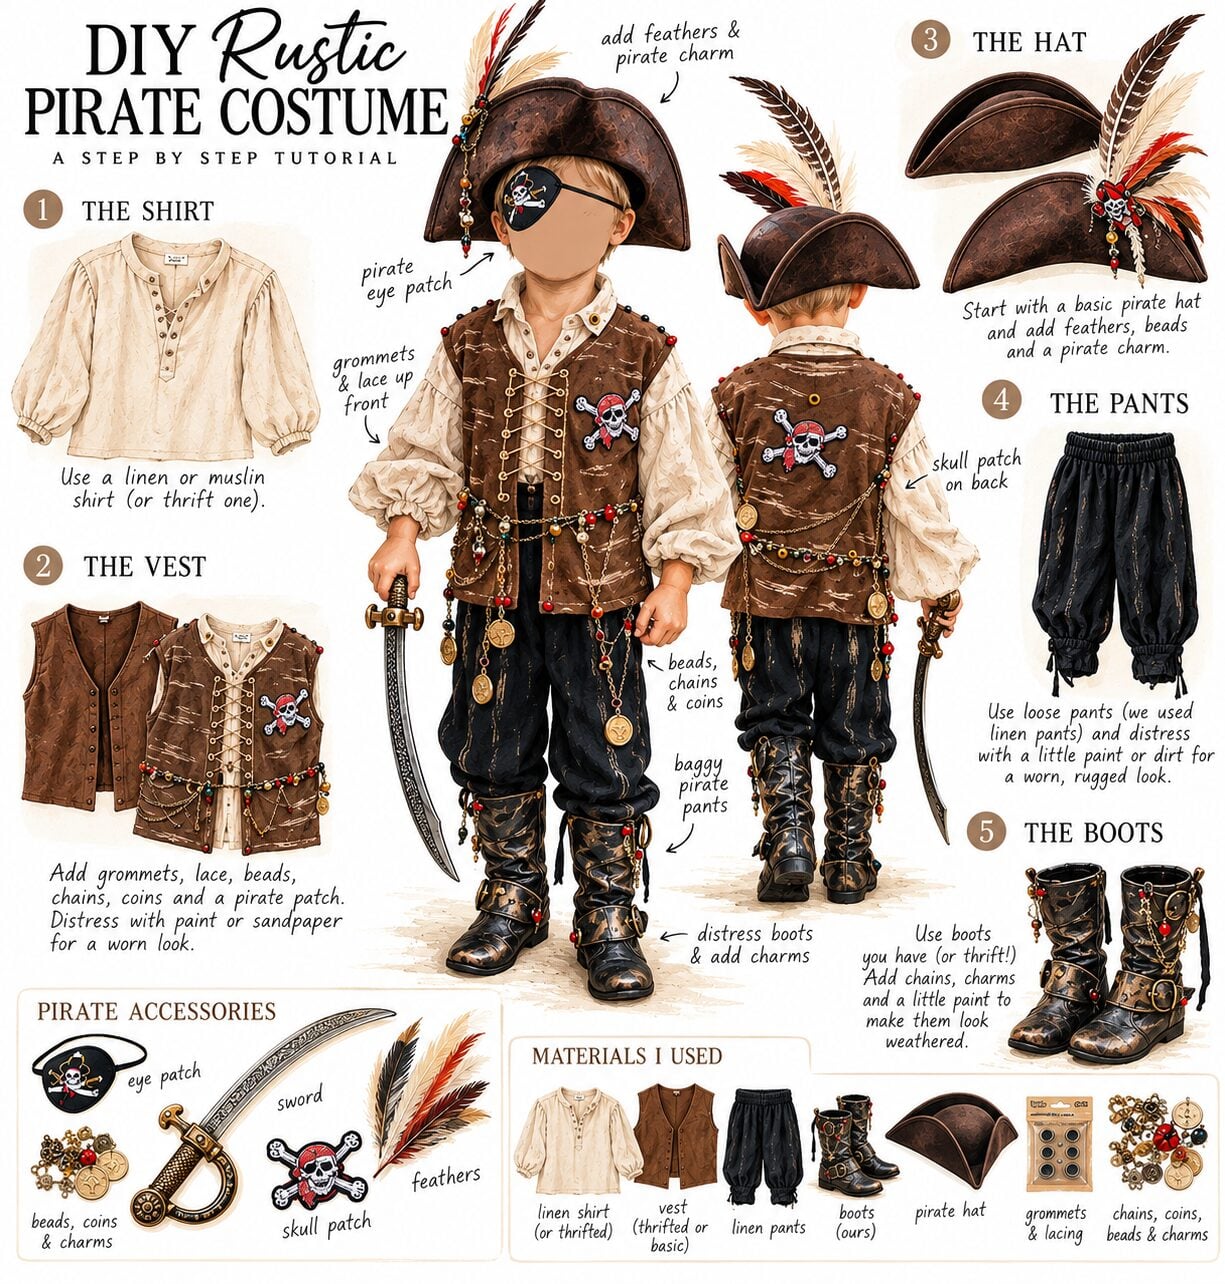
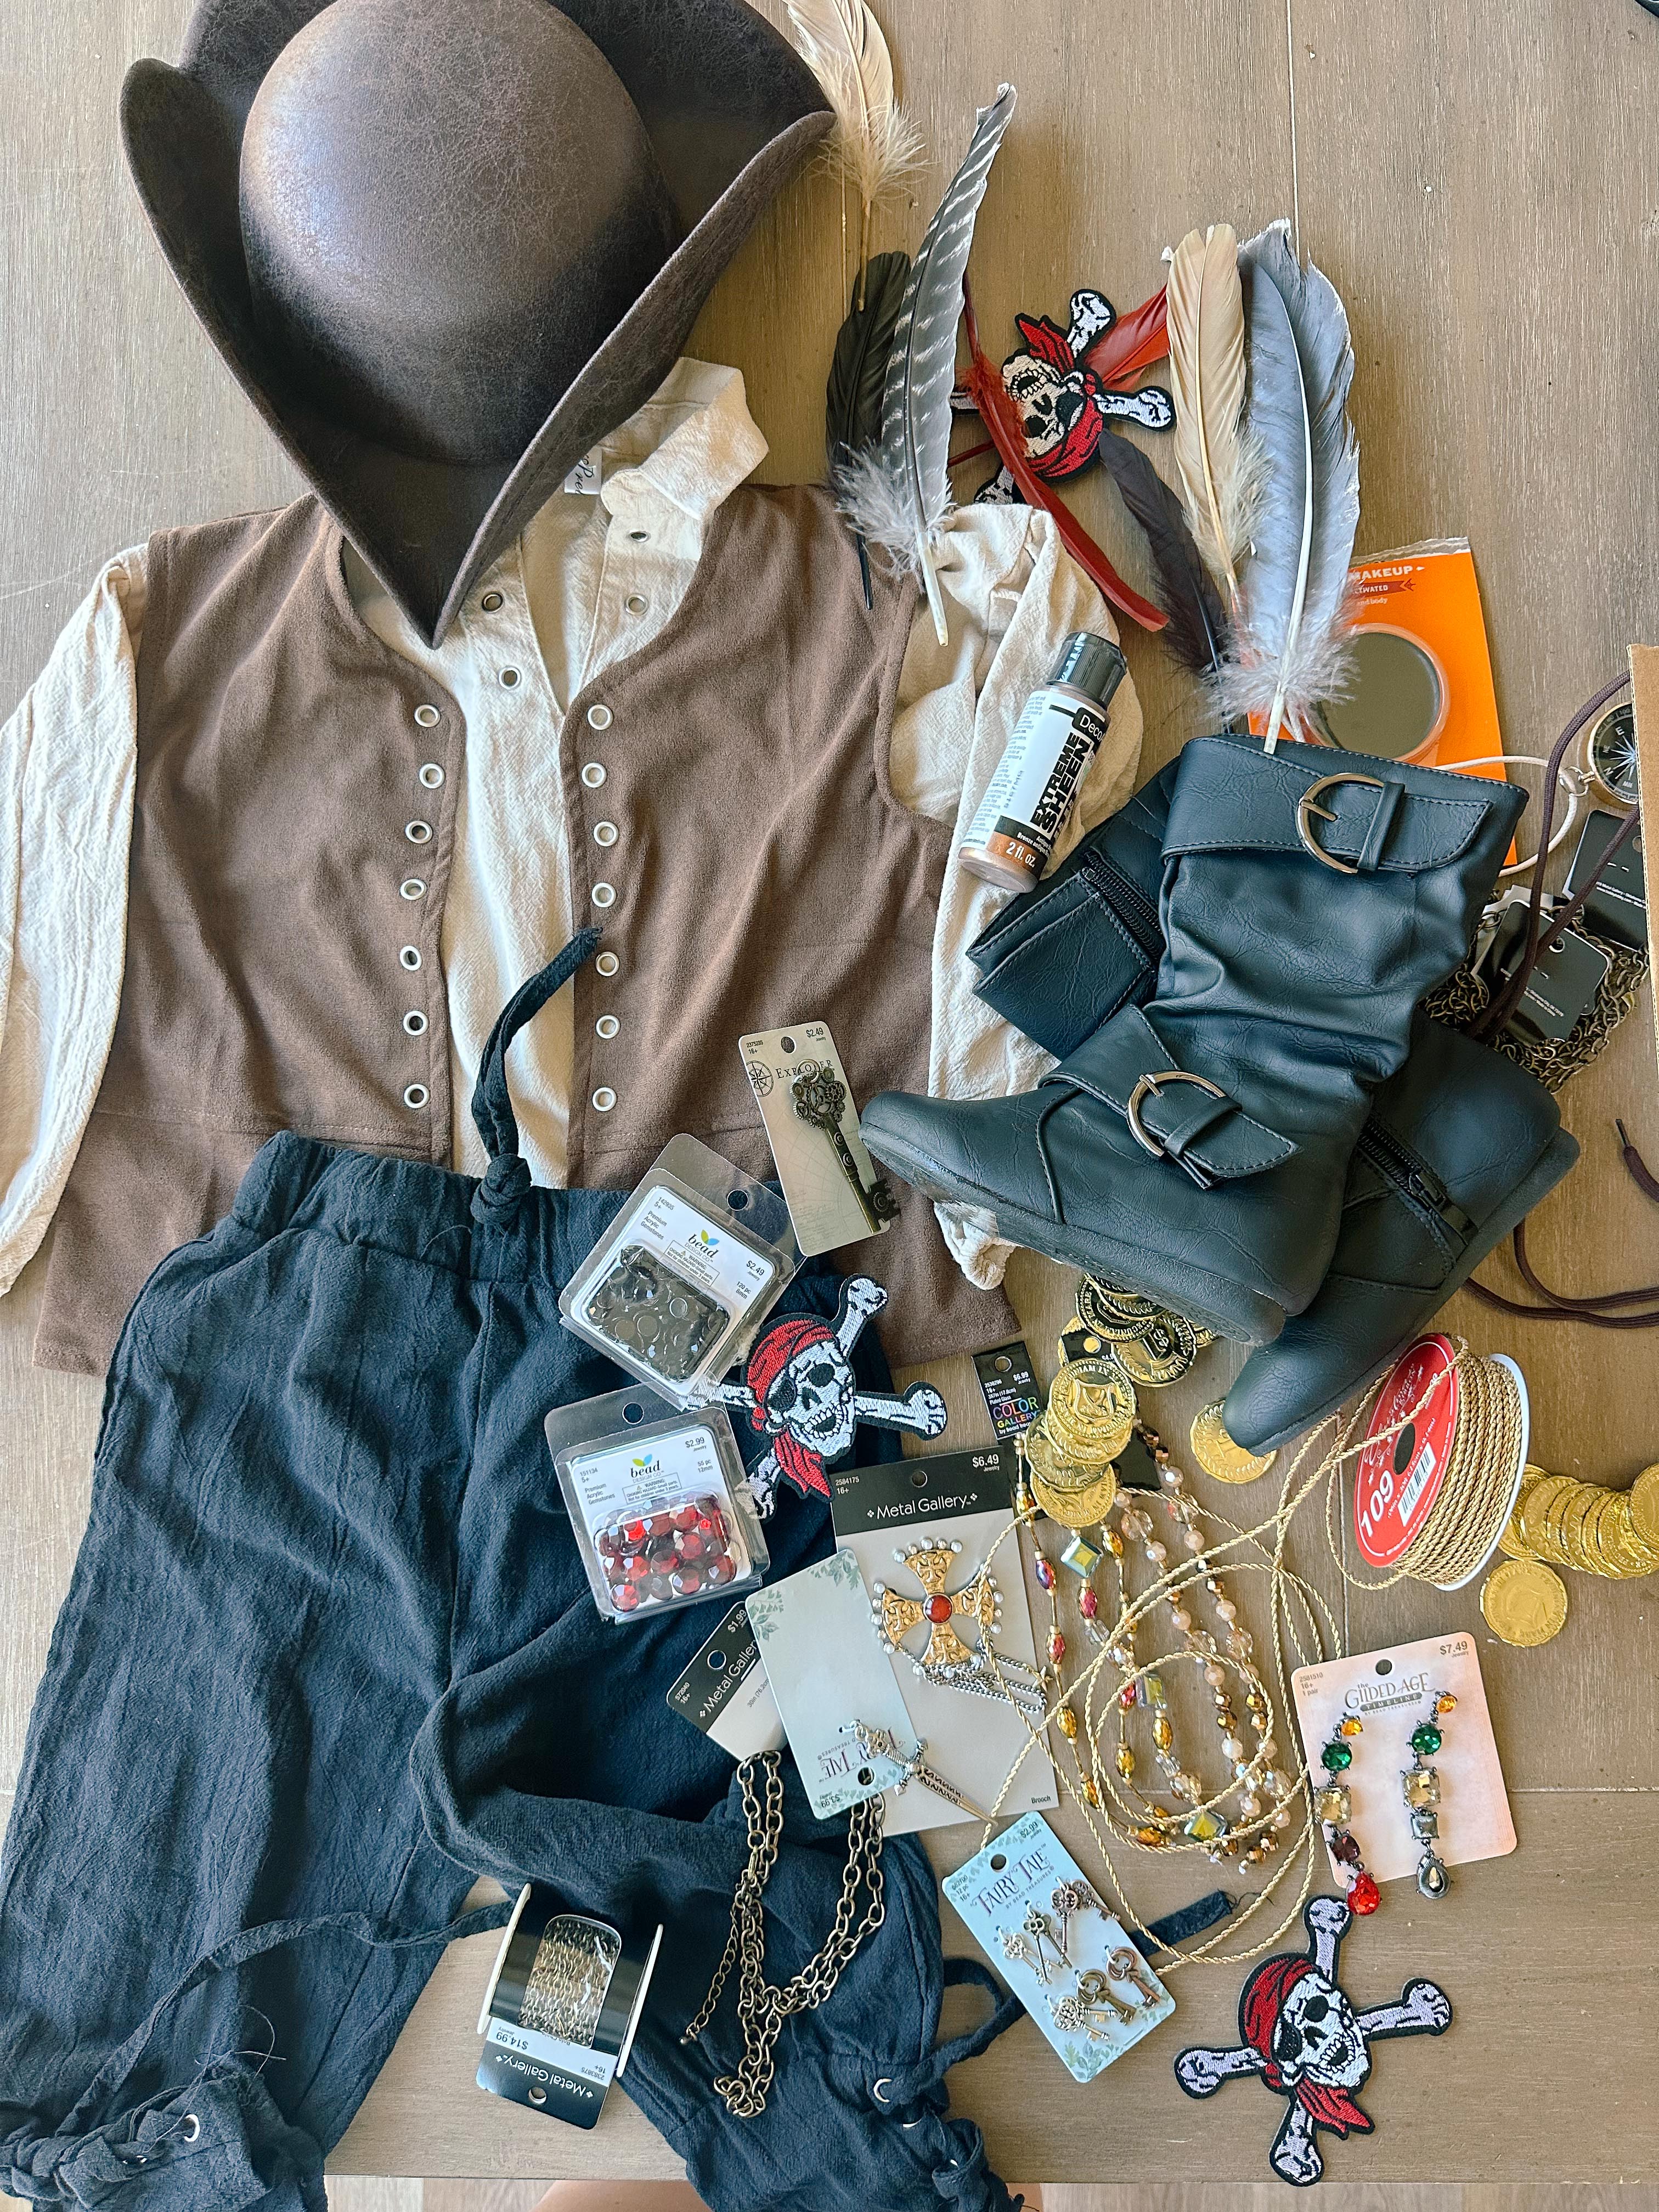
For the costume, I used: (linked everything in SHOPMY)
- Cream pirate style shirt
- Brown vest
- Loose black pants
- Black boots
- Brown pirate hat
- Pirate eye patch
- Toy pirate sword
- Skull and crossbones patches
- Feathers
- Gold and bronze chains
- Costume jewelry, beads and charms
- Fake pirate coins
- Grommets
- Gold cord
- Brown, black and metallic craft paint
- Hot glue and fabric glue
Tip: Before buying everything new, dig through old costume jewelry, broken necklaces and your craft supplies. Random chains, charms and beads are PERFECT for this project. I broke a lot of earrings I purchased from Hobby Lobby because I loved the jewels on them.
Step 1: Distress the Pirate Shirt
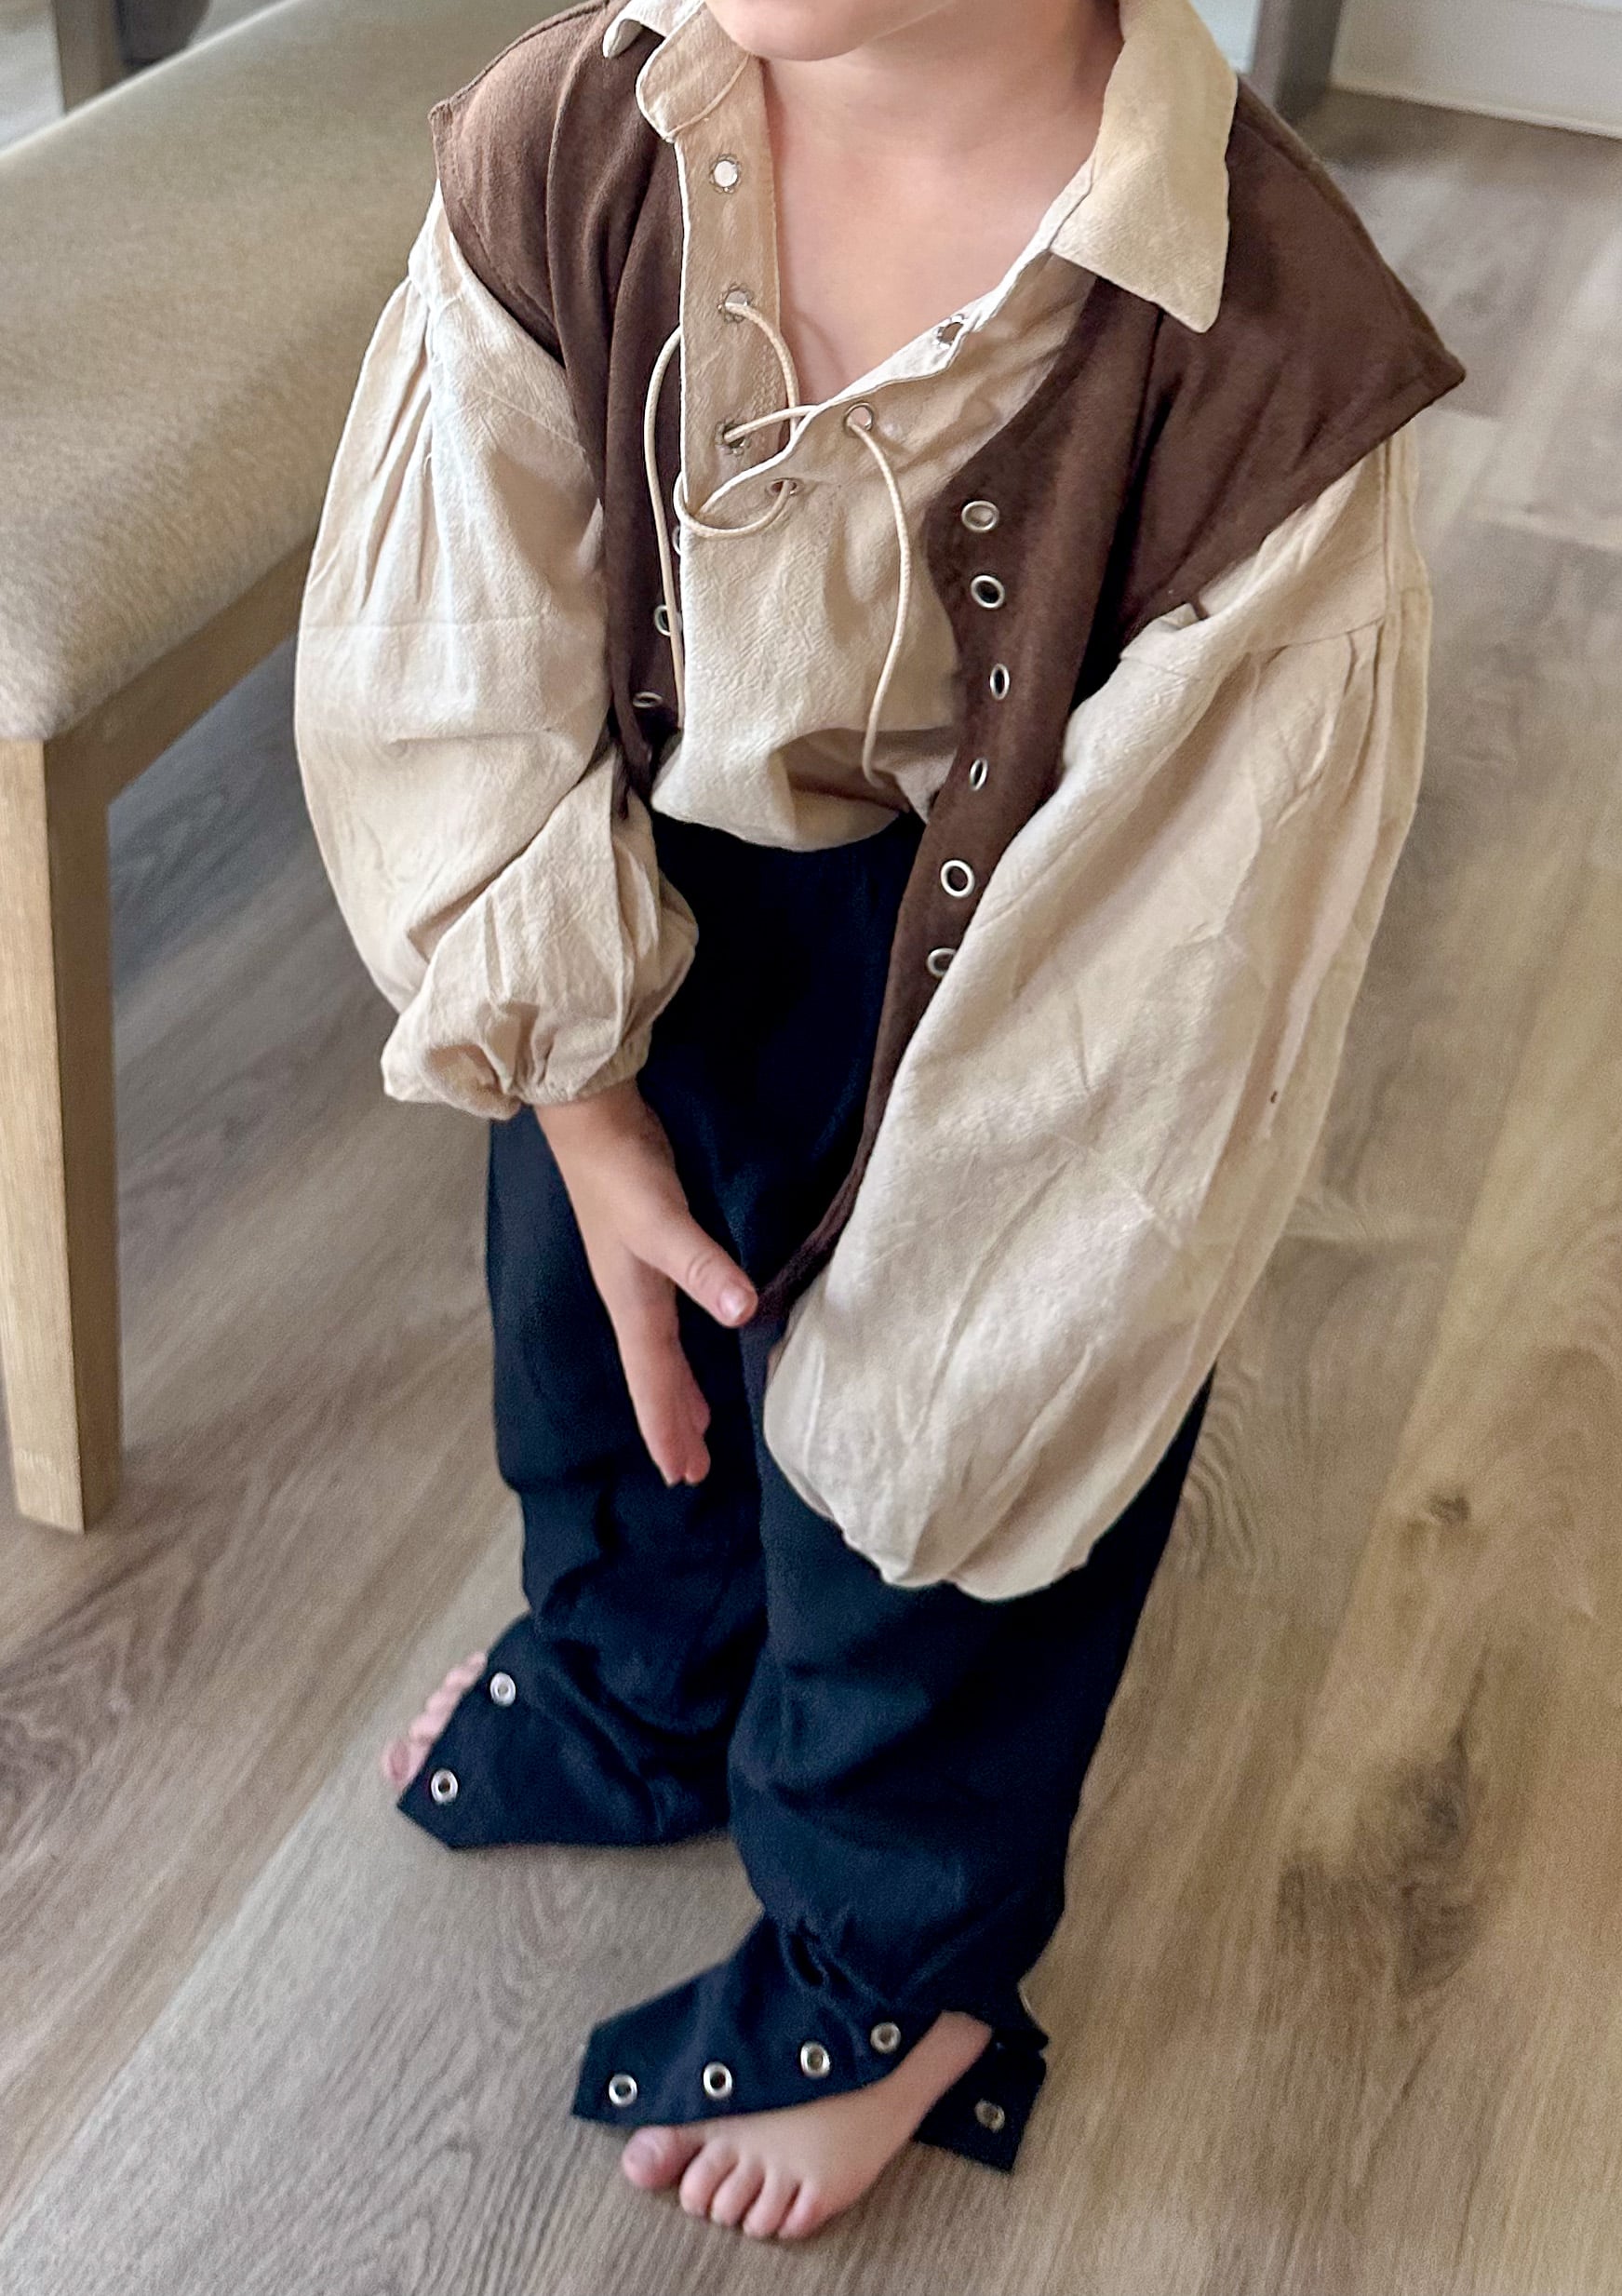
I started with a simple cream pirate shirt (from amazon). It already had the loose sleeves and old fashioned shape I wanted, so it just needed to look a little less…new.
Using brown paint, I lightly distressed the fabric around the sleeves, collar and other areas where clothing would naturally get dirty and worn. I also added rope ribbon instead of the strings it came with.
There really isn’t a science to this part. In fact, trying to make everything look perfect will work against you! Dab, rub and lightly brush the color onto the fabric until it starts looking like it has spent a few years aboard a pirate ship.
You can always add more, so start lightly.

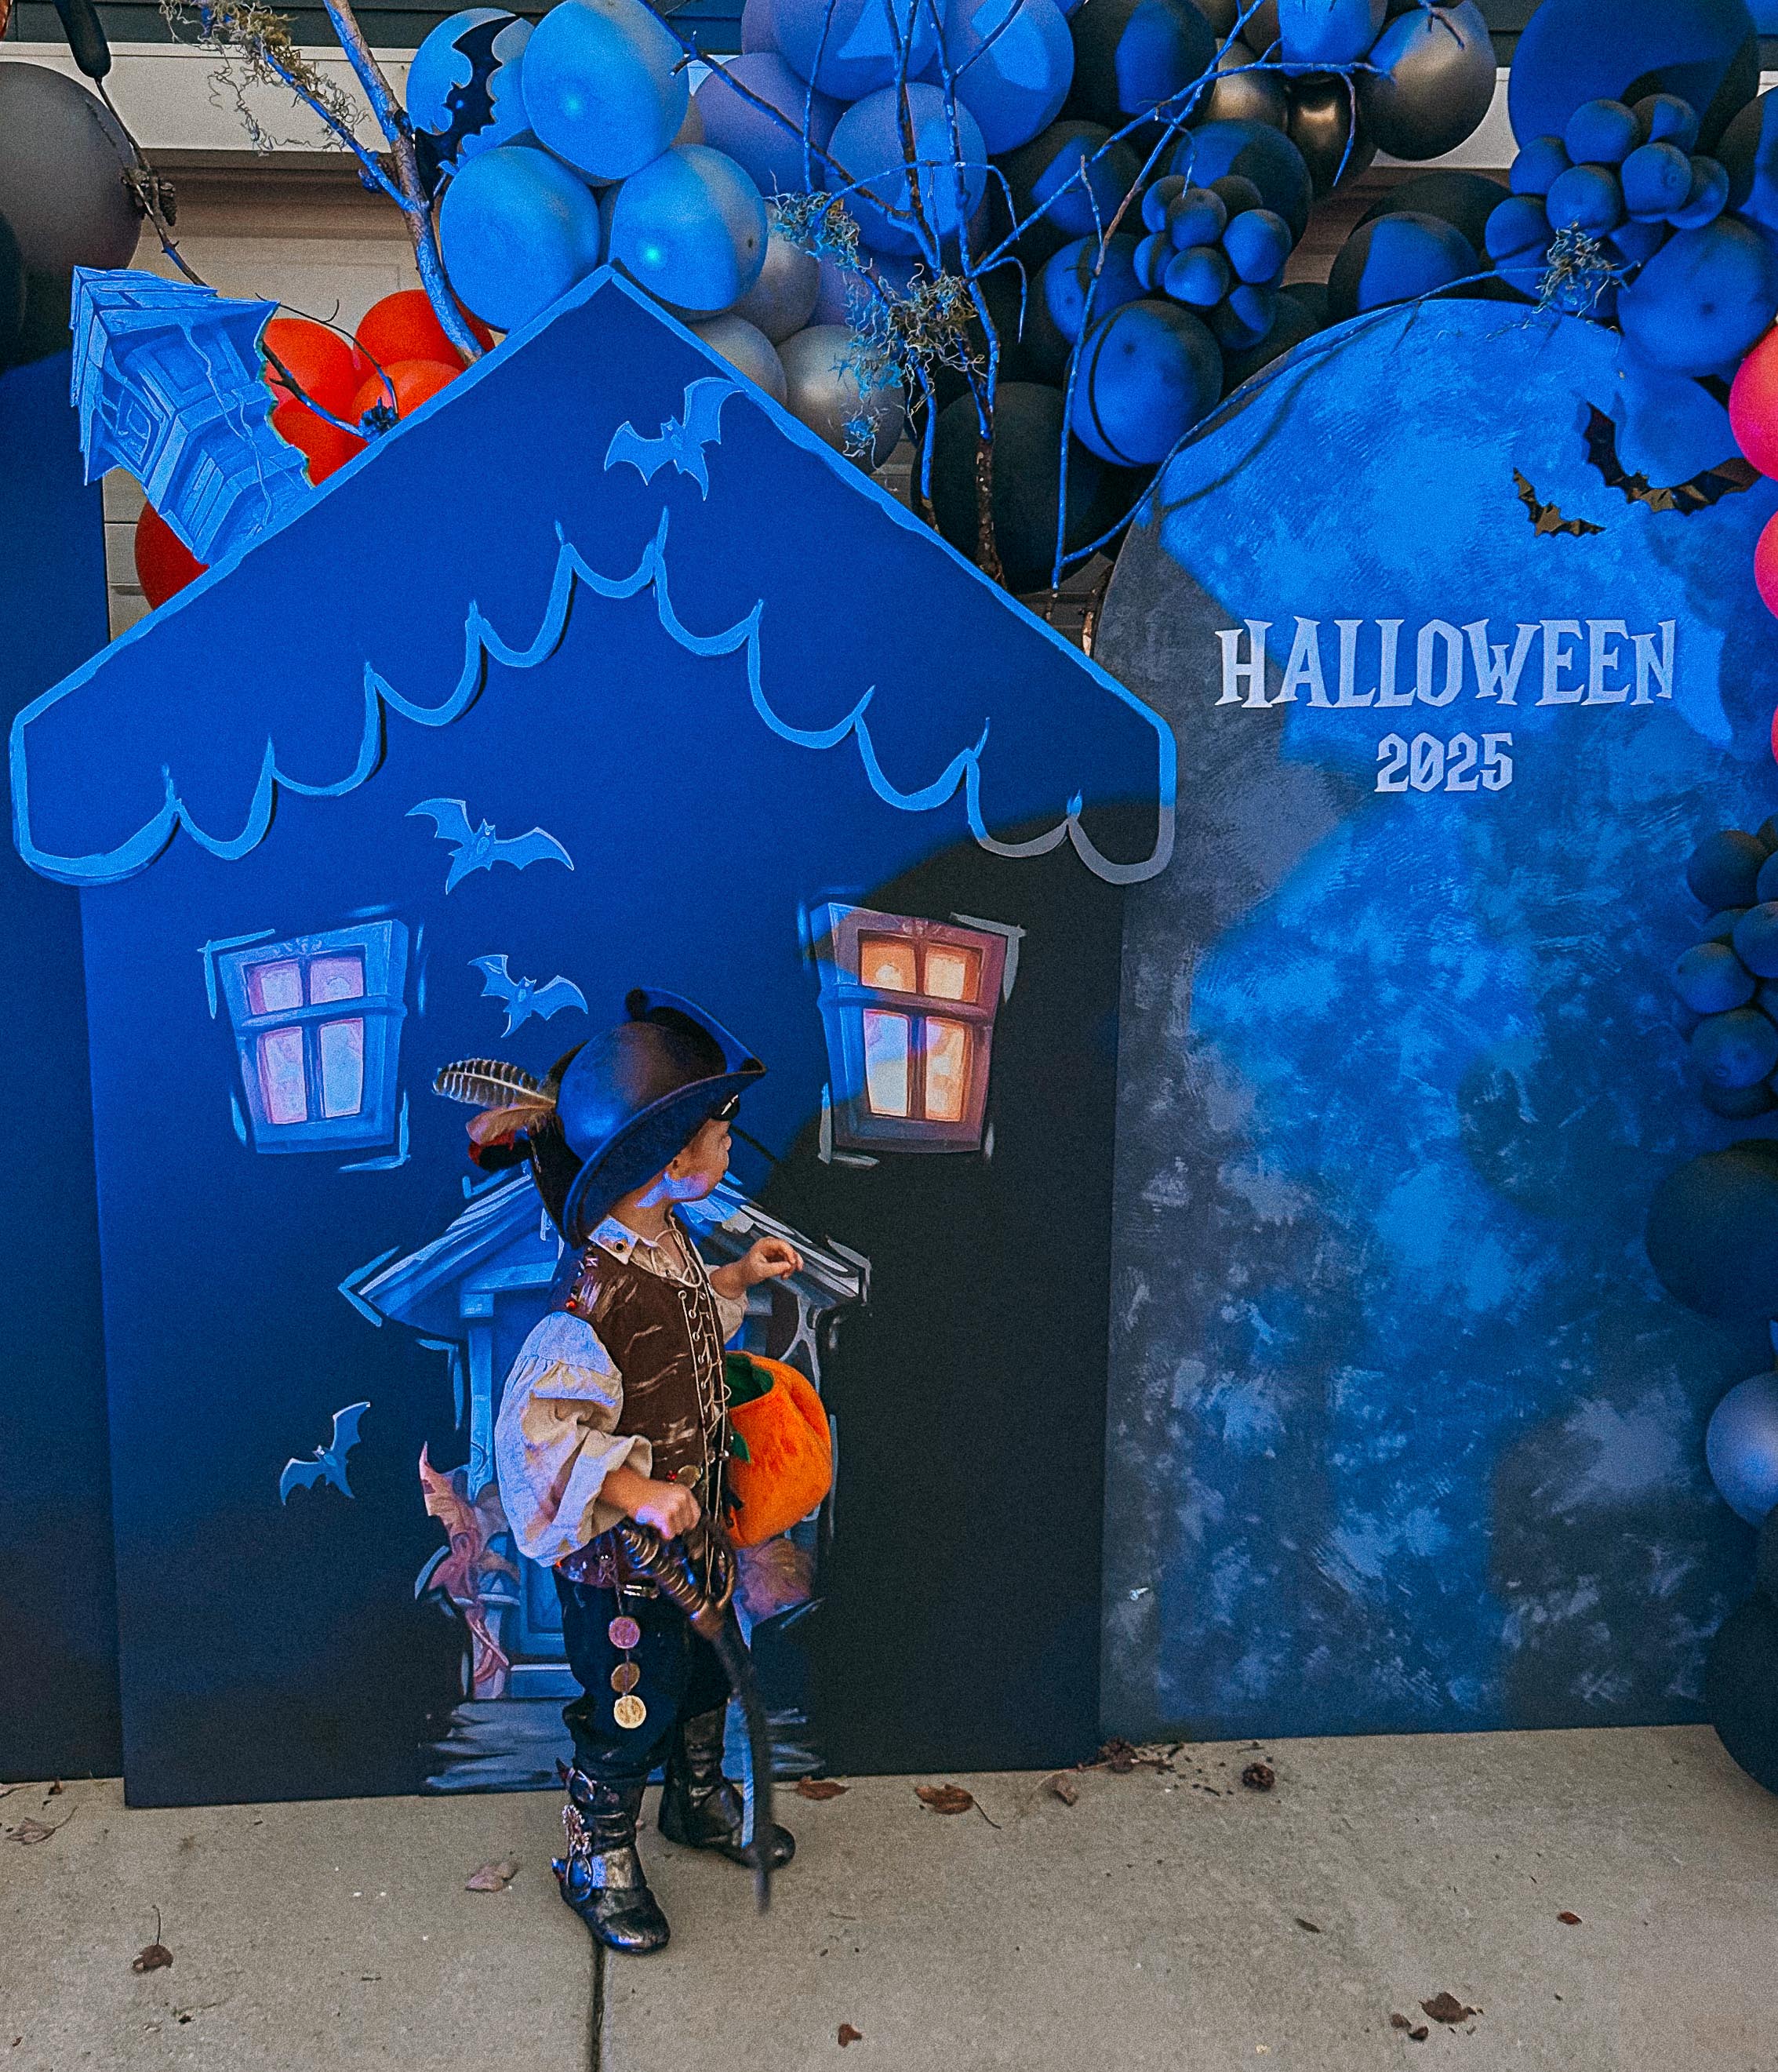
As much as I wish I could be making my kid’s halloween costumes this year, I think my era is over for a bit. He wants the family to be Power Rangers…
Step 2: Transform the Pirate Vest
This is where the costume really started coming together.
I began with a very basic brown vest and turned it into the centerpiece of the entire costume.
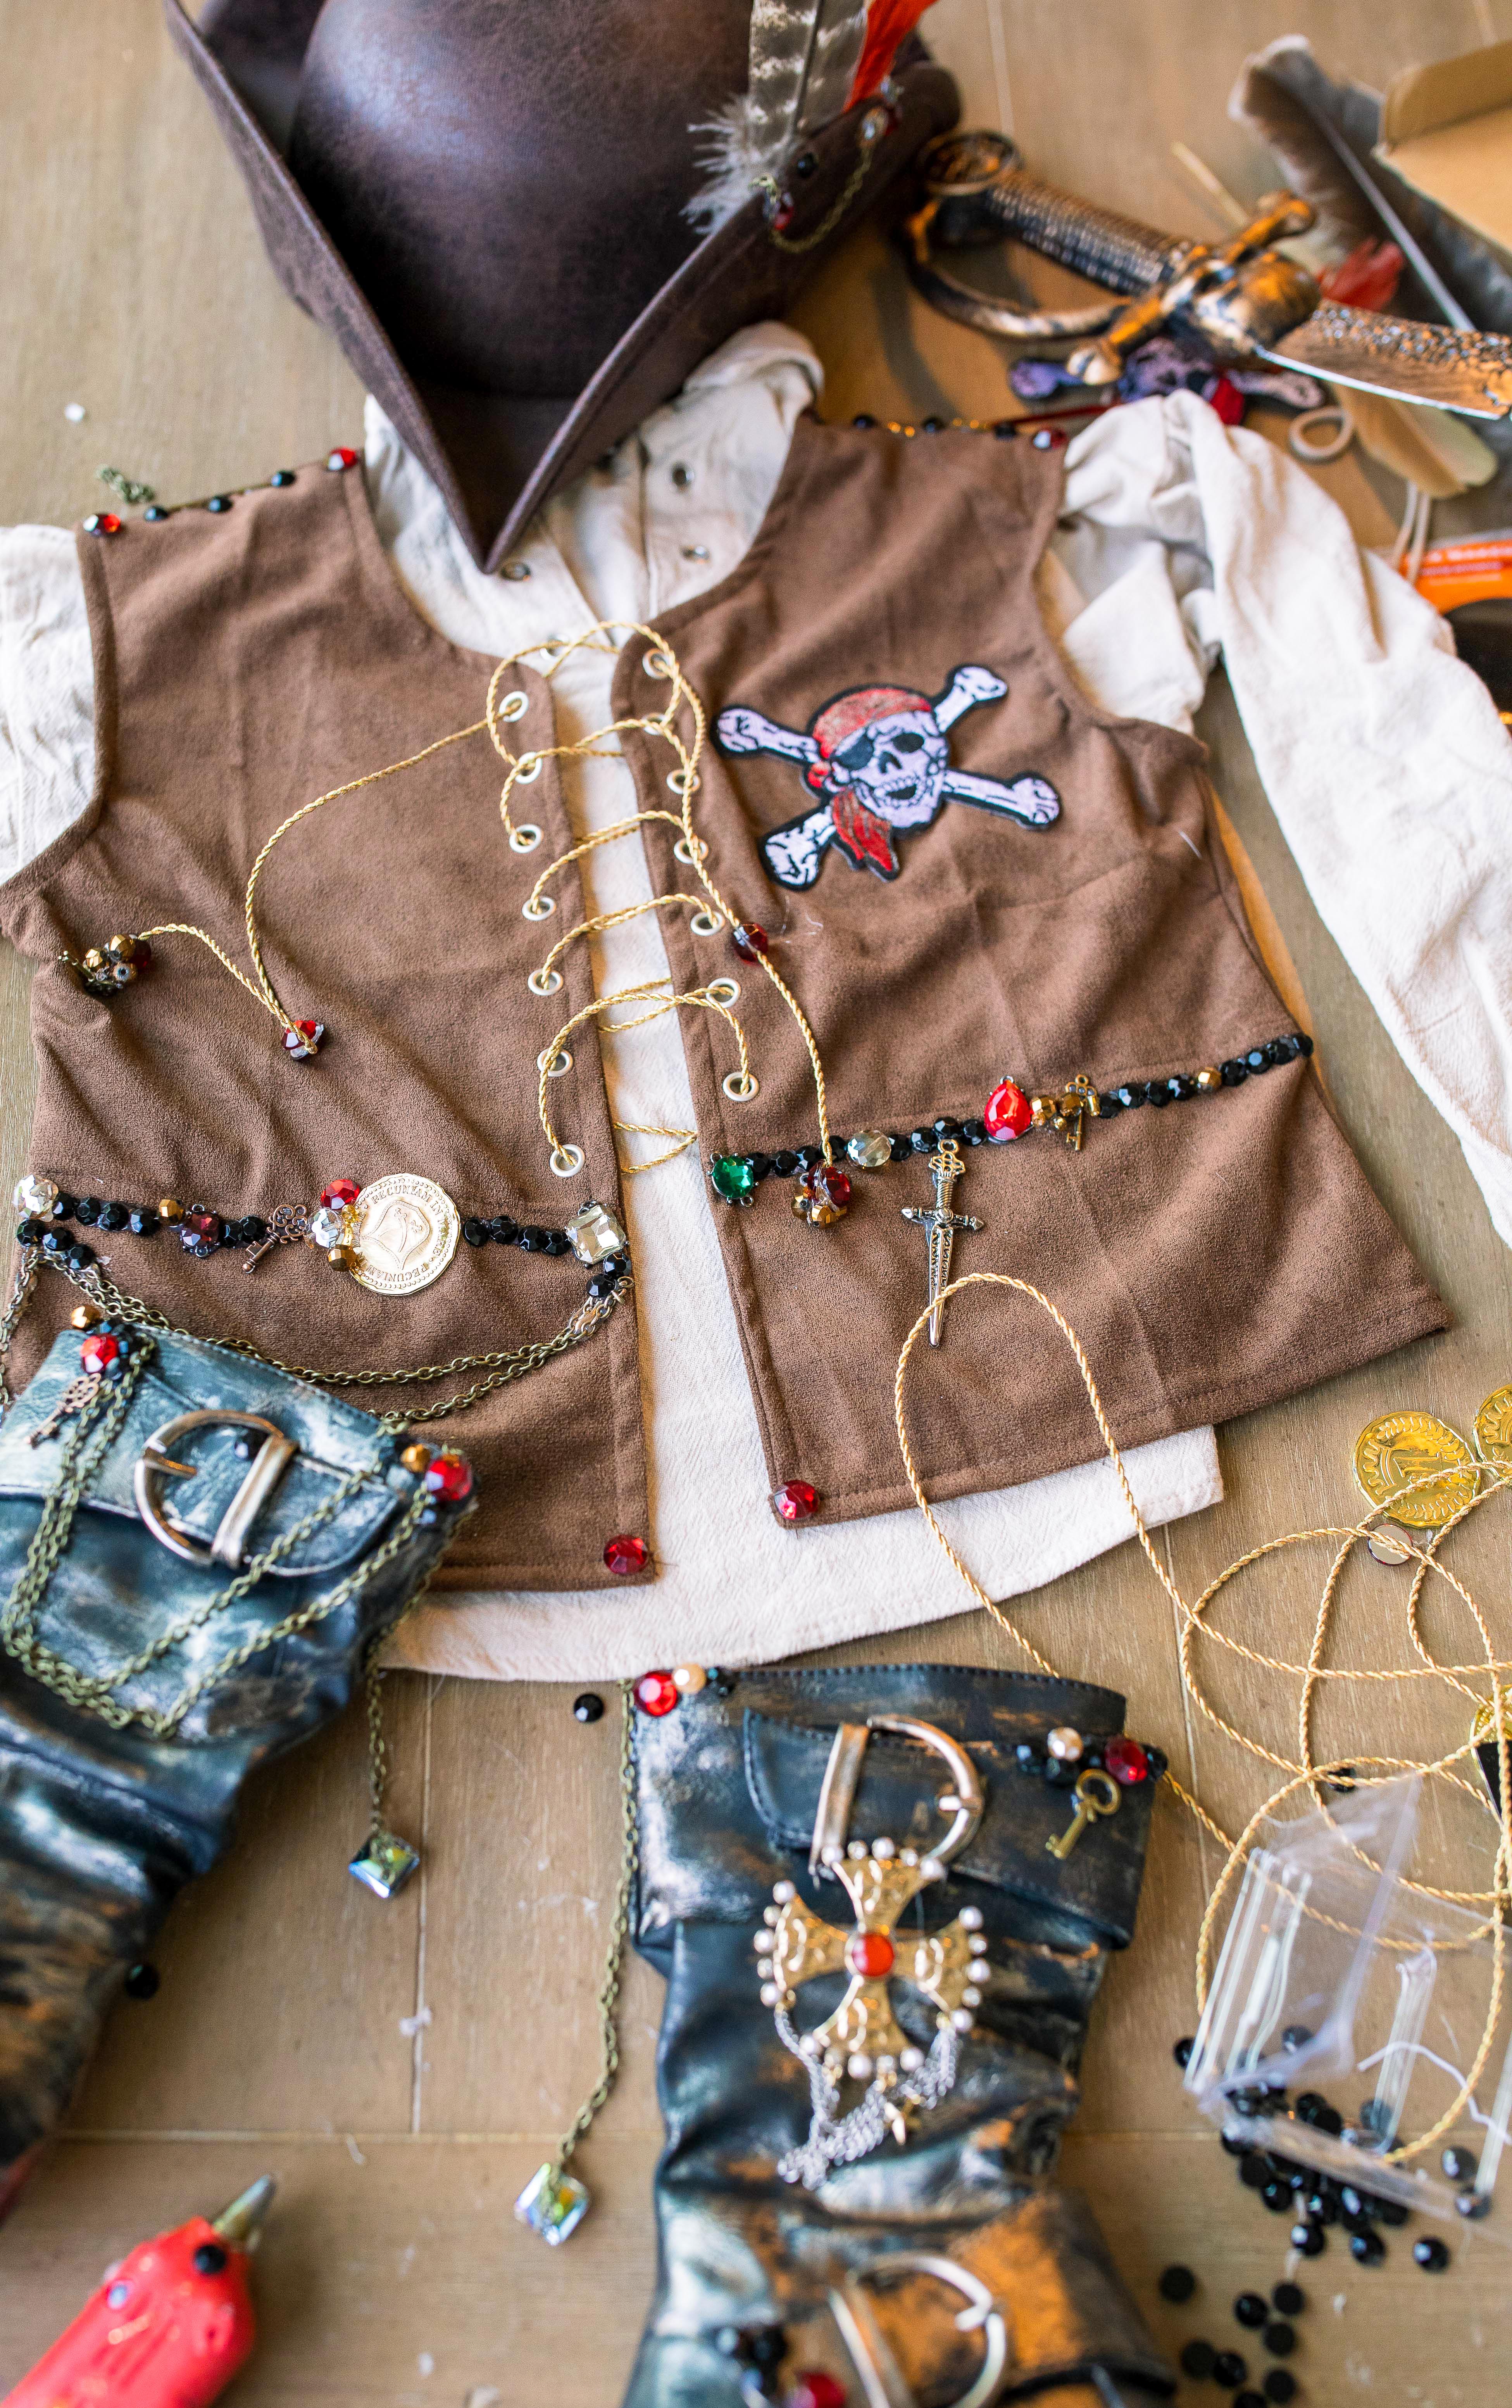
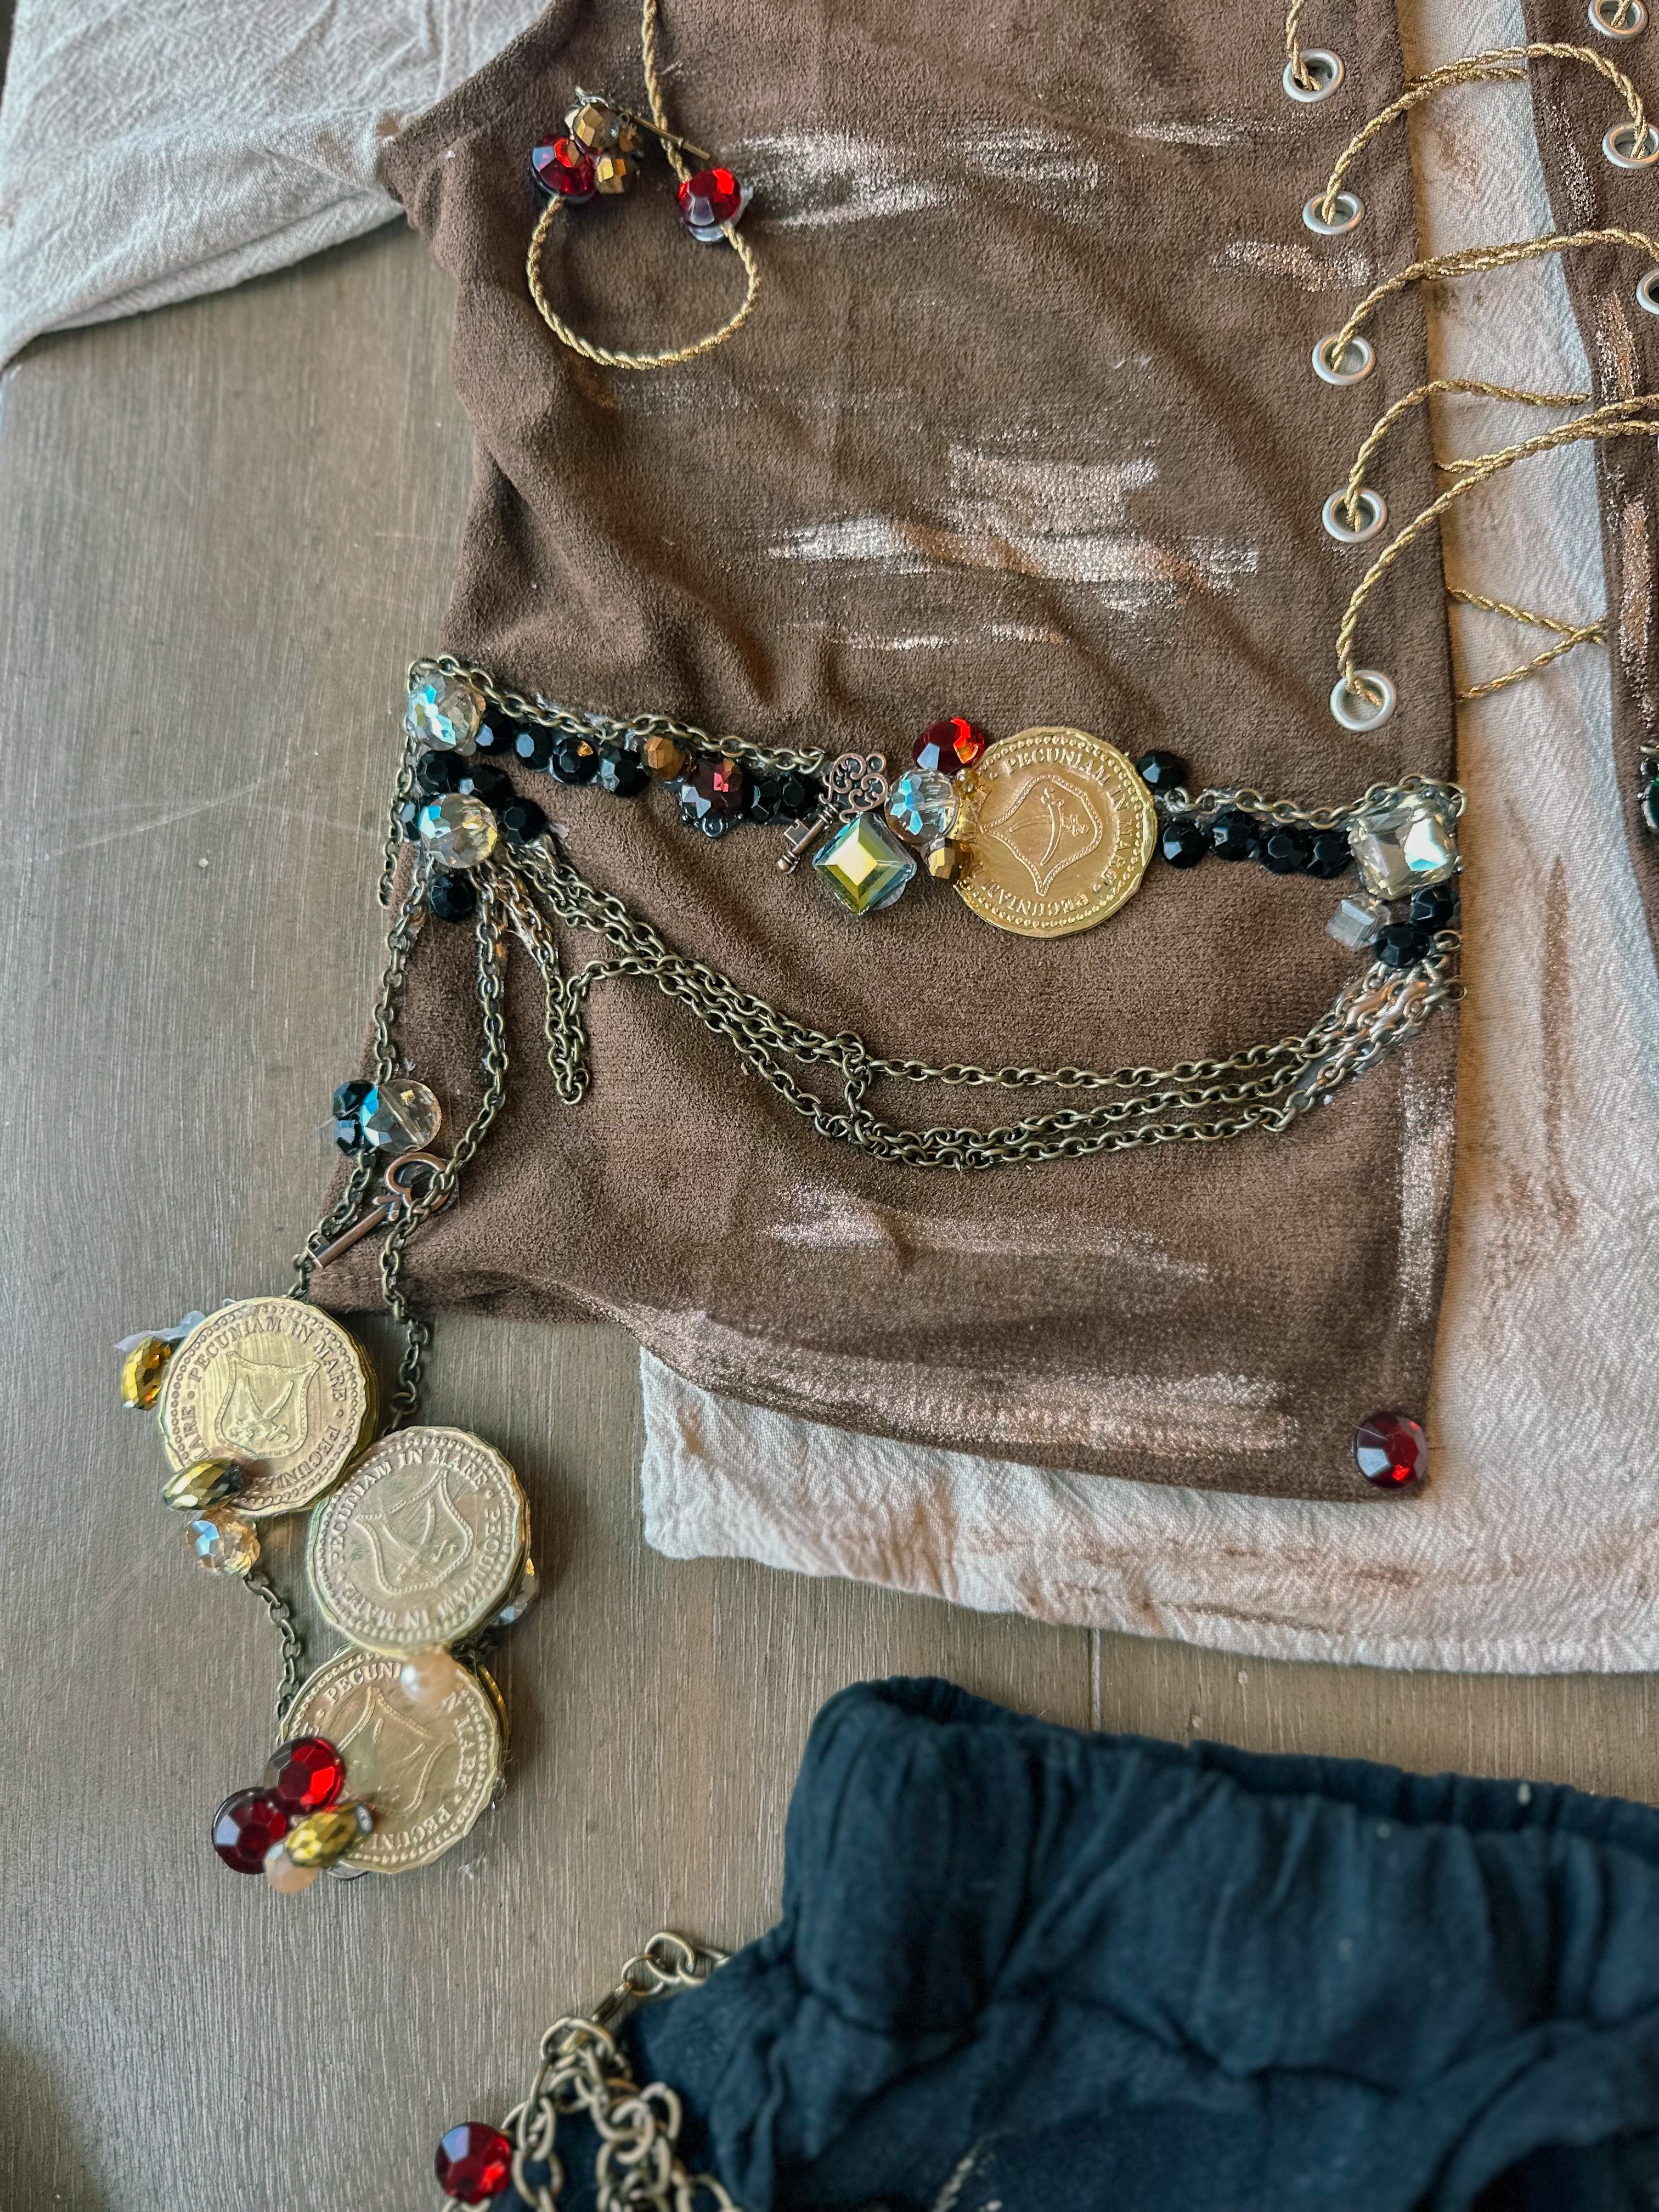
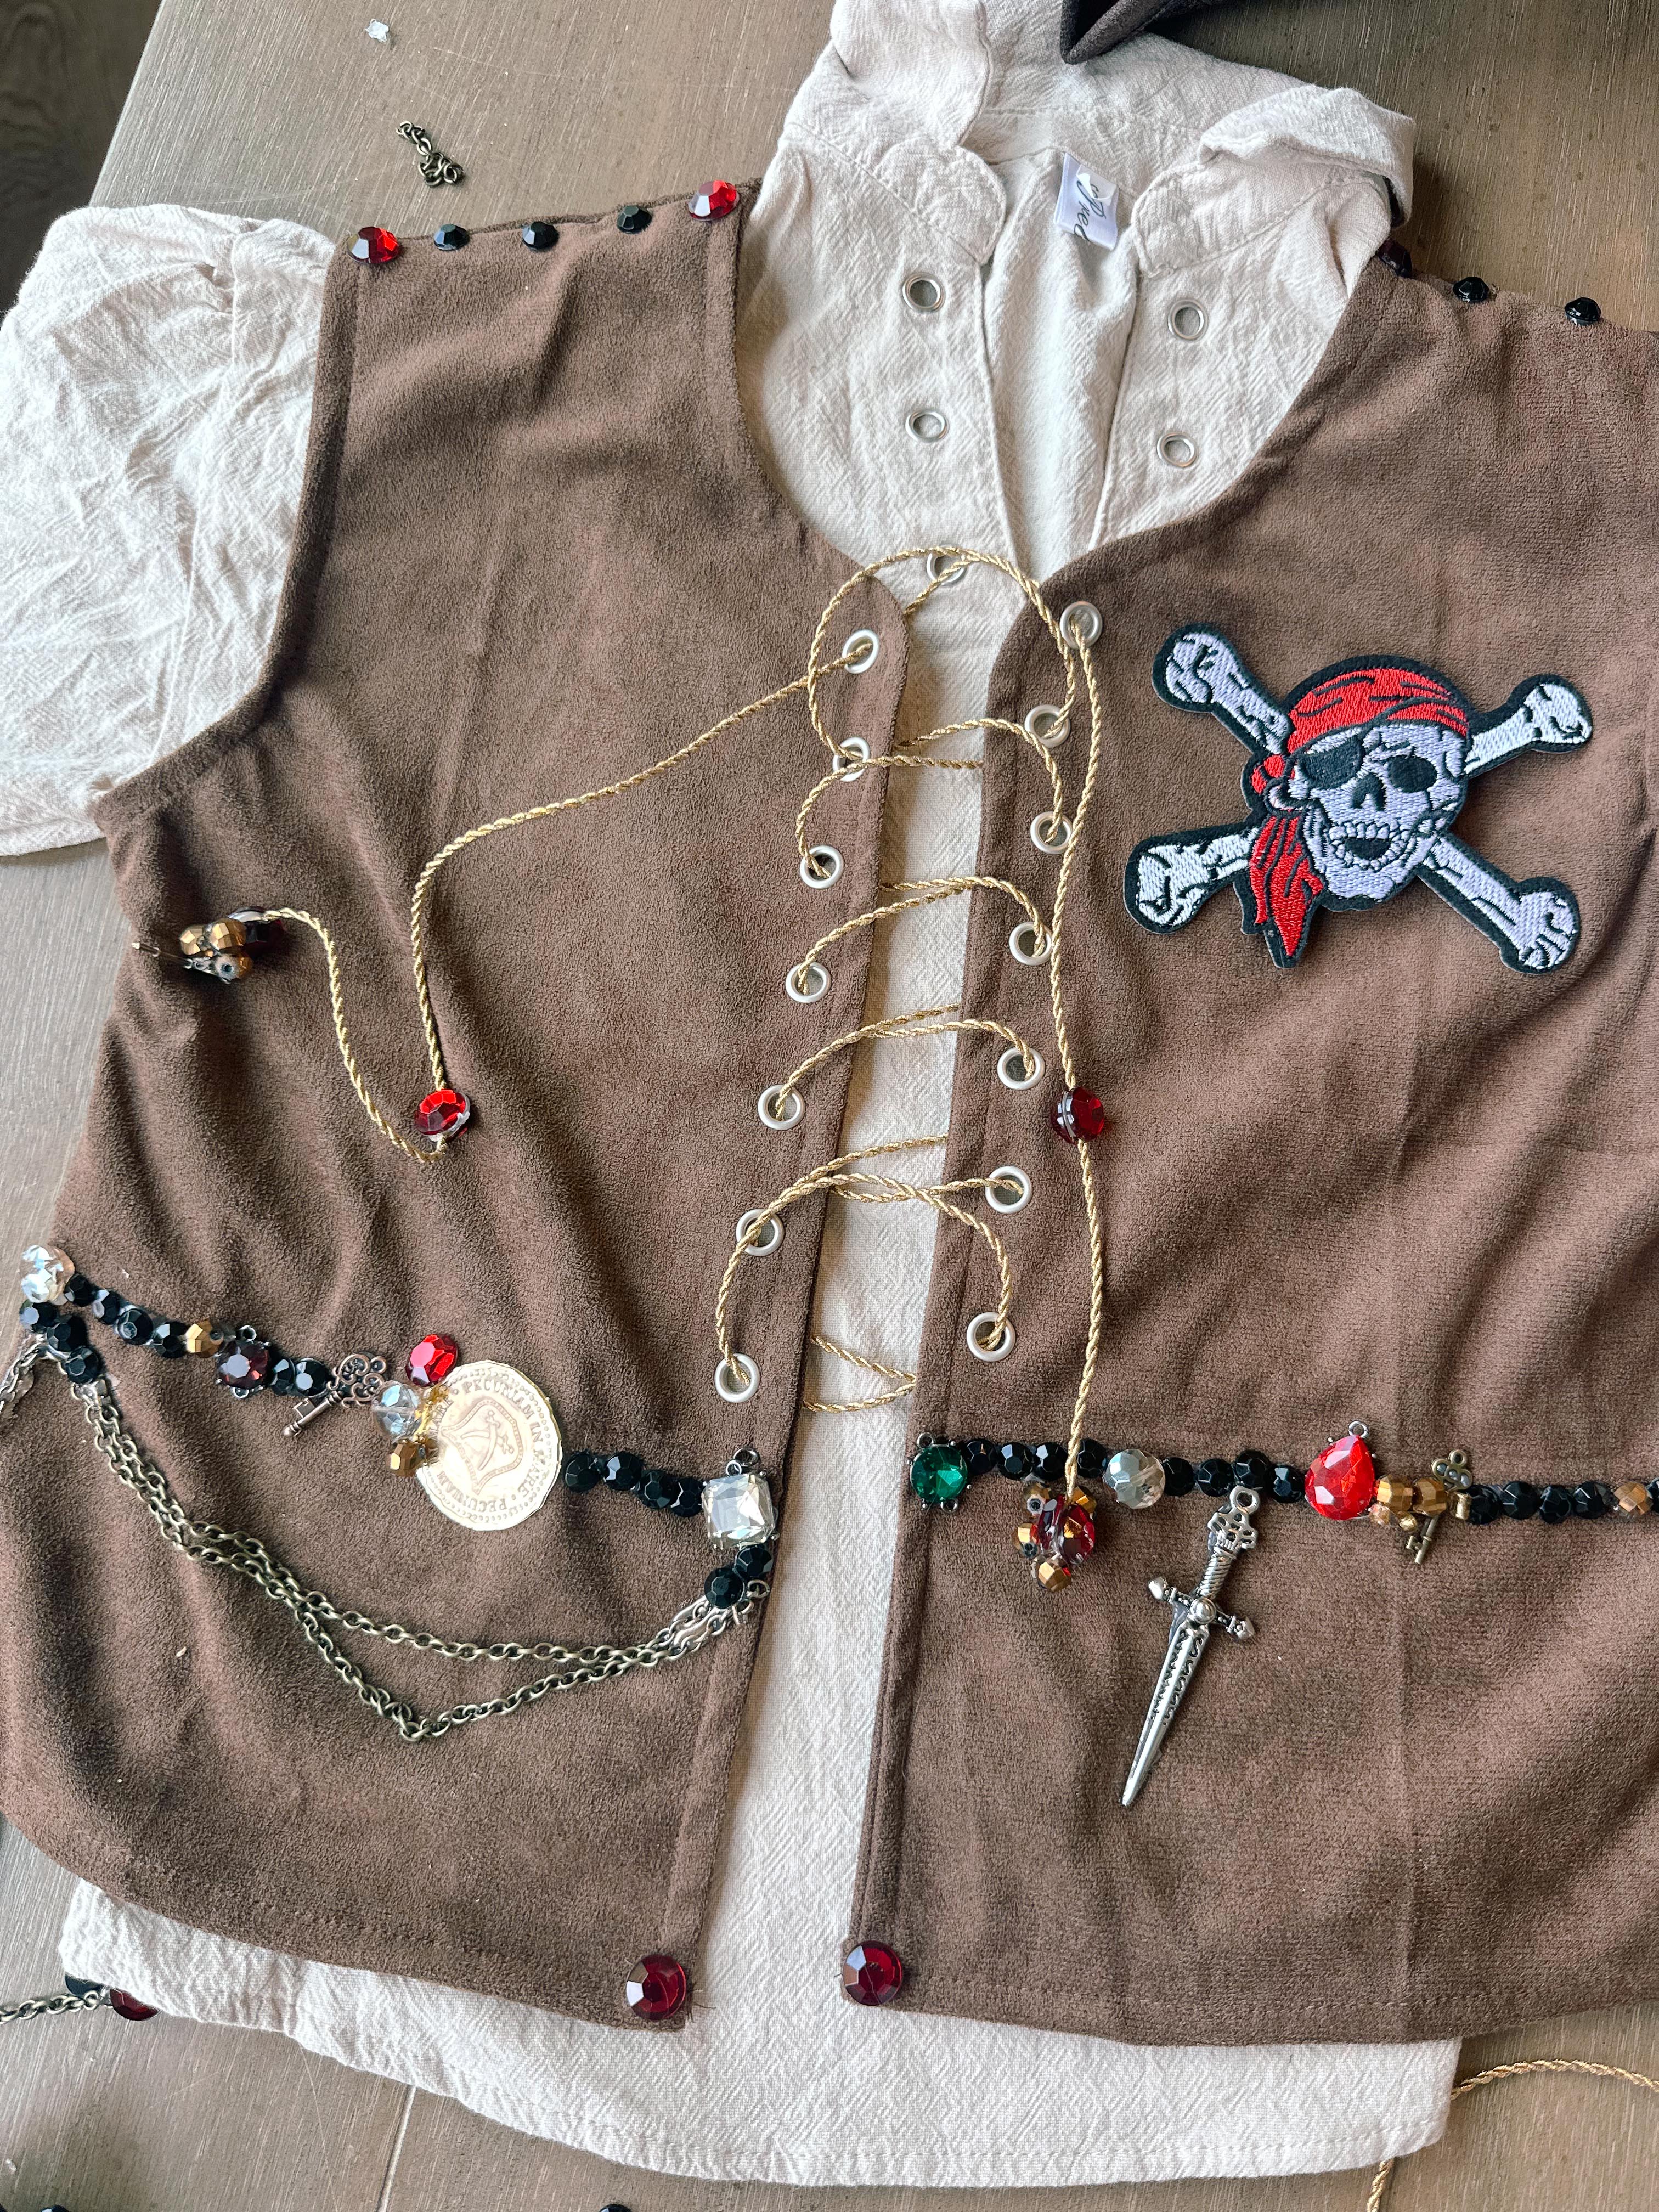
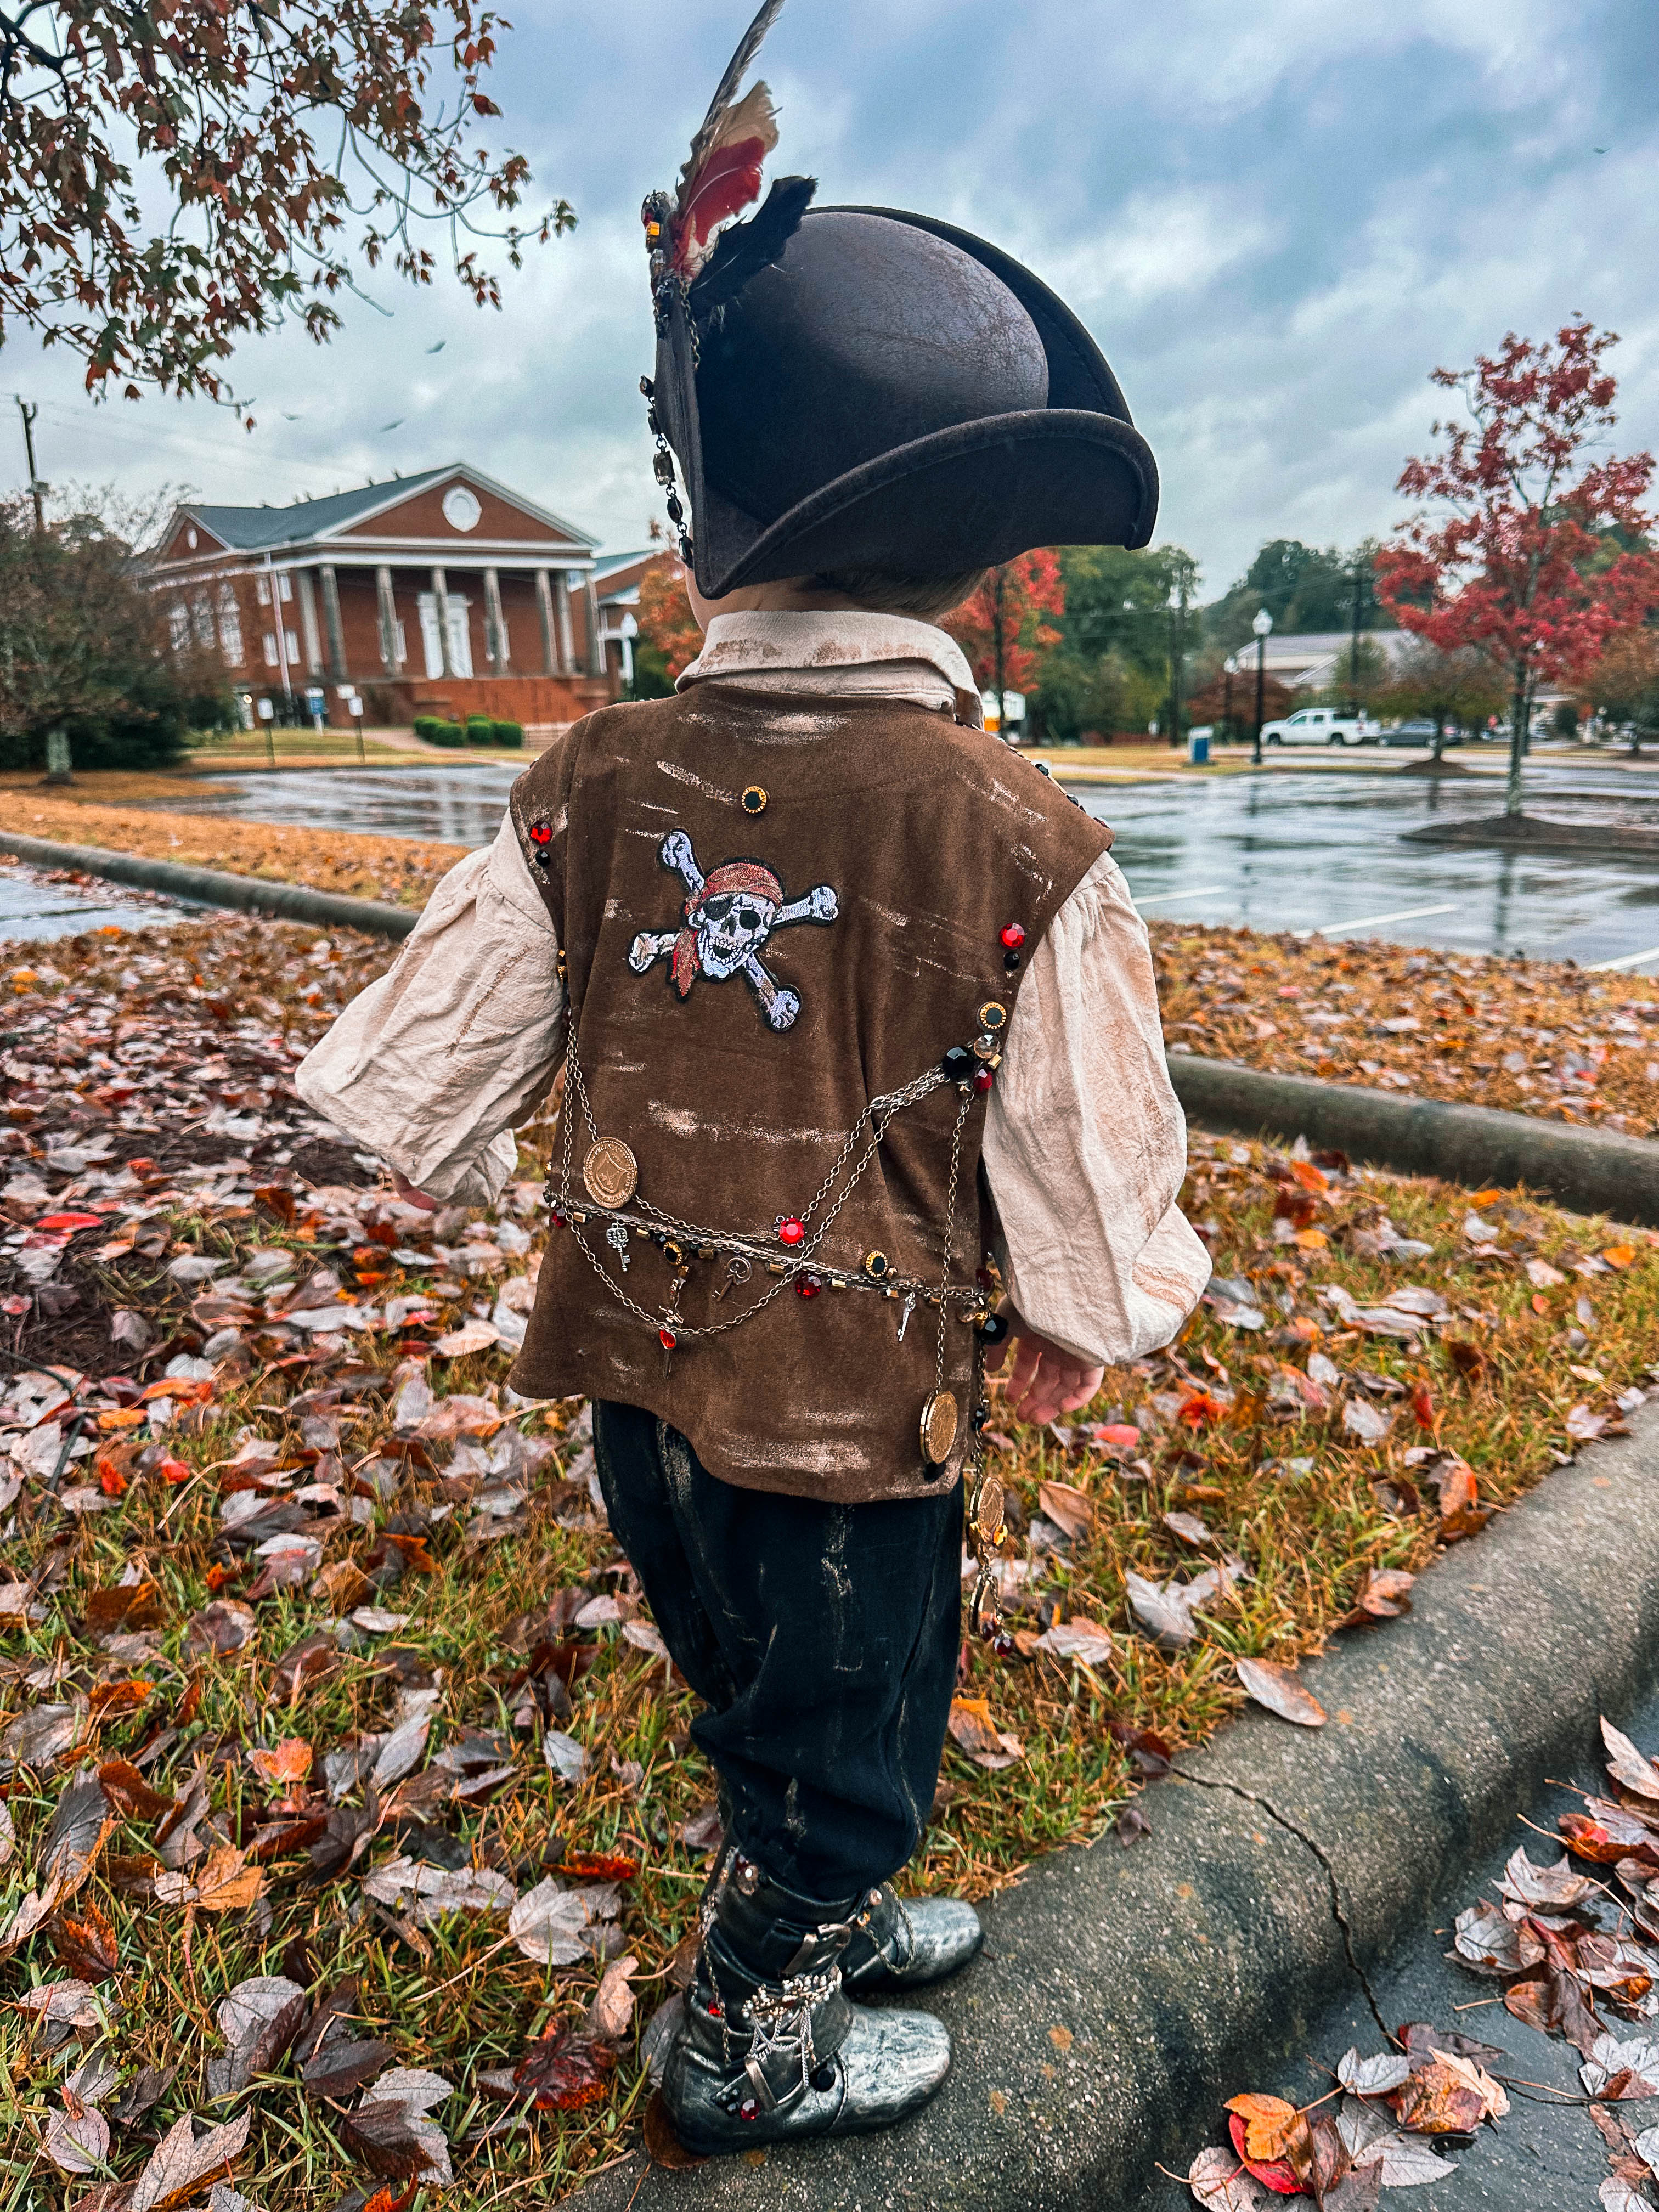
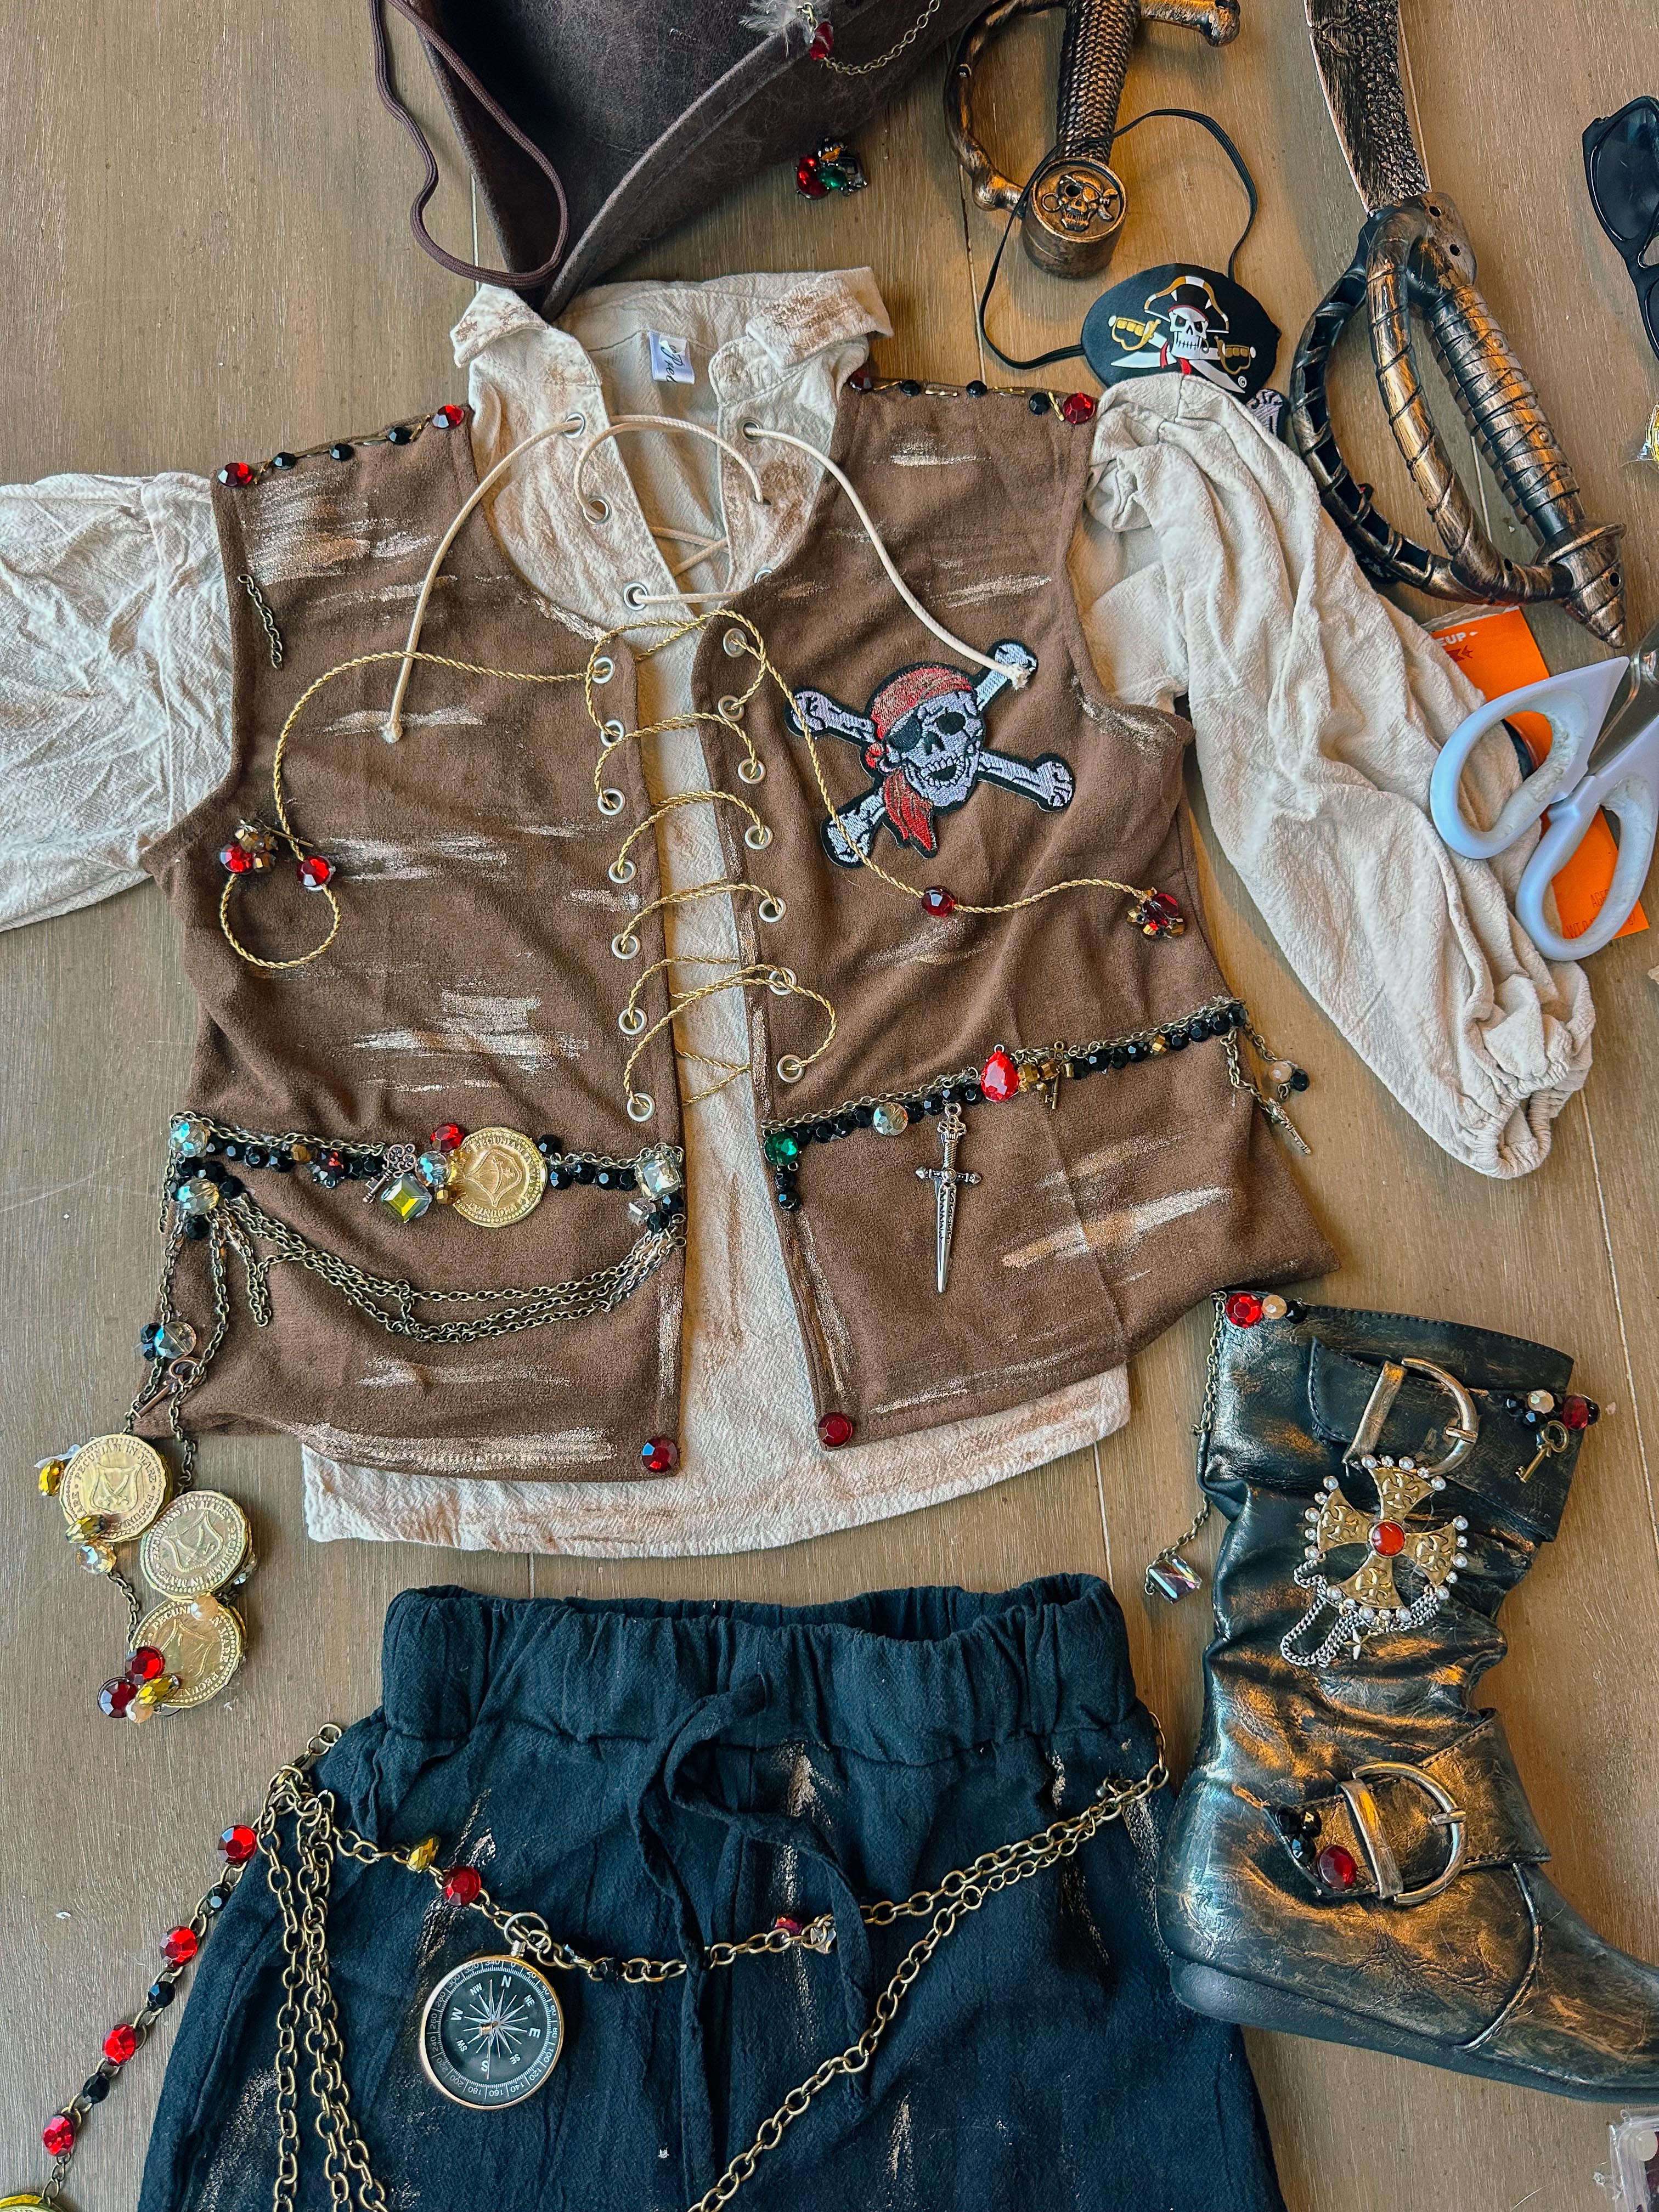
First, I added grommets down the front and threaded gold cord through them to create a lace up detail. Then I distressed the fabric with paint to give it a worn, weathered appearance.
Now the TREASURES!
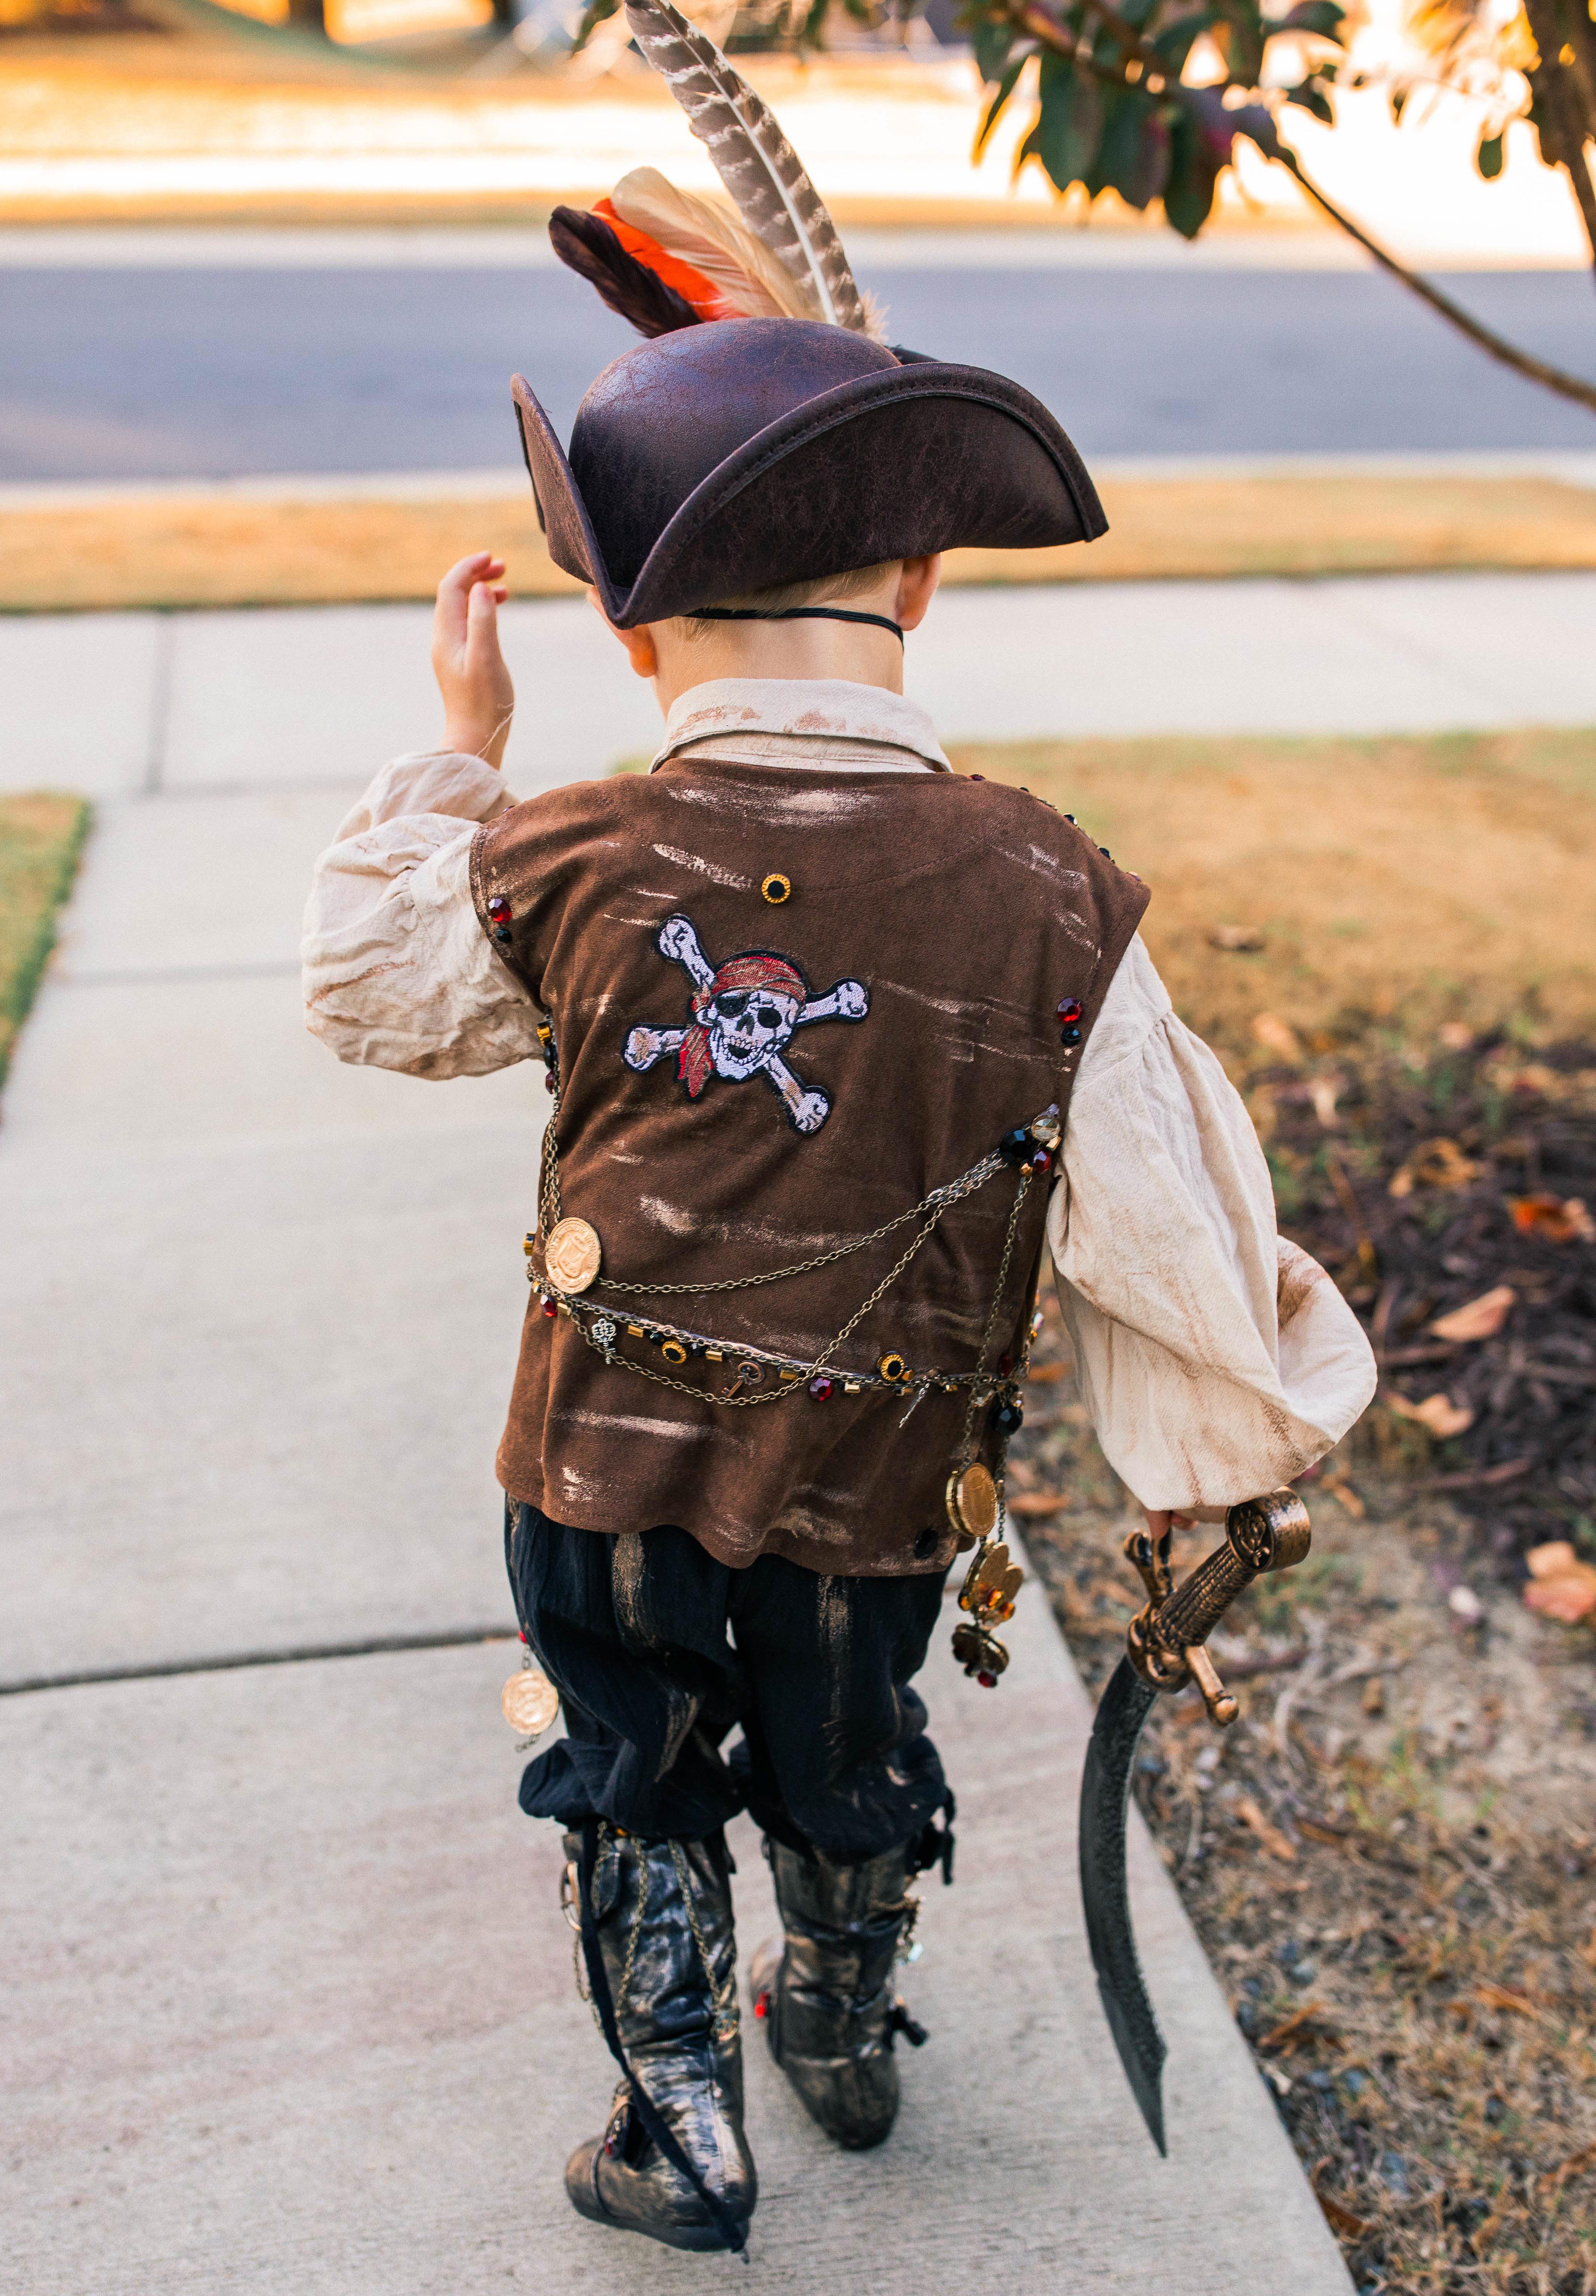
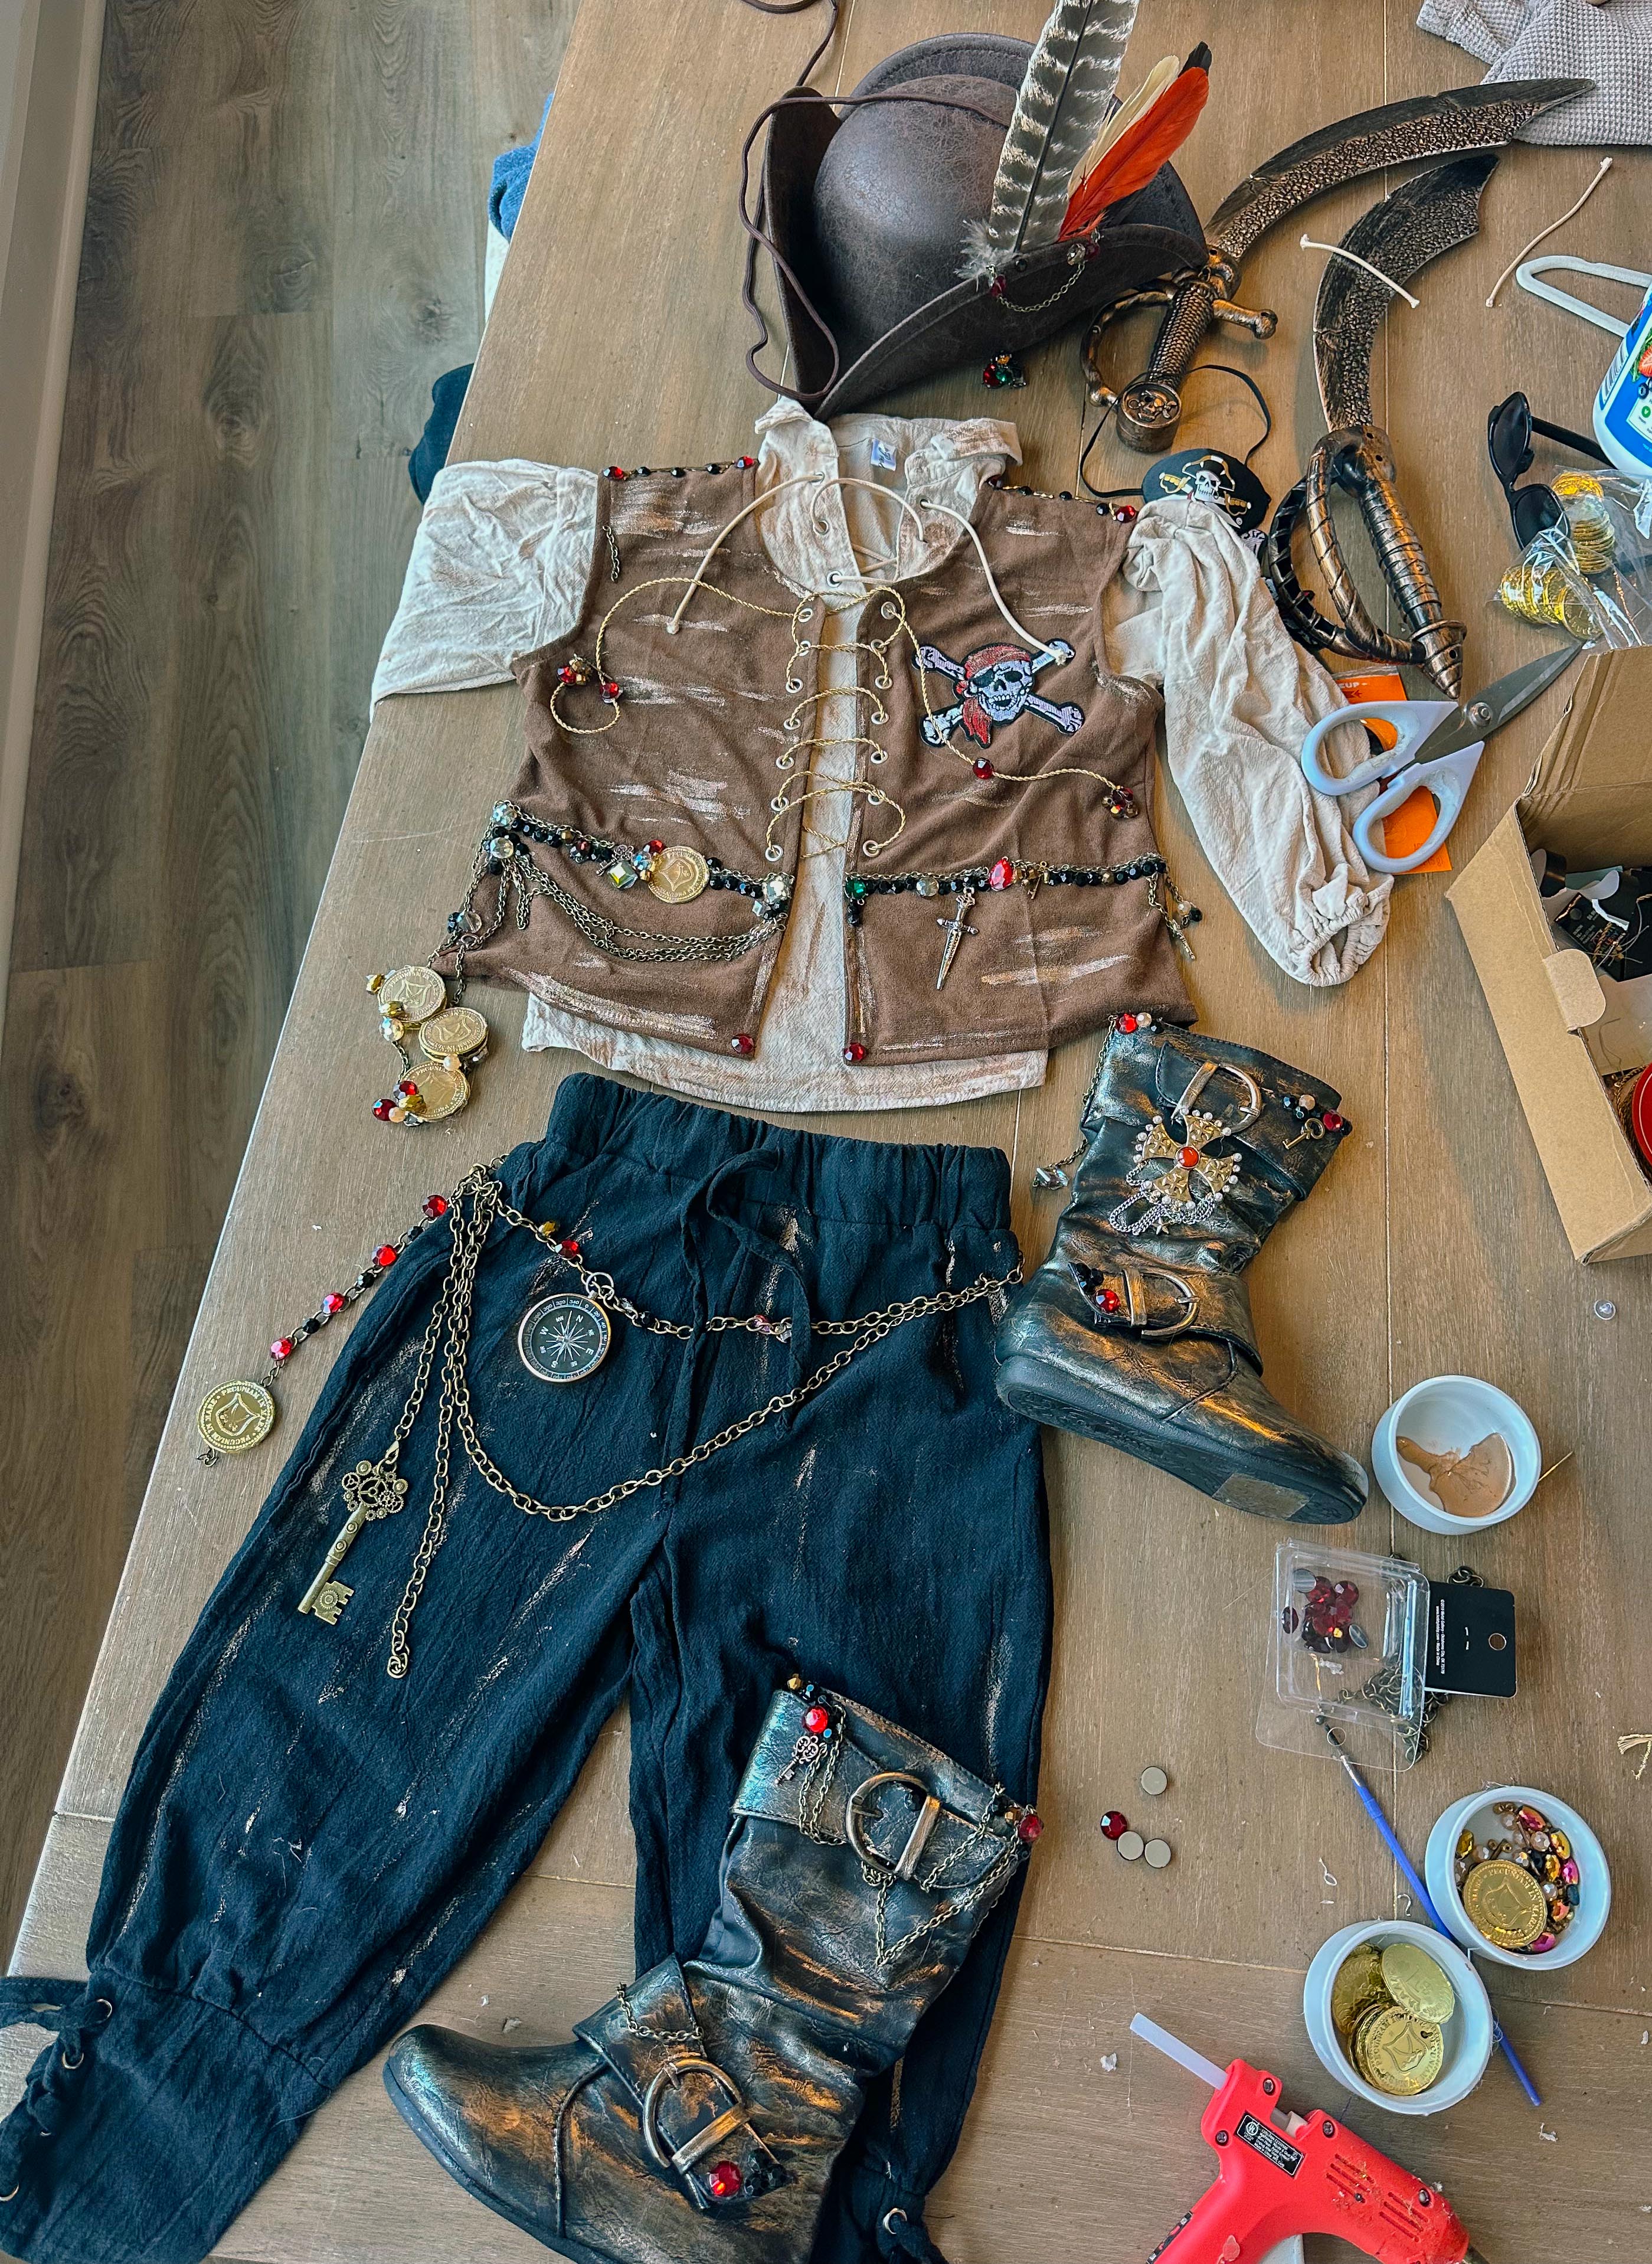
I added chains, beads, jewels, coins and little charms all over the vest. Some of the chains drape across the front while others hang loosely from the bottom. I intentionally made everything a little uneven because I wanted it to look like he had collected random treasures during his pirate adventures.
I also added skull and crossbones patches to the front and back.
There is absolutely no right placement here. Lay everything out before attaching it and just keep adding details until it feels finished.
And then, if you’re anything like me, add five more things.
Step 3: Decorate the Pirate Hat
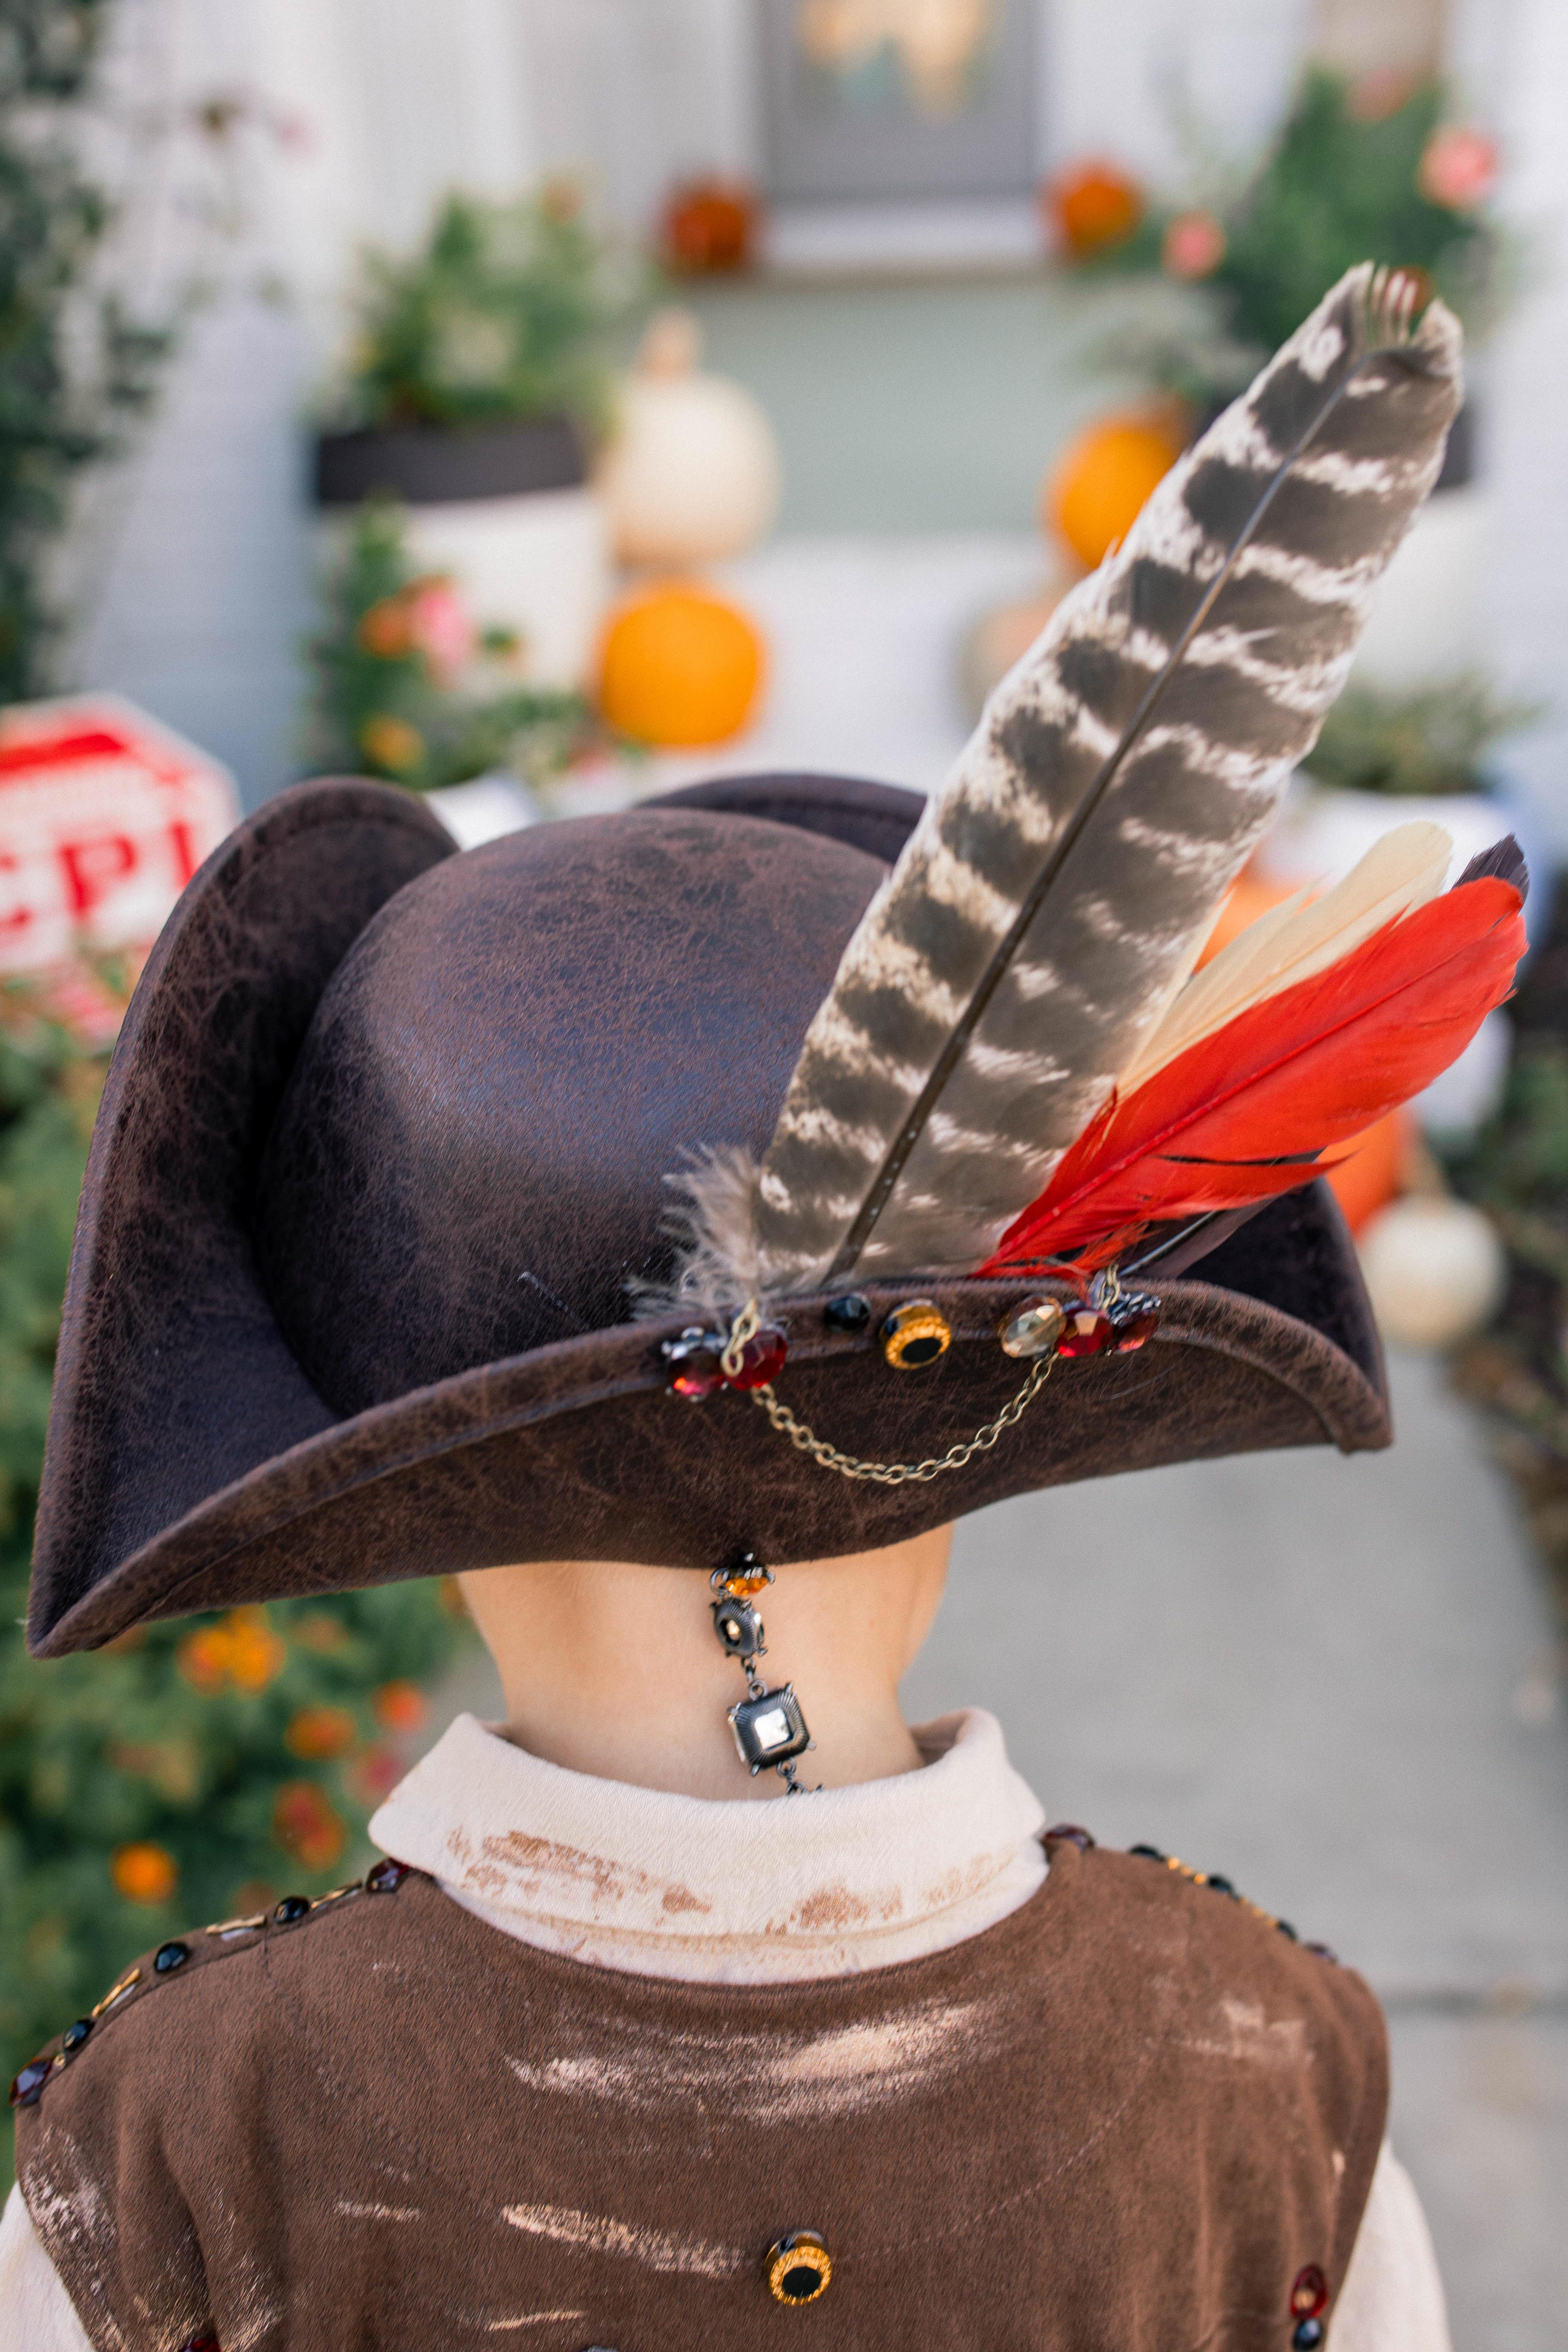
The pirate hat started out pretty simple, so I used the same idea as the vest to make it feel custom.
I attached several feathers in different colors and sizes to one side of the hat and layered in a pirate skull embellishment, beads, jewels and dangling charms.
This tiny detail made SUCH a difference.
I wanted the hat to feel almost like something a pirate captain would have decorated with little treasures collected along the way.
Step 4: Distress the Pirate Pants
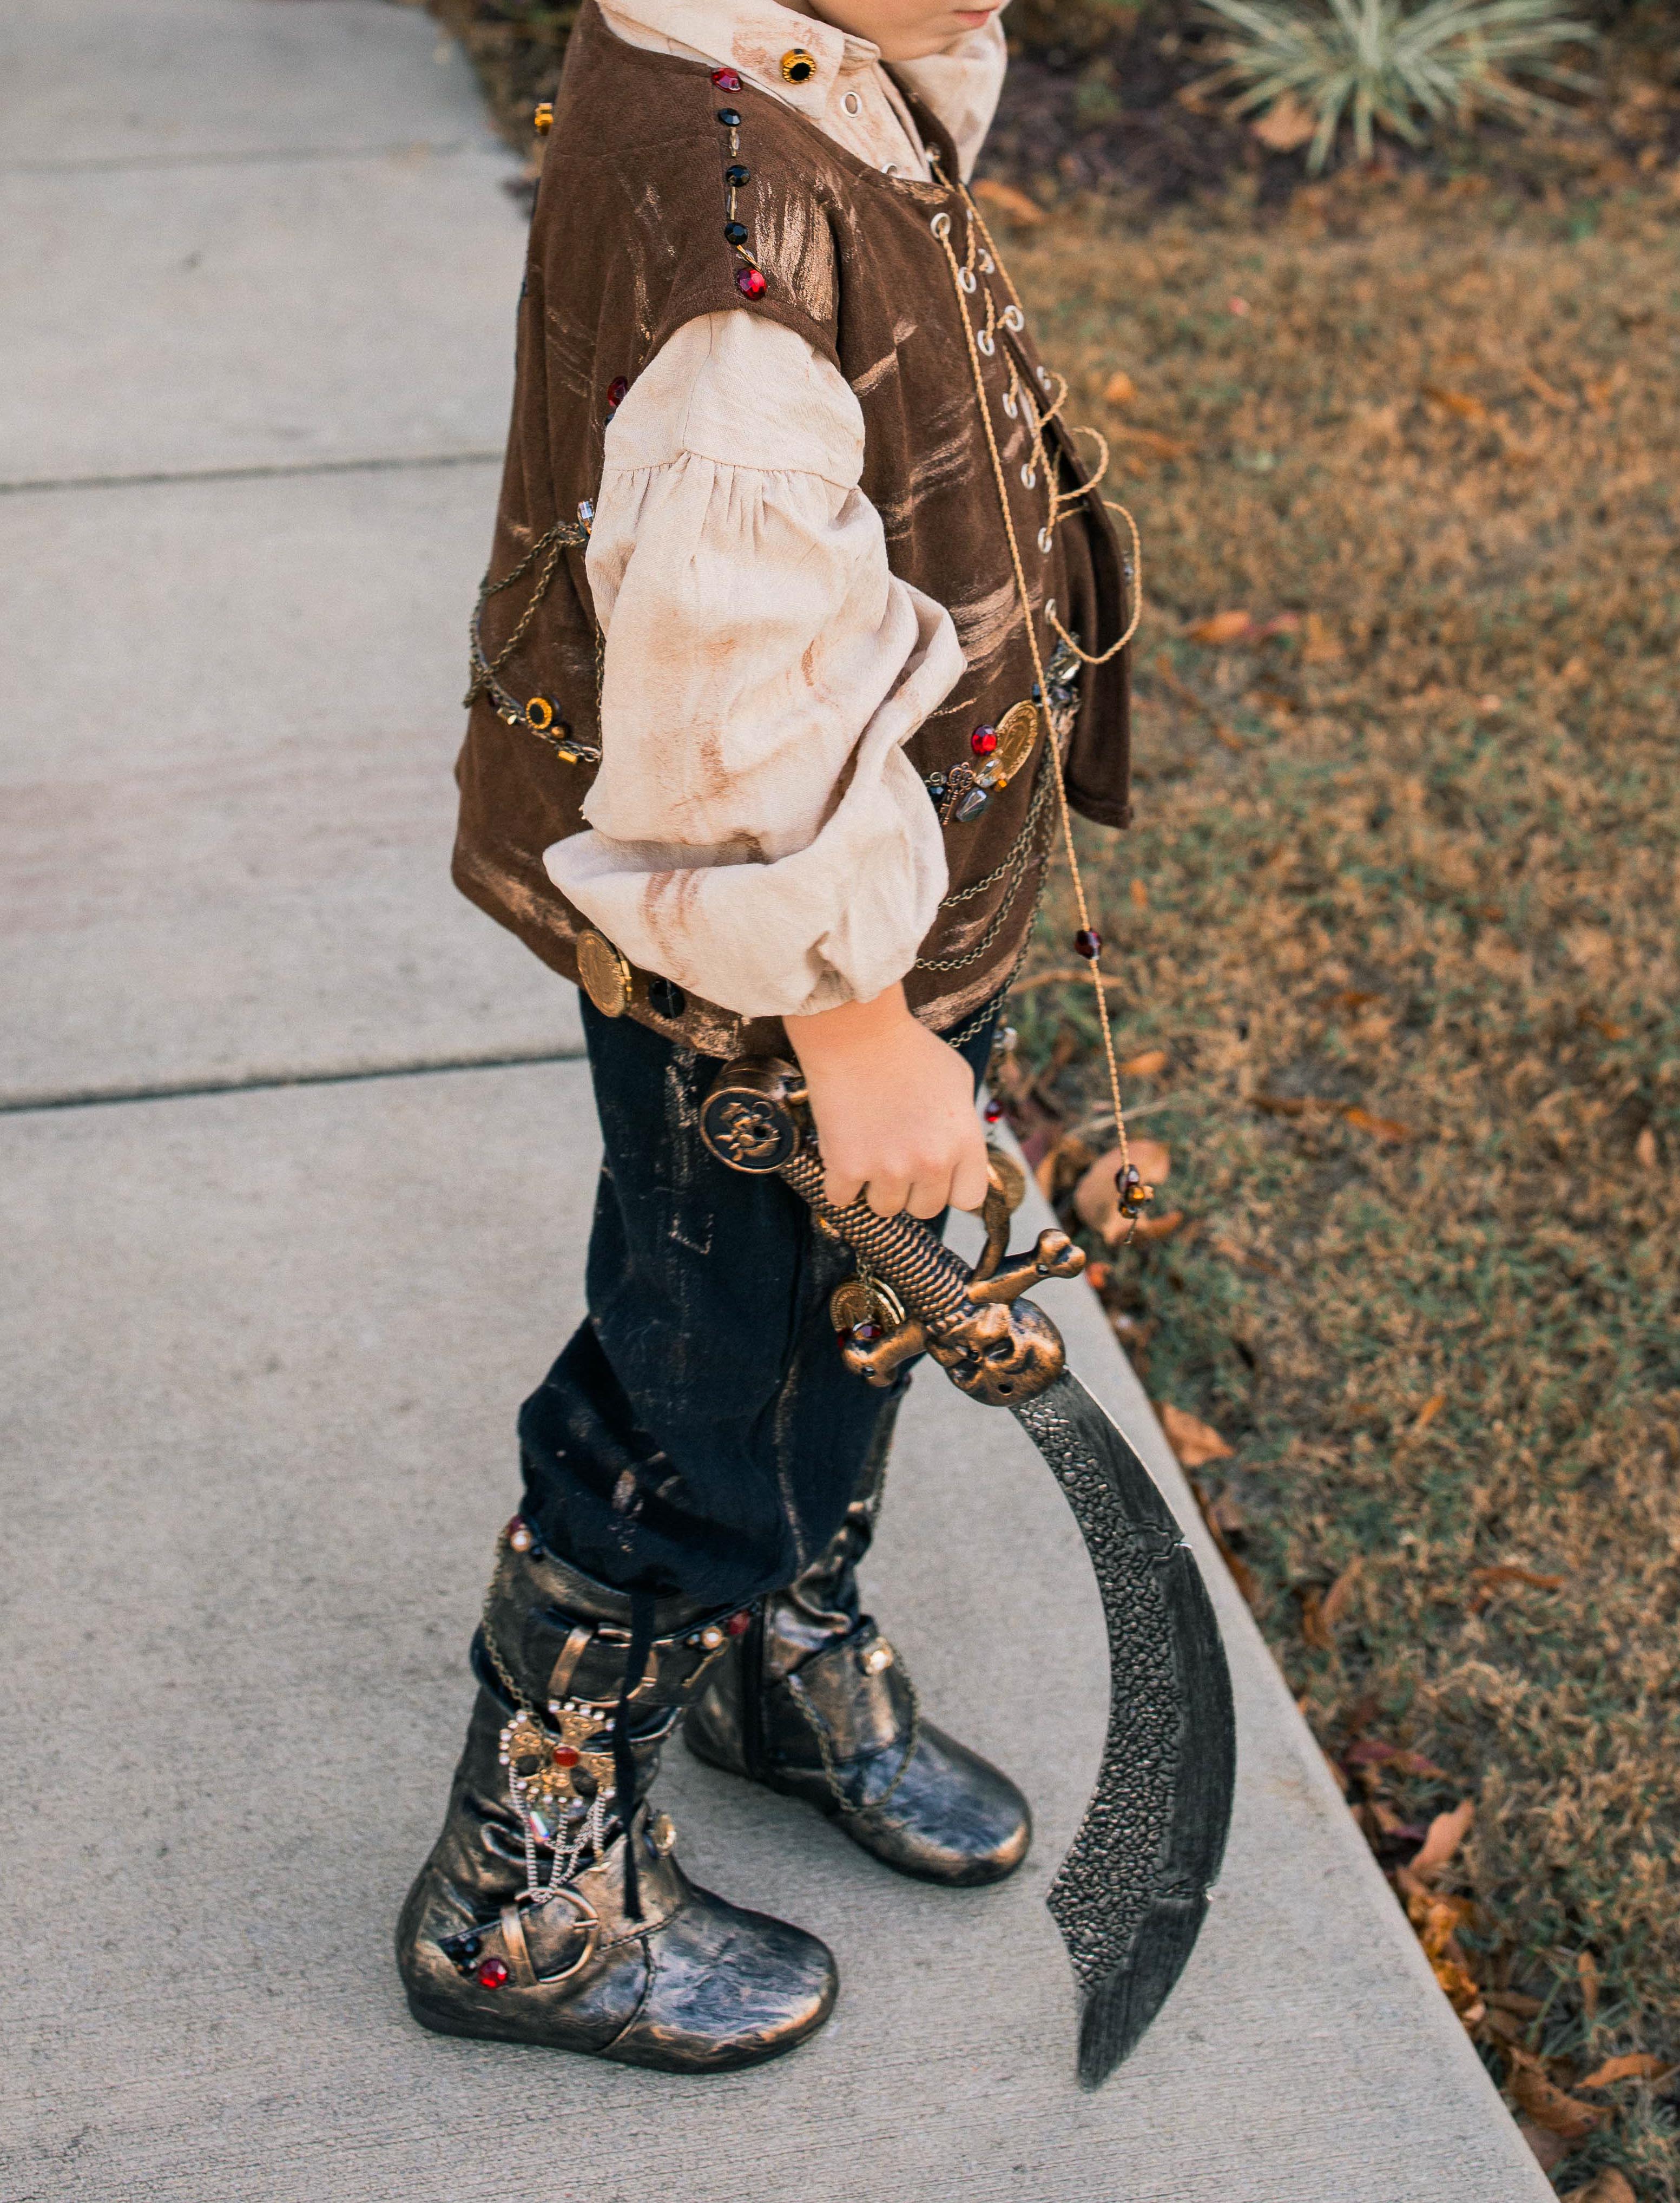
For the pants, I wanted something loose and billowy that could tuck into the boots.
I used simple black pants and lightly distressed them with paint so they coordinated with the shirt and vest. Again, you don’t need to make this perfect.
A few uneven streaks and smudges actually make them look more realistic.
I also added chains and a compass detail around the waist for another little layer of pirate treasure.
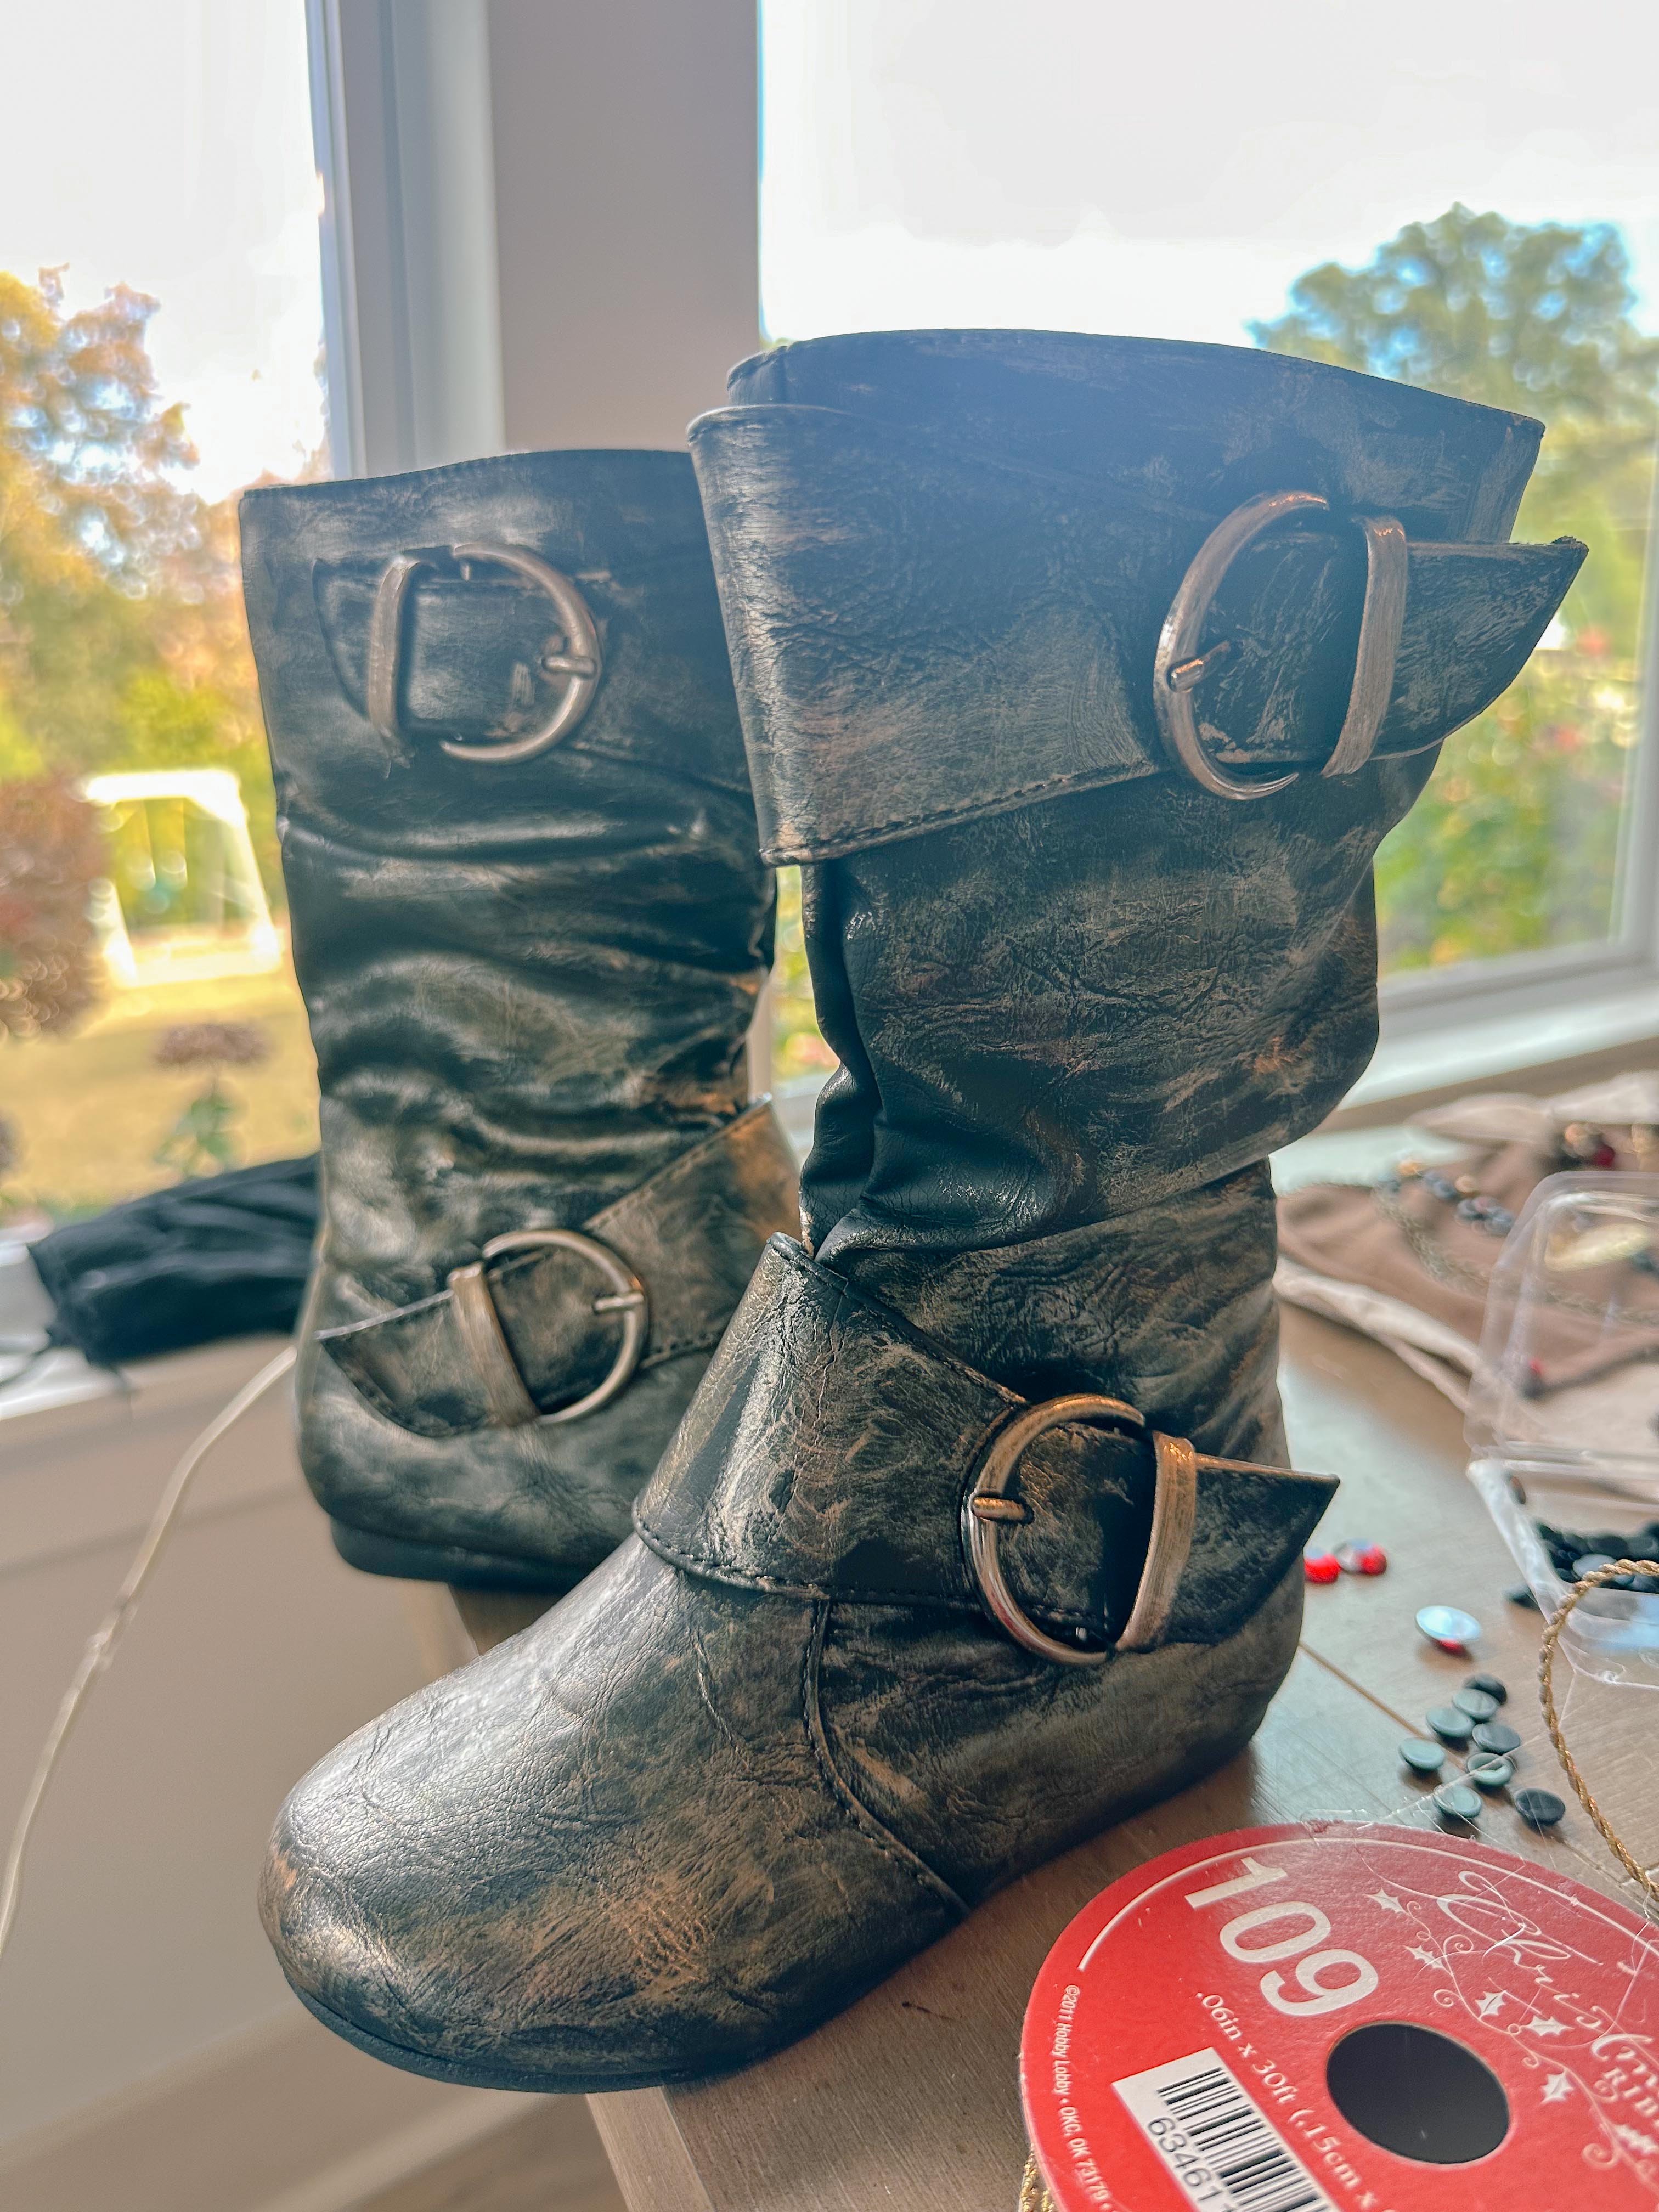
Step 5: DIY Weathered Pirate Boots
Okay, the boots might be my favorite transformation.
They started as simple black boots, but once the rest of the costume was finished, they looked way too clean.
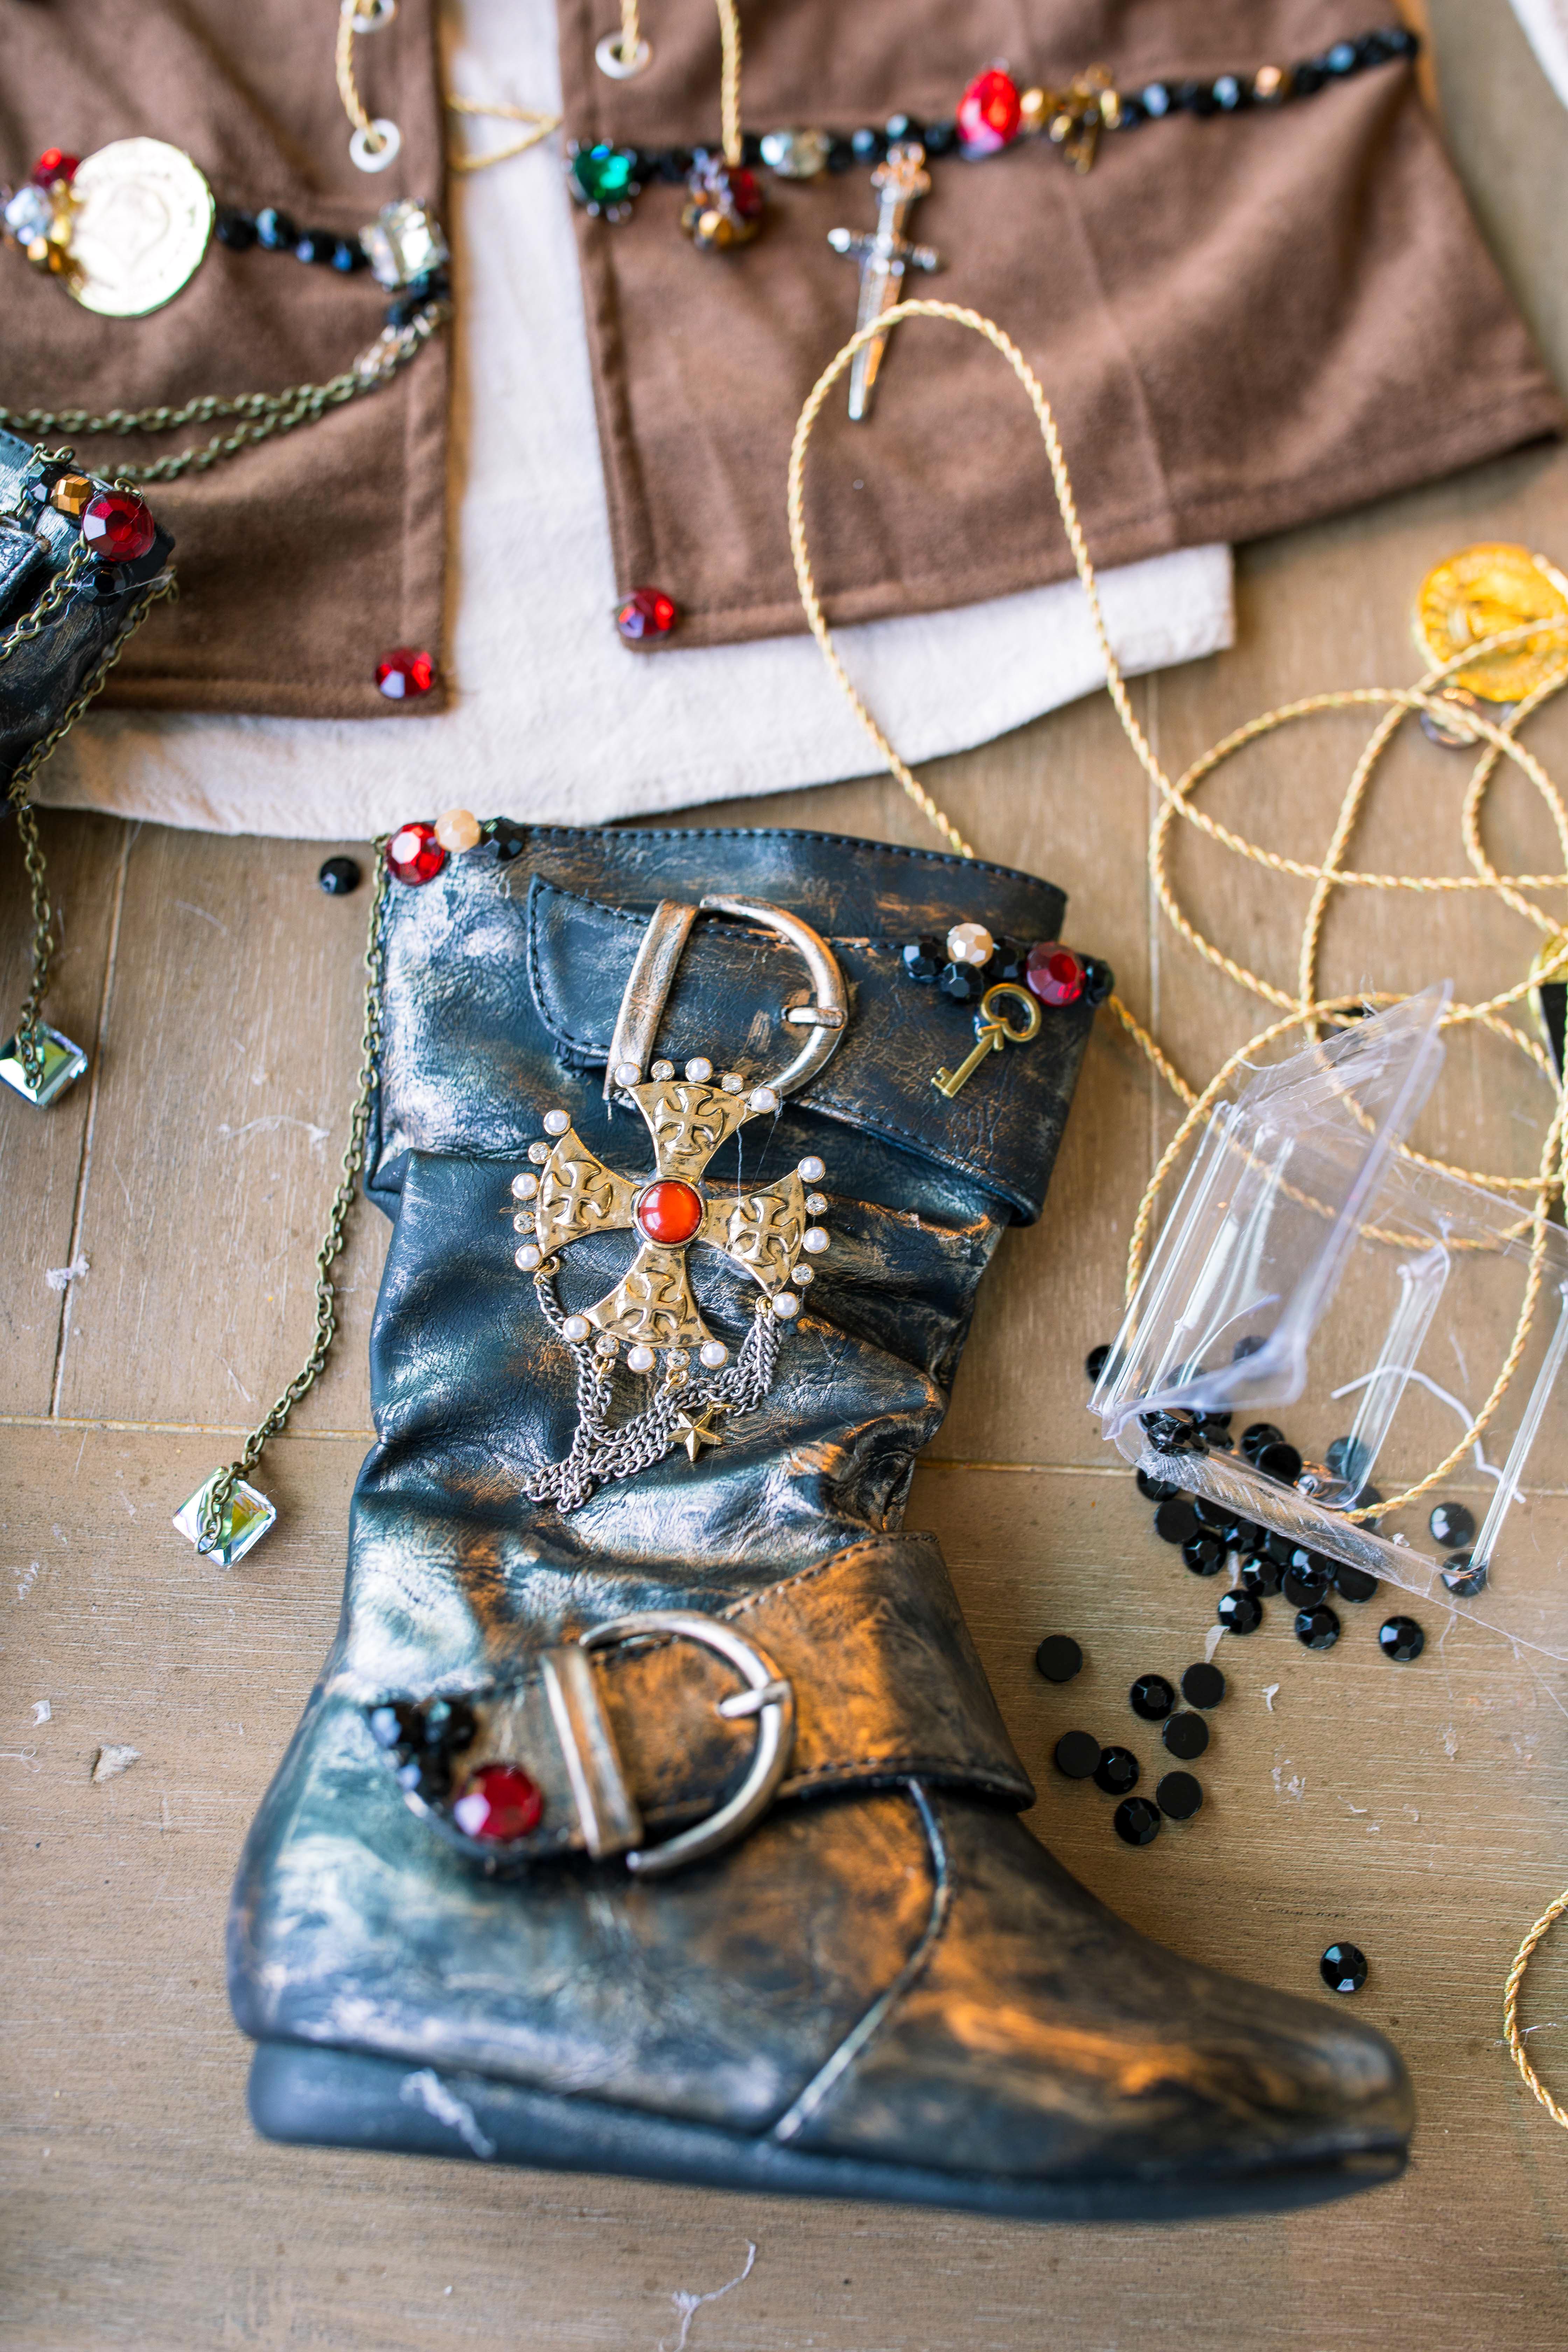
So I covered them with paint.
I lightly brushed brown and metallic tones over the boots, concentrating around the buckles, seams, toes and creases. This instantly made them look older and more weathered.
Then I added a few chains, jewels and dangling charms to tie them into the rest of the costume.
They looked so cool!

Make It Comfortable for Halloween Night
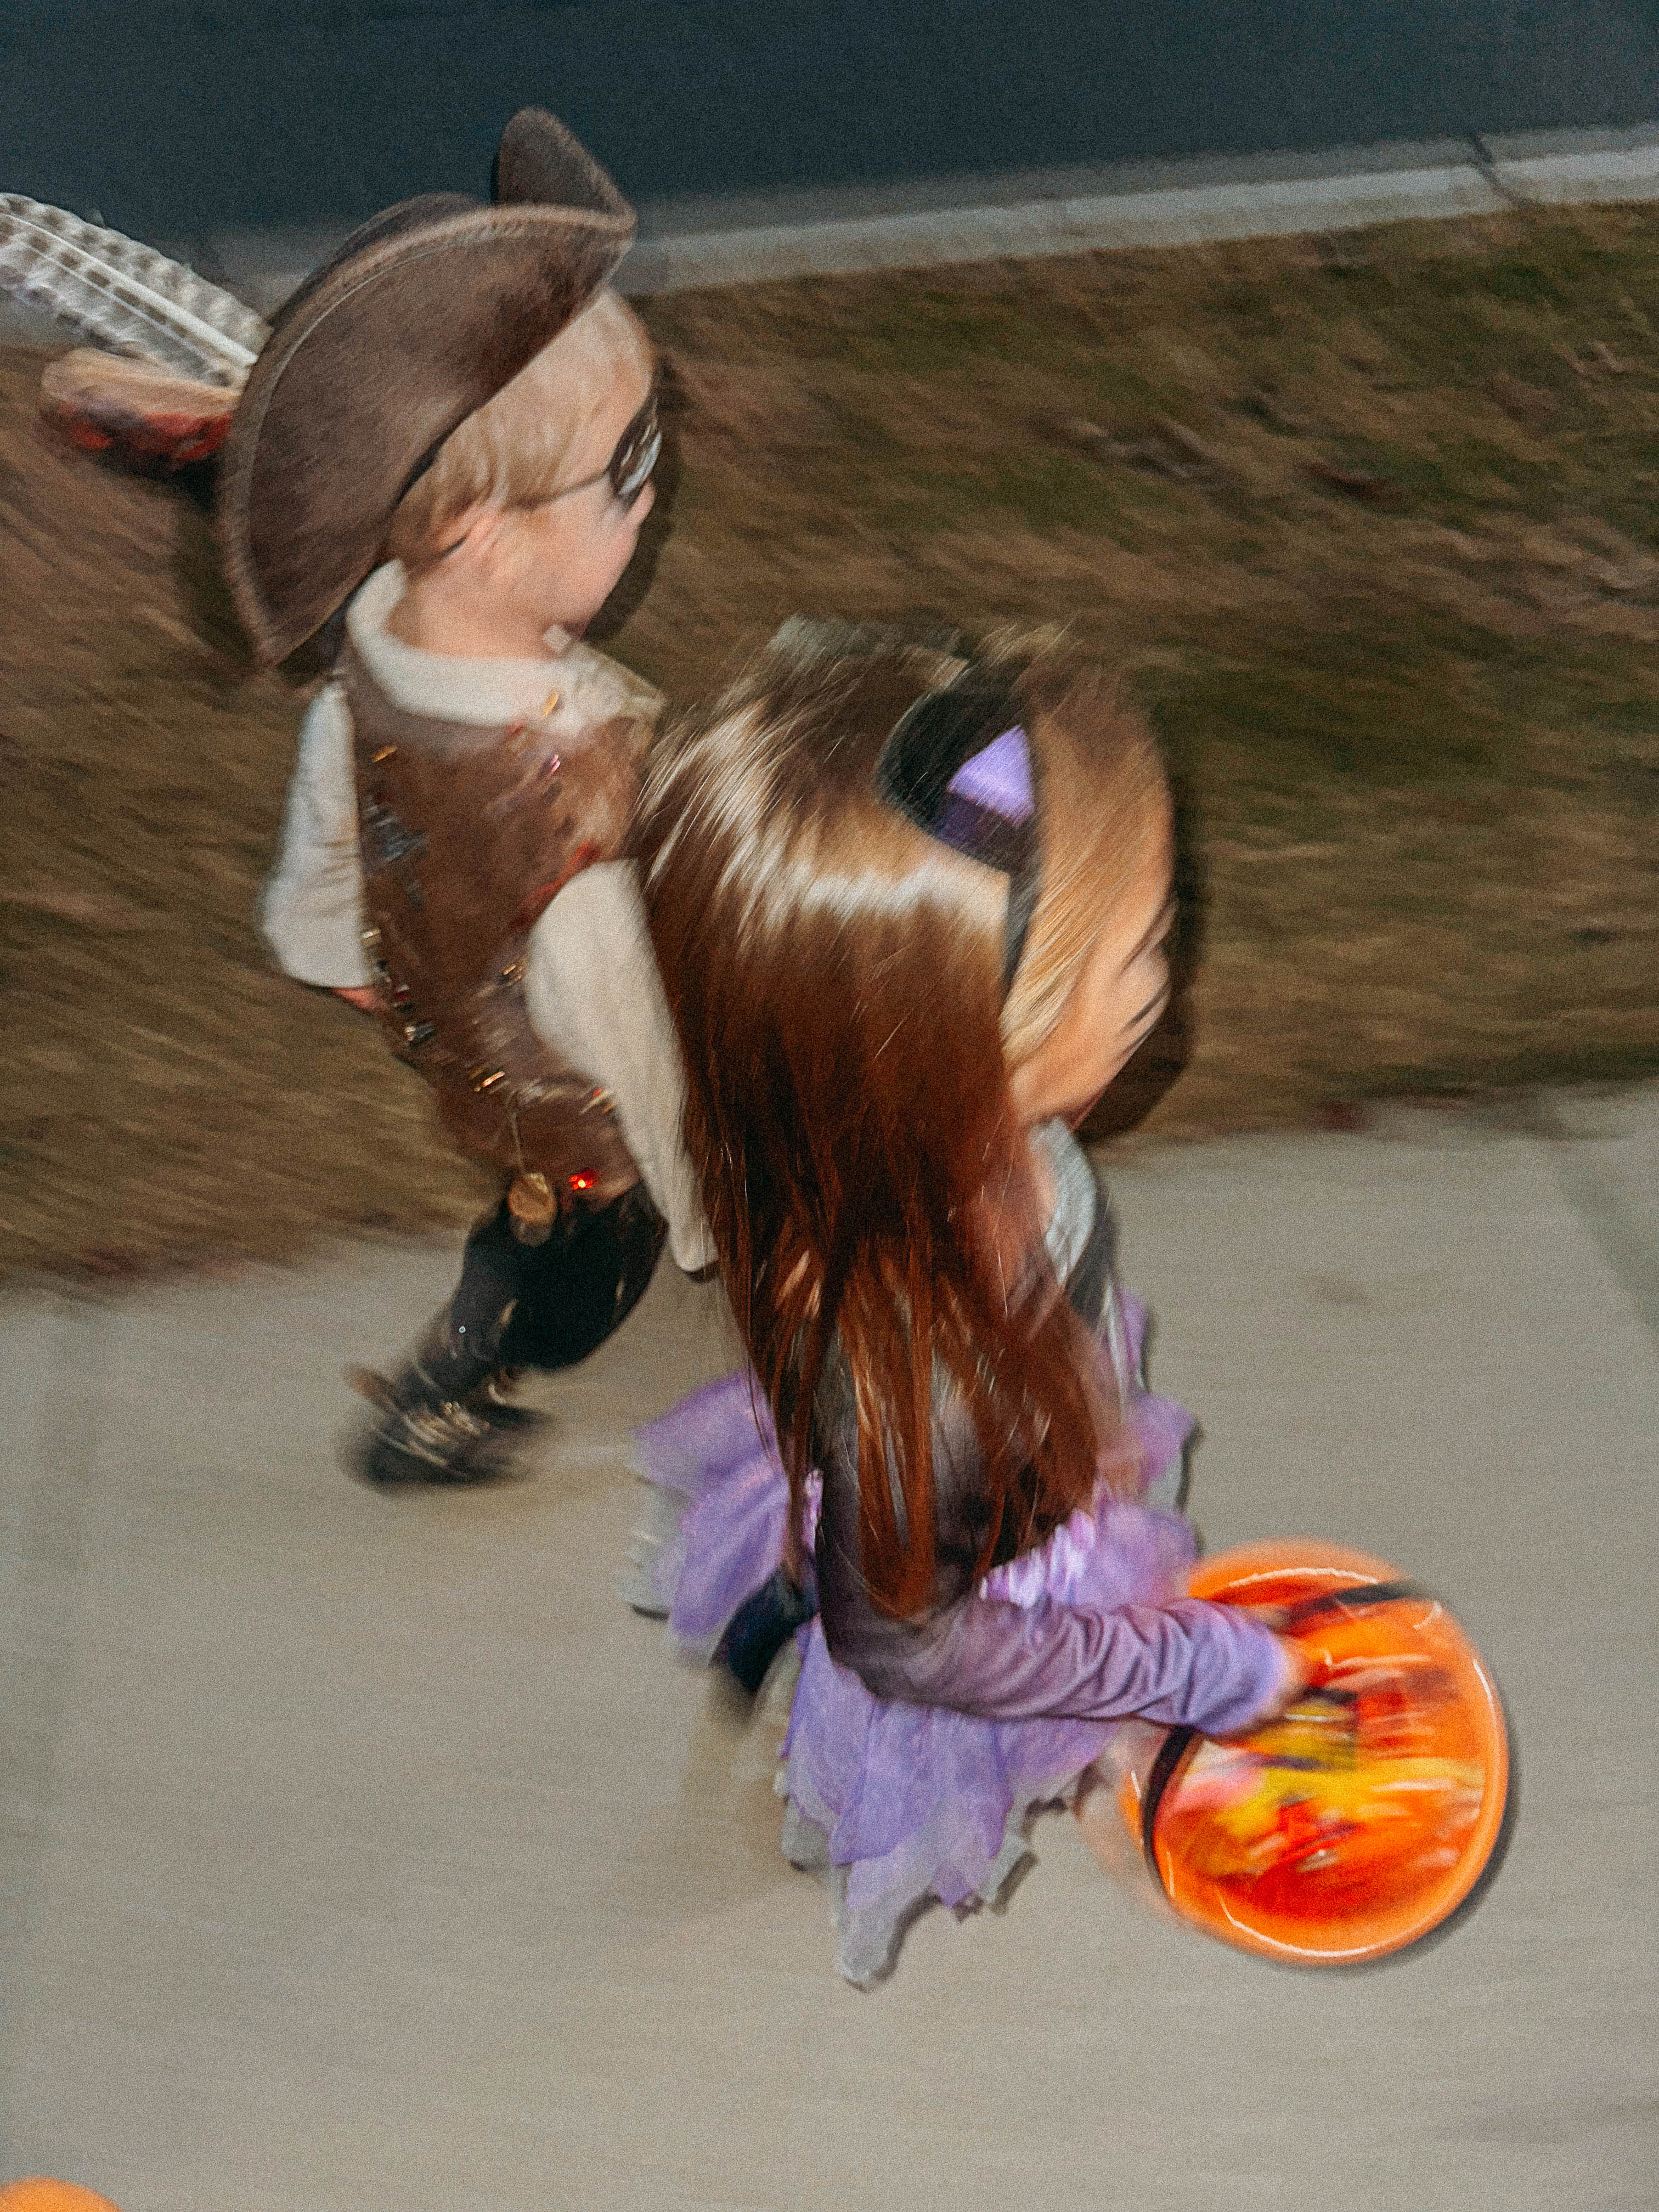
As much as I wanted this costume to look detailed and realistic, I also wanted it to be comfortable enough to actually wear all Halloween night. Everything underneath is soft, loose and easy to move around in, and I made sure none of the chains or accessories felt heavy or got in the way of running around. The loose shirt and pants also leave plenty of room to layer something warm underneath if Halloween night is chilly. My biggest tip is to have your child try everything on before Halloween and walk, sit and run around in it. A cute costume isn’t worth much if they’re asking to take it off ten minutes into trick or treating!
The Secret Is in the Details
If you’re recreating this DIY pirate costume, my biggest advice is to layer, layer, layer.
The basic shirt, vest, pants and boots create the silhouette, but all those tiny details are what make the costume special.
The chains don’t have to match. The jewels don’t need to be symmetrical. The paint doesn’t need to be perfect. Let some things dangle. Make some pieces look tarnished. Layer gold with bronze and black. Add a coin somewhere unexpected.
The more collected and imperfect it looks, the better.
An Easy DIY Halloween Costume You Can Make Your Own
What I love most about this costume is that no two versions would ever look exactly alike.
You could make yours much simpler or go completely overboard with the pirate treasure like I did. You can thrift almost every piece, reuse things from your Halloween bins and customize the colors and accessories around whatever you already have.
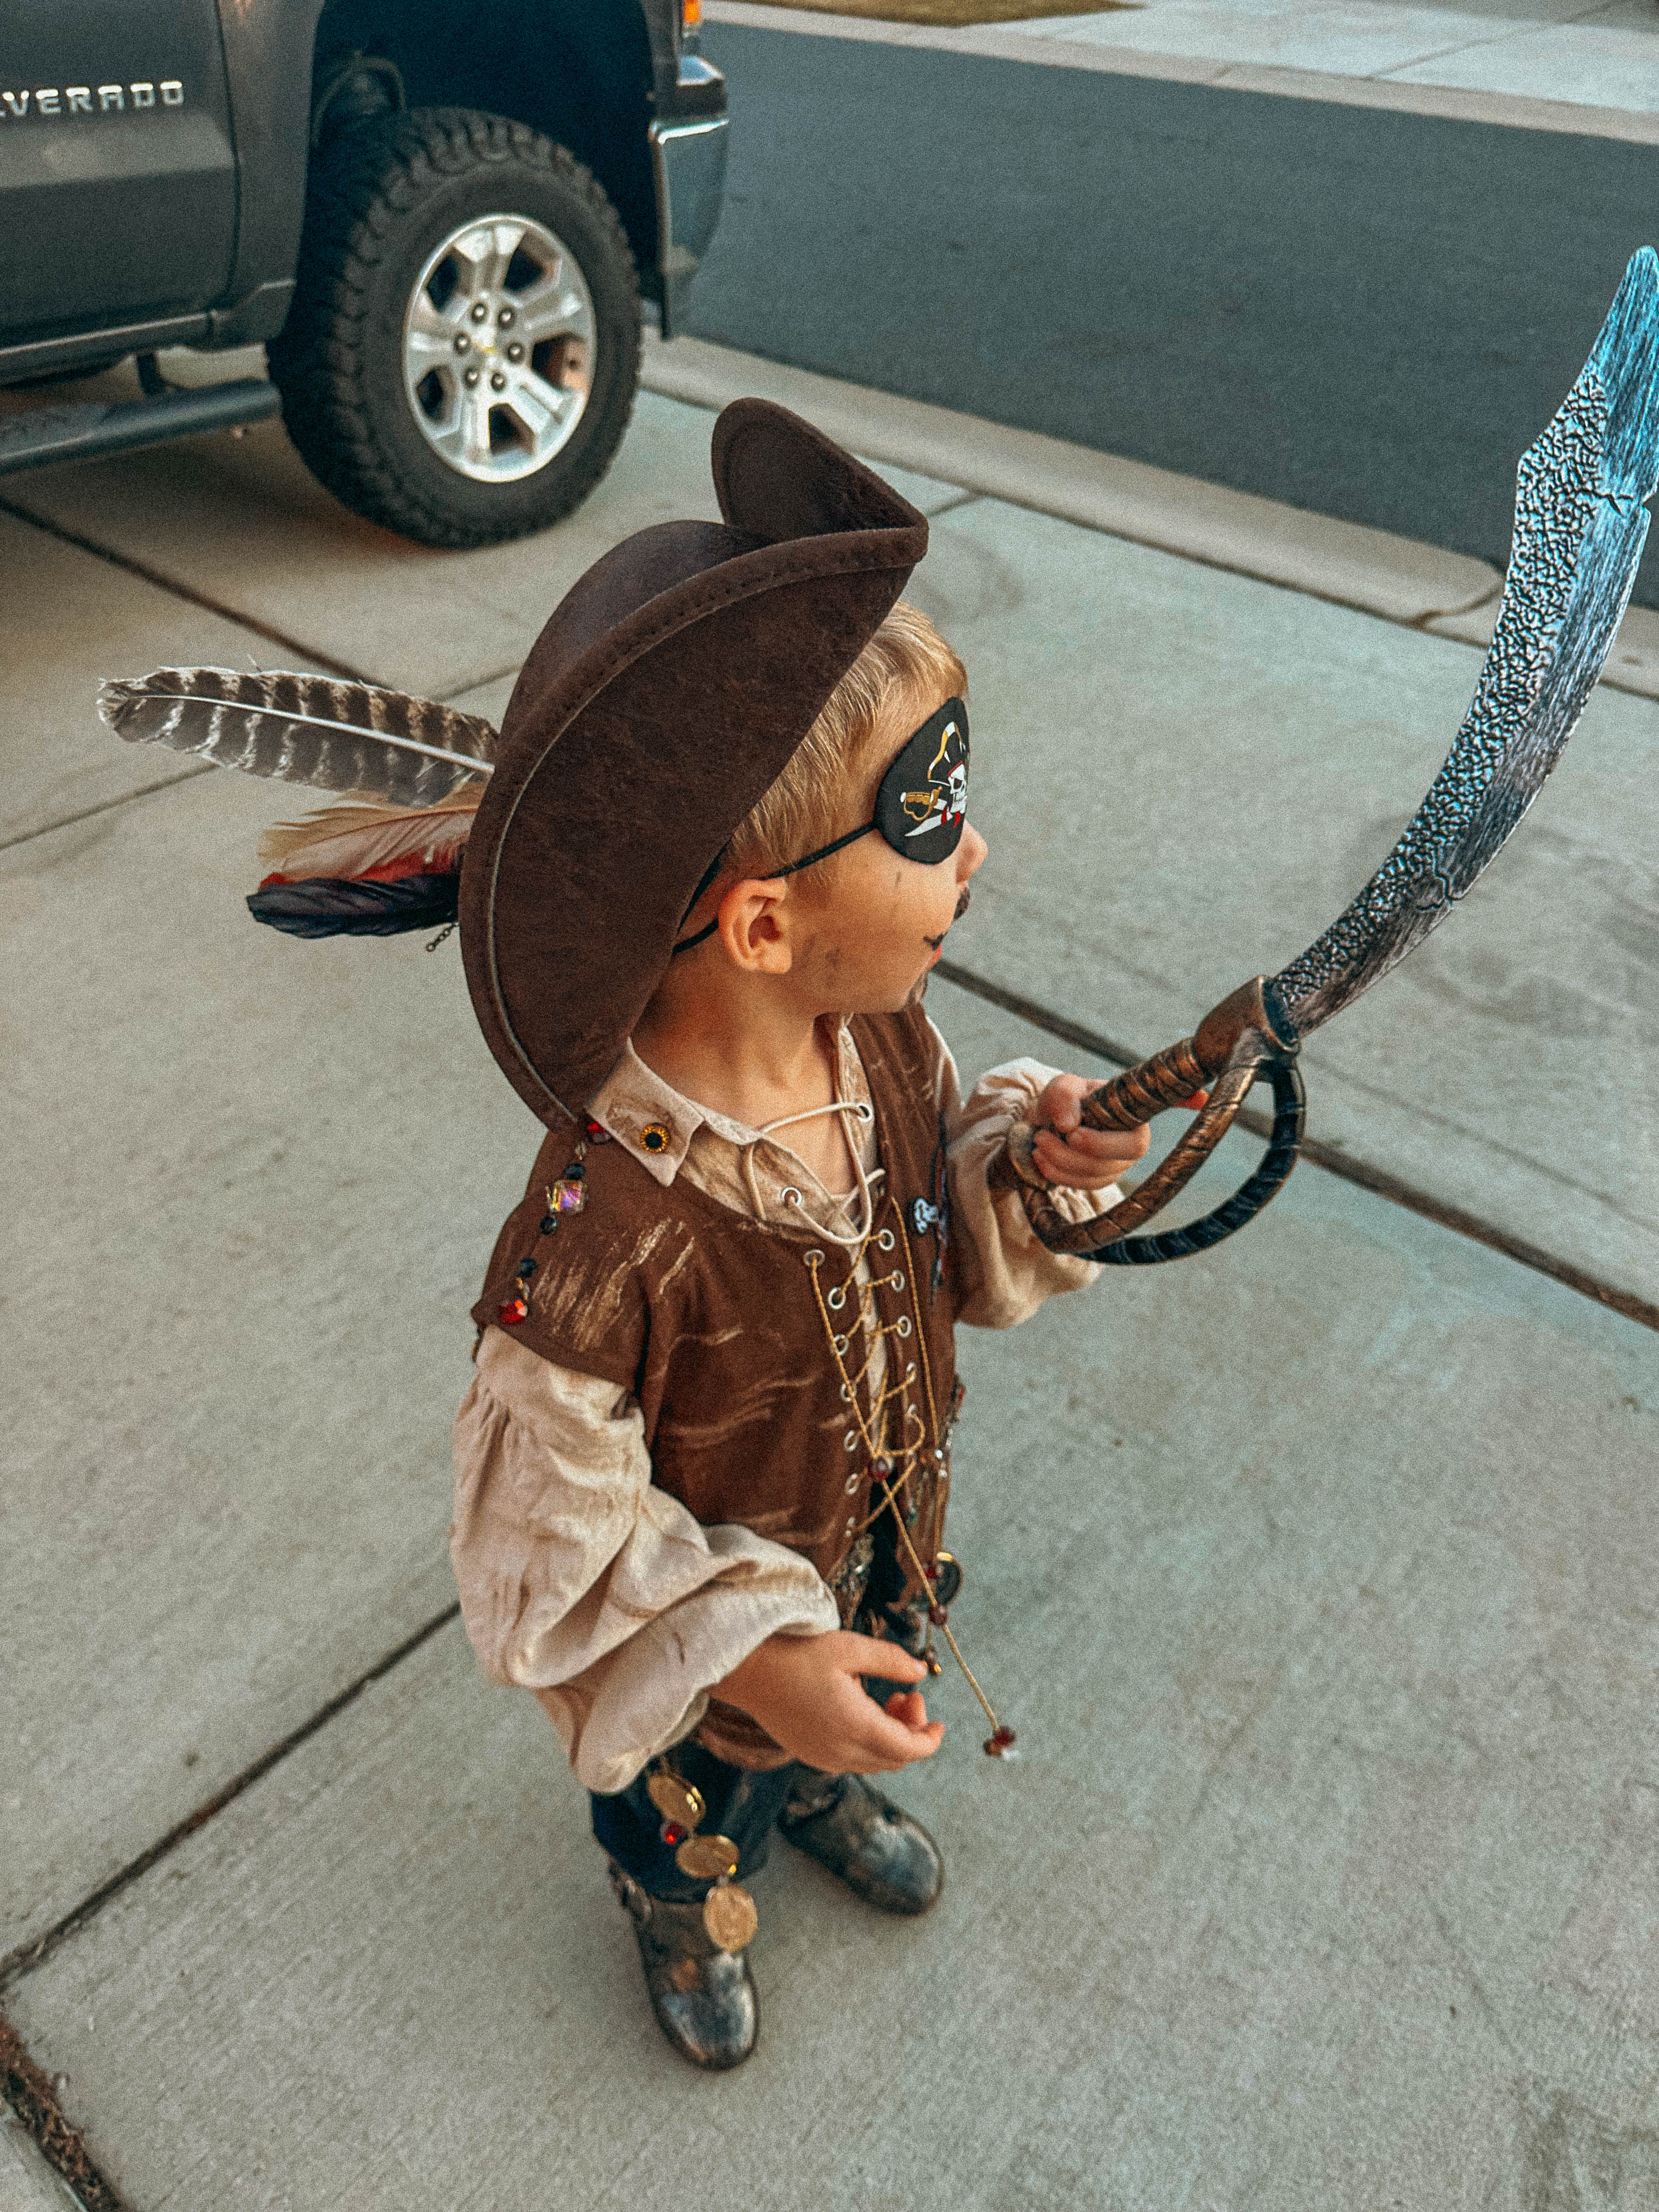
Once we added the sword and eye patch, our little pirate was officially ready to set sail.
I absolutely love how his DIY rustic pirate costume turned out. It has that homemade Halloween magic I was hoping for, and all of the weathered fabric, dangling treasure, feathers and tiny details made it feel so much more special than simply buying a costume and calling it a day.
Add a Pirate Mustache & Beard
For the finishing touch, I used a little face paint to give him a scruffy pirate mustache and beard. I kept it intentionally messy and uneven, adding a few little strokes around his upper lip, chin and cheeks instead of drawing on a perfectly shaped beard. You want it to look like your little pirate has been out at sea for weeks, not like he just left the barber. A small amount of brown or black face paint goes a long way, and you can lightly smudge it with your finger to make it look even more weathered and natural.
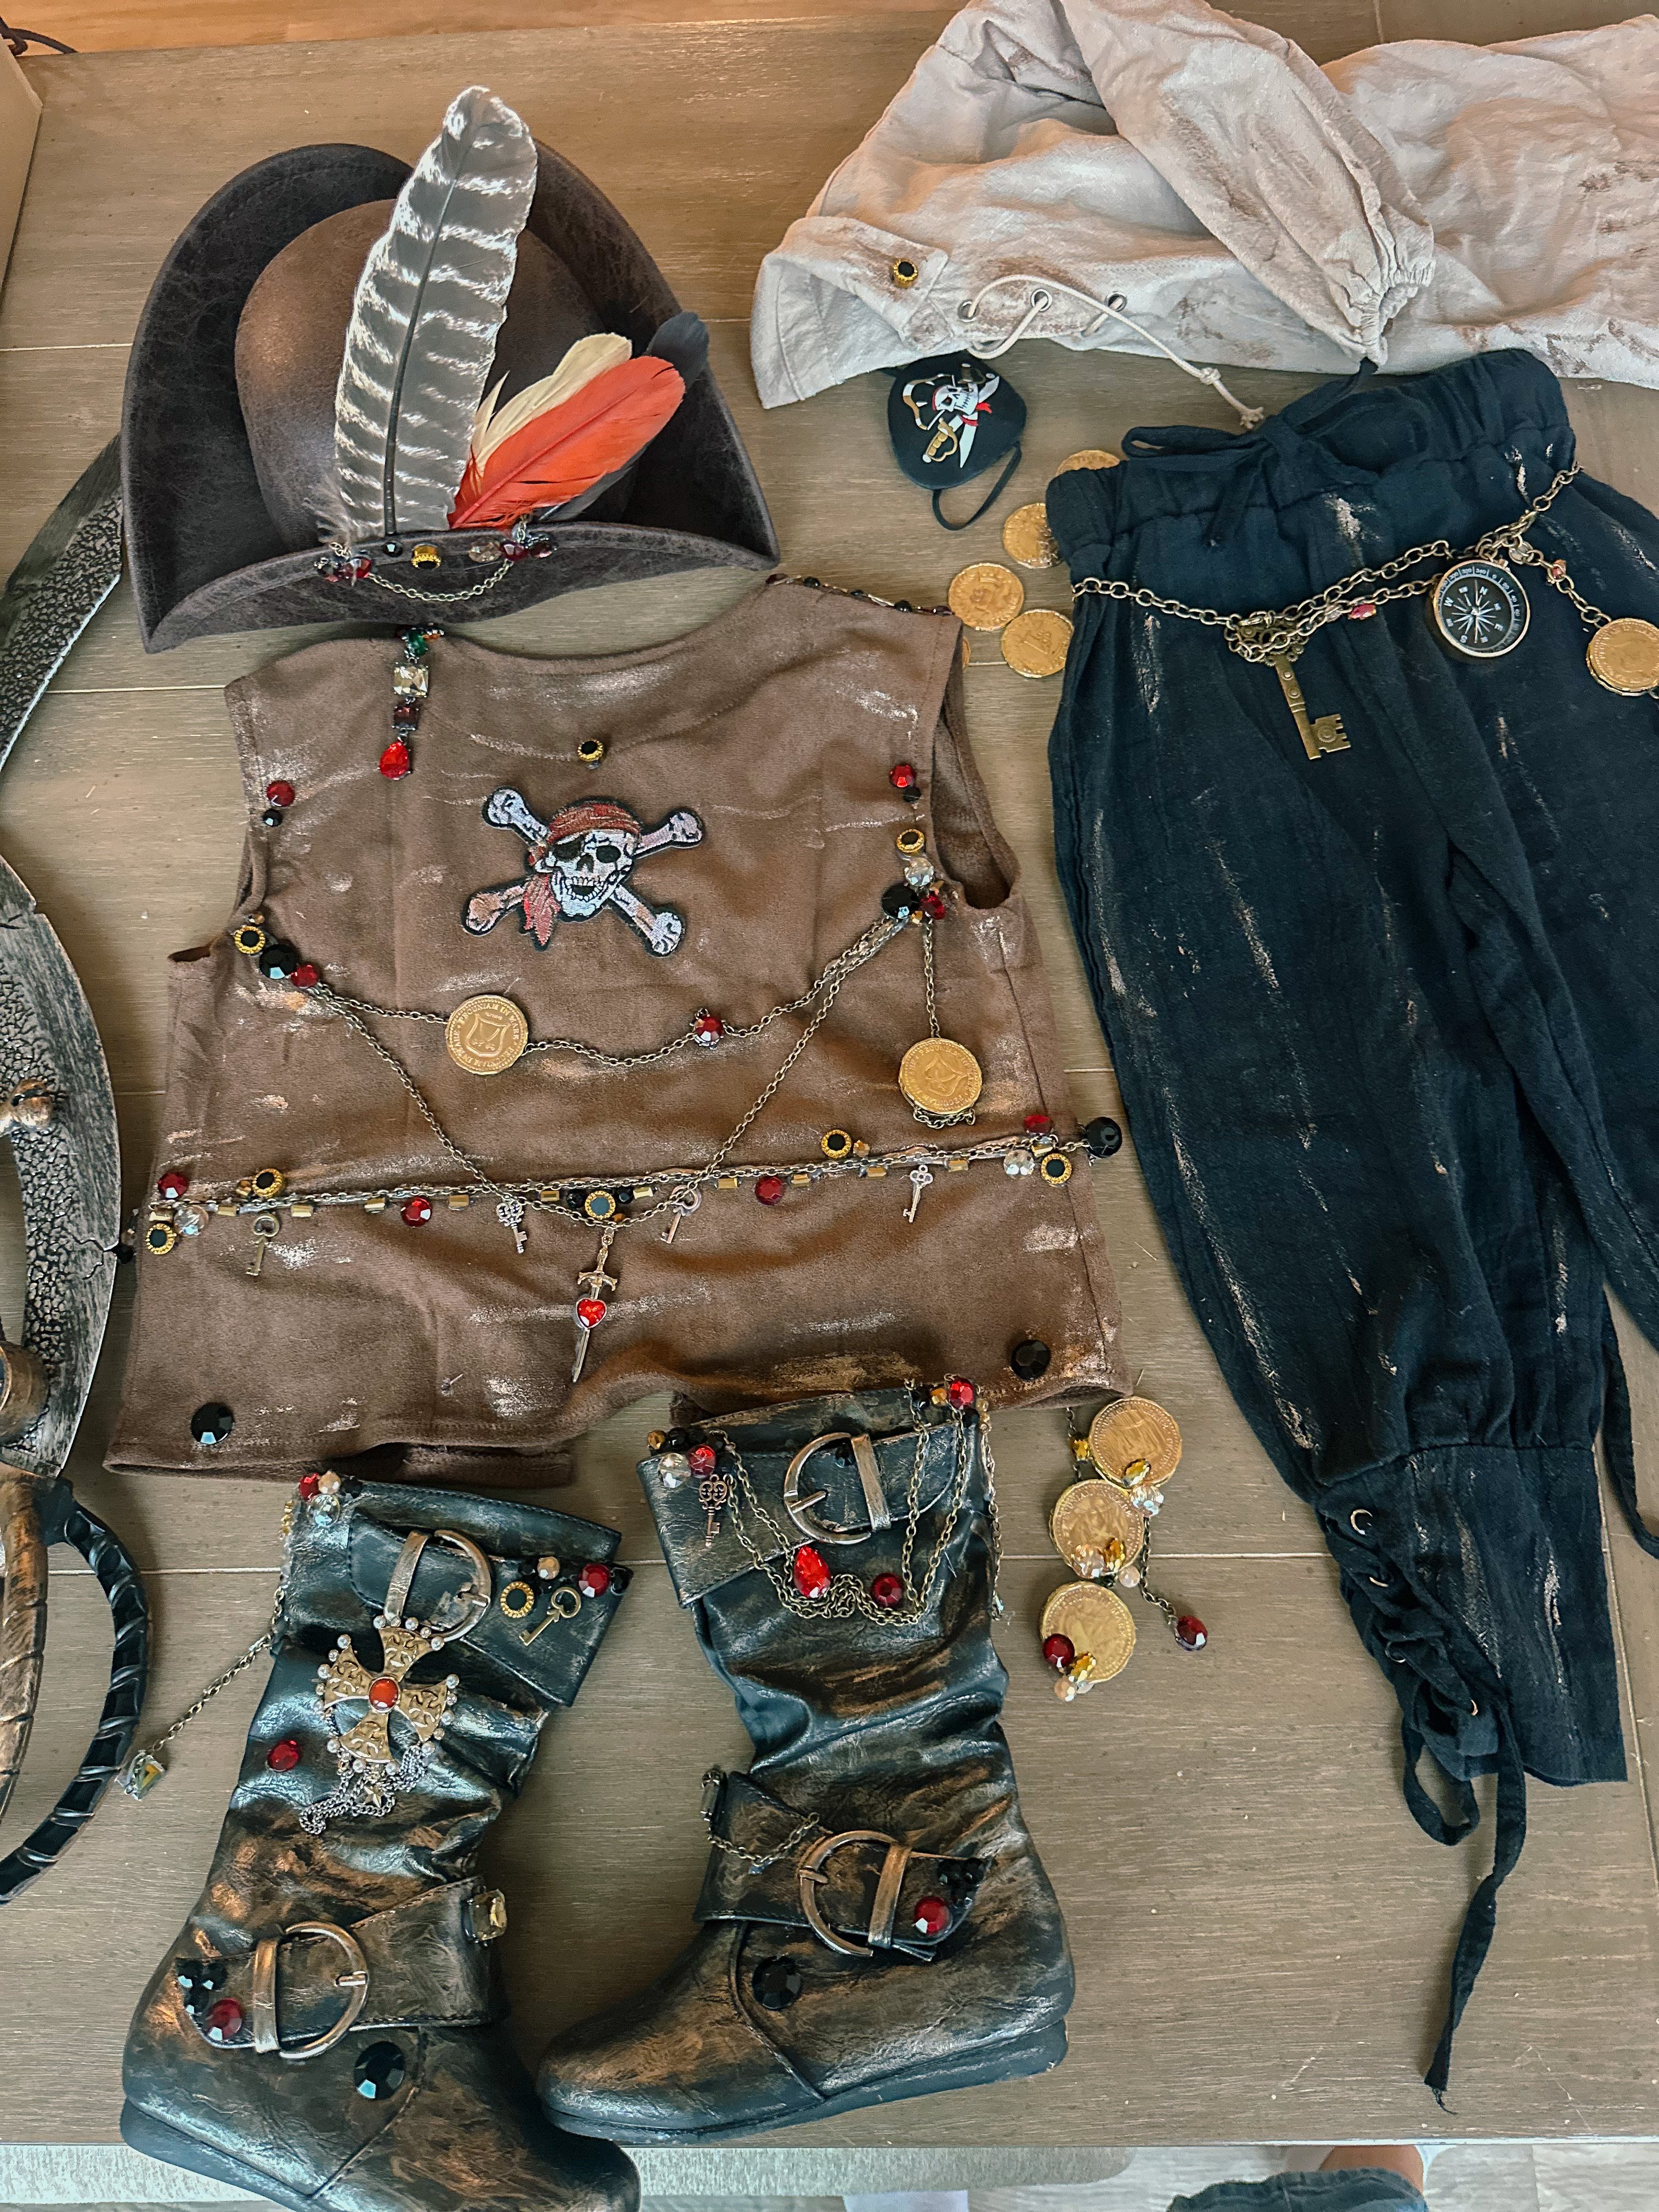
I had so much fun putting this little pirate costume together, and I love that it feels completely one of a kind. It’s amazing what you can do with a few basic costume pieces, some paint, old jewelry and a little creativity! The best part about a project like this is that there really are no rules. Add more treasure, make it extra weathered, use what you already have and let your little pirate help choose the details. I hope this tutorial inspires you to create your own DIY pirate costume this Halloween. And if you make one, I’d absolutely love to see your little pirate’s finished look! 🏴☠️⚓️