I Stenciled My Doormat on the Front Porch | Painting Concrete
an easy DIY to spice up the front porch
With this project, I’ve learned that I’m not that great at stenciling, but if I can do it, anyone can! I’m excited to share this DIY doormat stenciling project with you all finally. It’s been a few months since finishing, but I needed to make sure it held up before sharing the tutorial. I’m happy to report that it’s stayed strong, and not a chip of paint has left the concrete. I love how it turned out, and I can’t wait to paint a fall one in a few months. 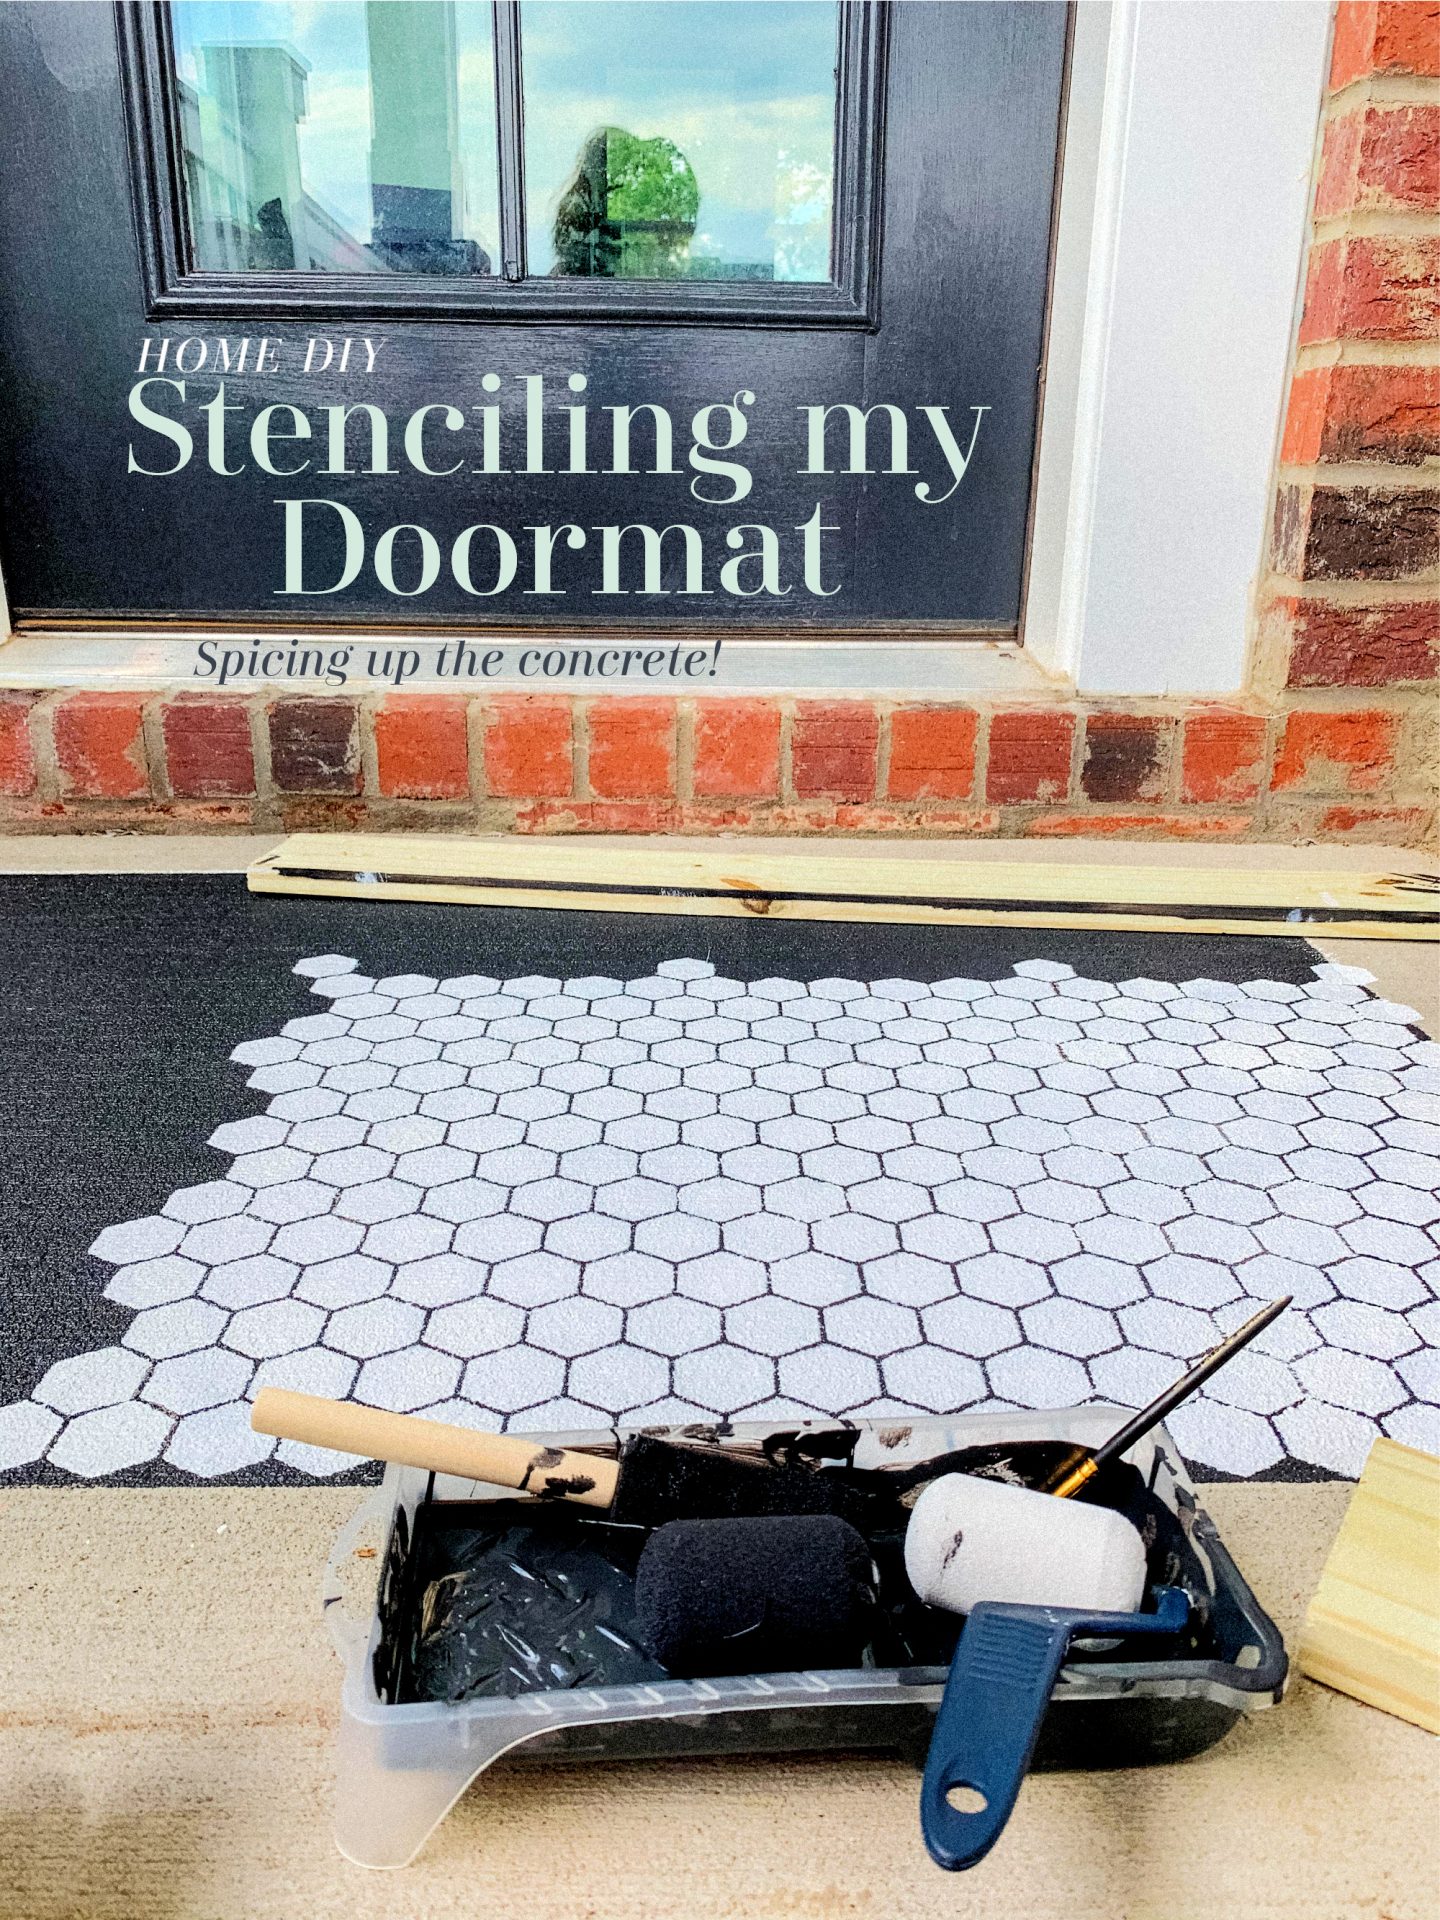
You may be wondering why in the world I would paint the concrete, but I have a good reason. When we get rainstorms, for some reason, the rain likes to hit directly onto my front door, splashing all over the doormat. When I have rugs or those straw mats, they get destroyed and stain the concrete. I was tired of buying many doormats and decided to paint one. I had someone ask me where people are supposed to wipe their shoes if I don’t have a doormat, well, my mom always taught me to take the shoes off and leave them outside 👍 But if you’re in the same boat as me, but need a place to wipe the shoes, try using a shoe-wiping rug in the entryway of your home. 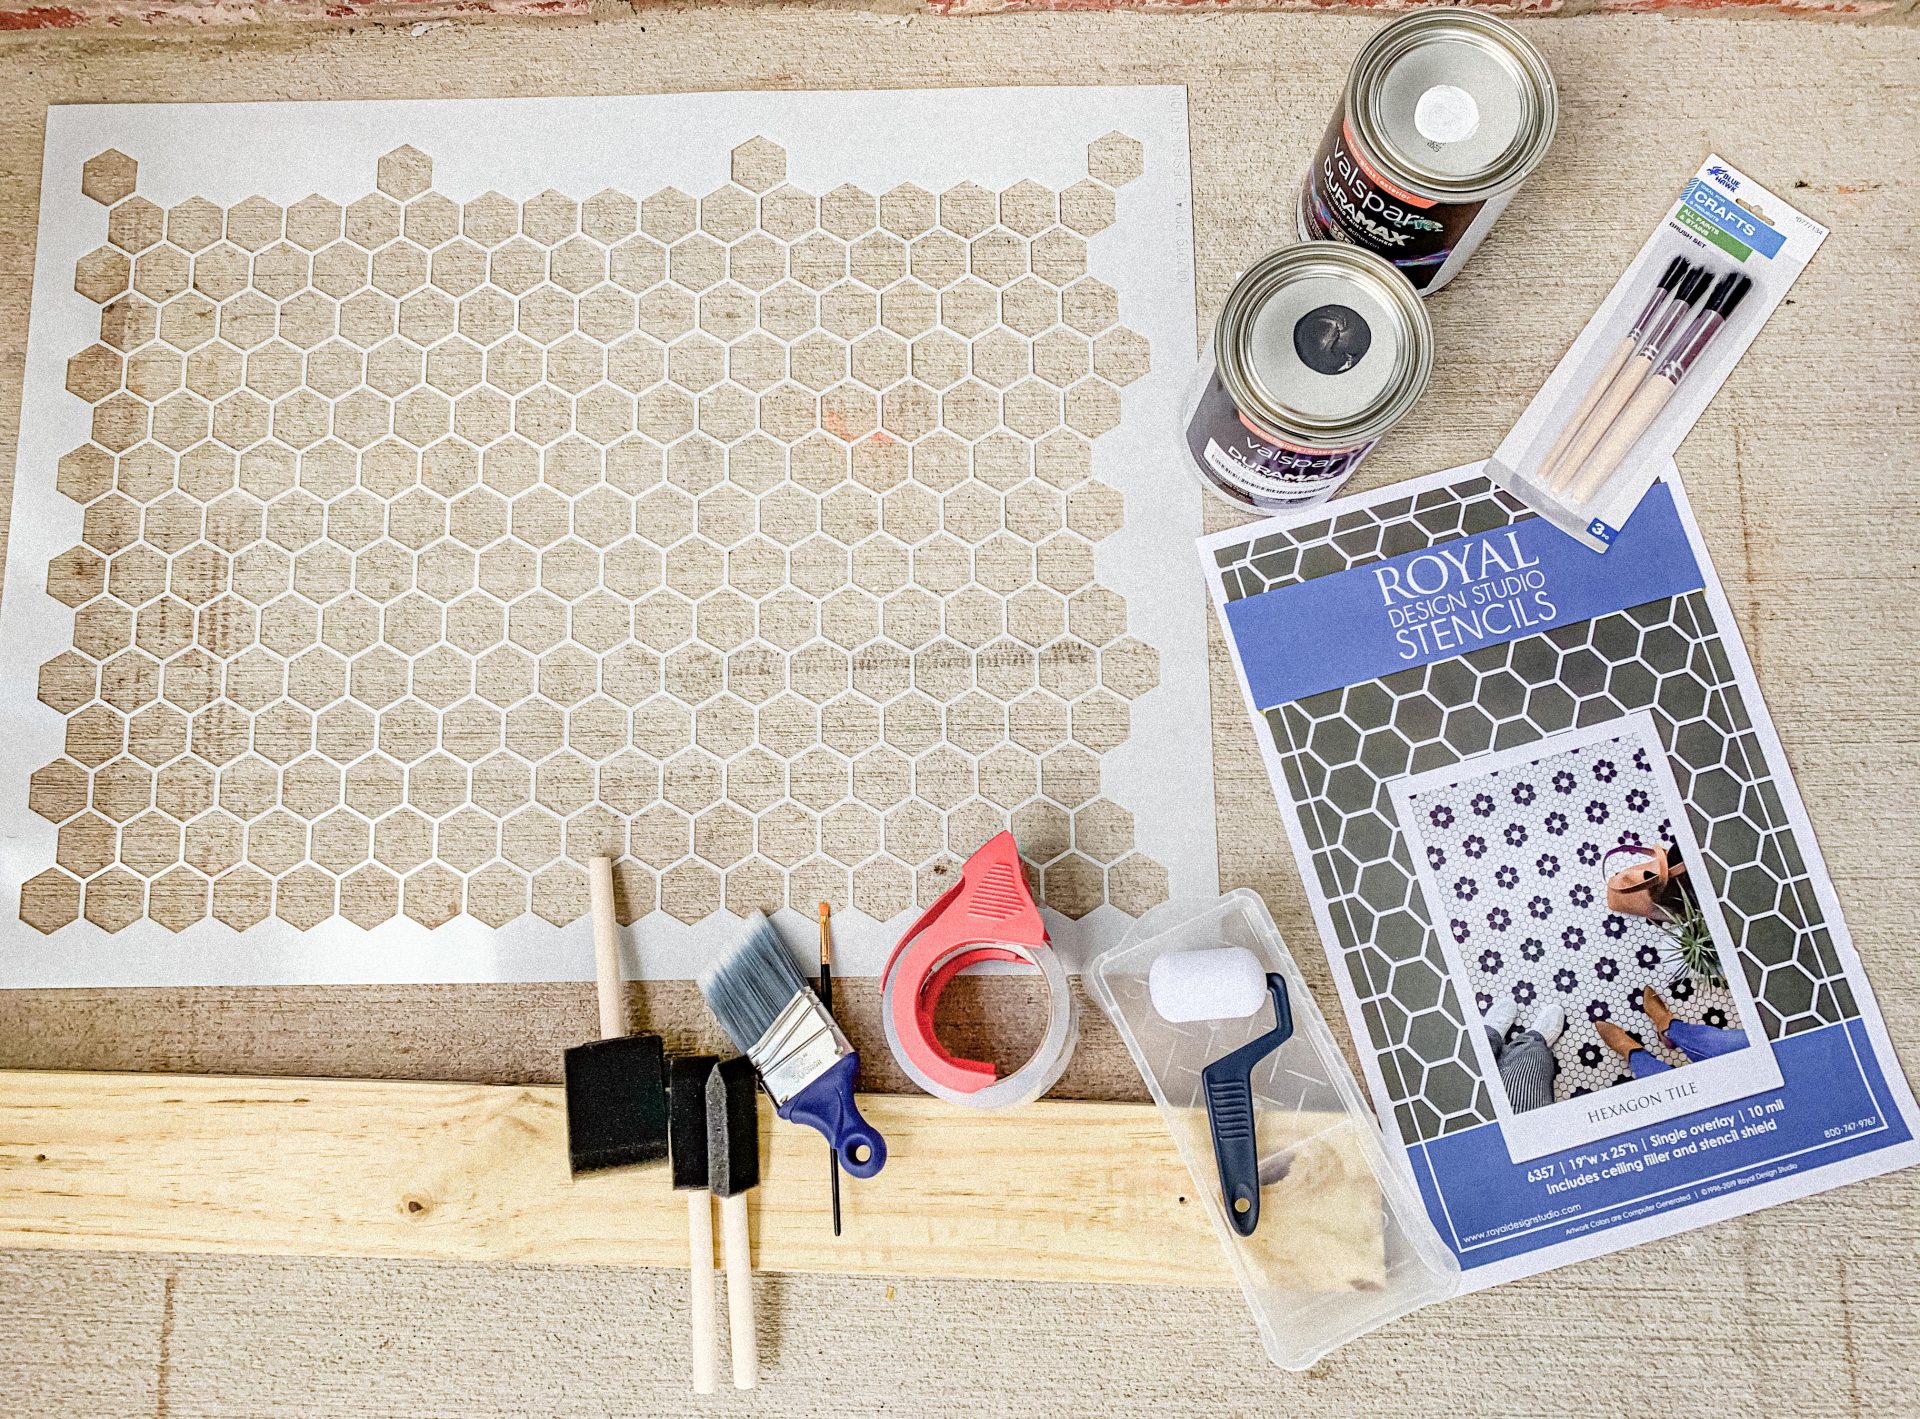 You will need:
Small paint roller
Stencil Brush
Exterior Paint (concrete paint is preferred)
Chalk
Measuring Tape
Paint Tray
Stencil (I used Royal Stencils)
Touchup Brush
Tape/Heavy objects to hold down the stencil
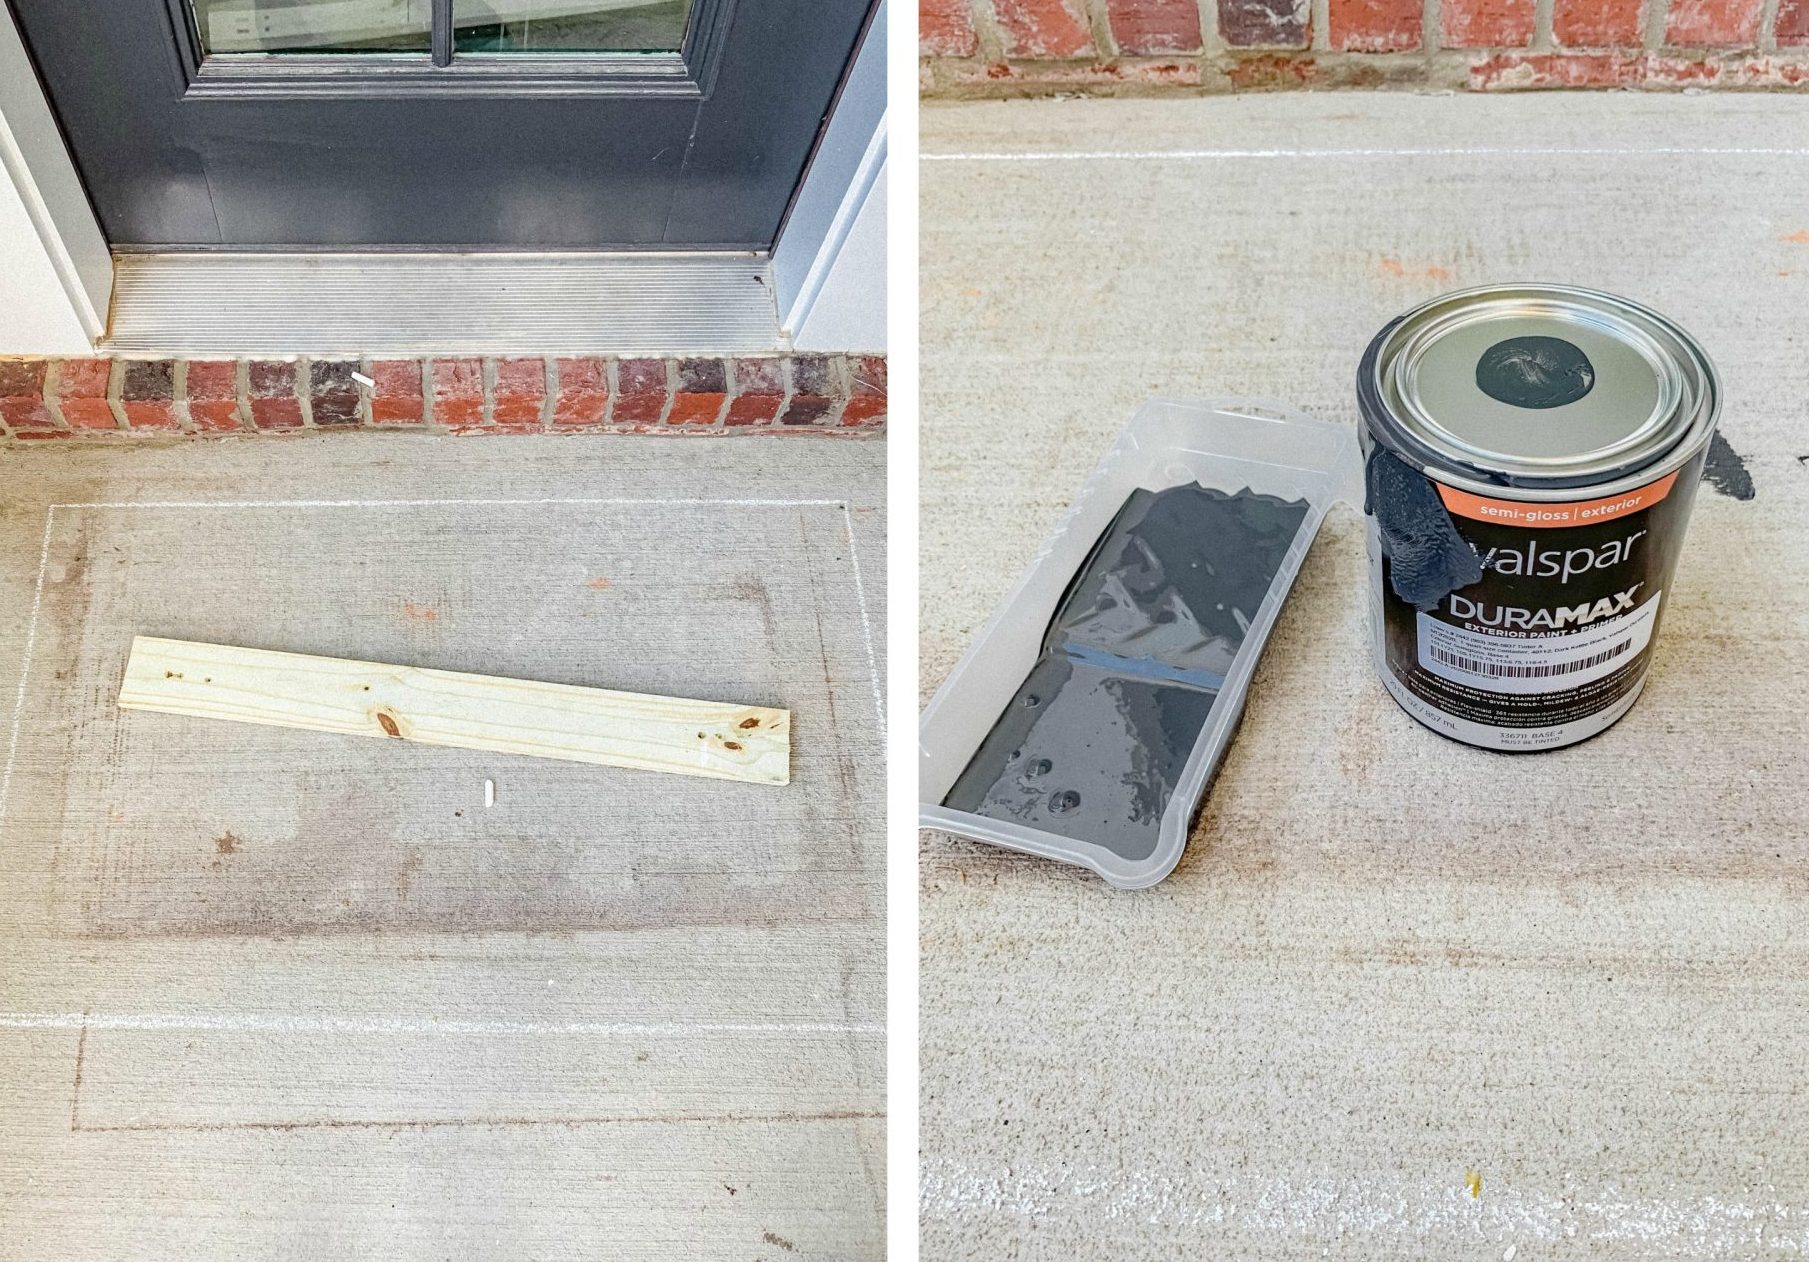 Step One:
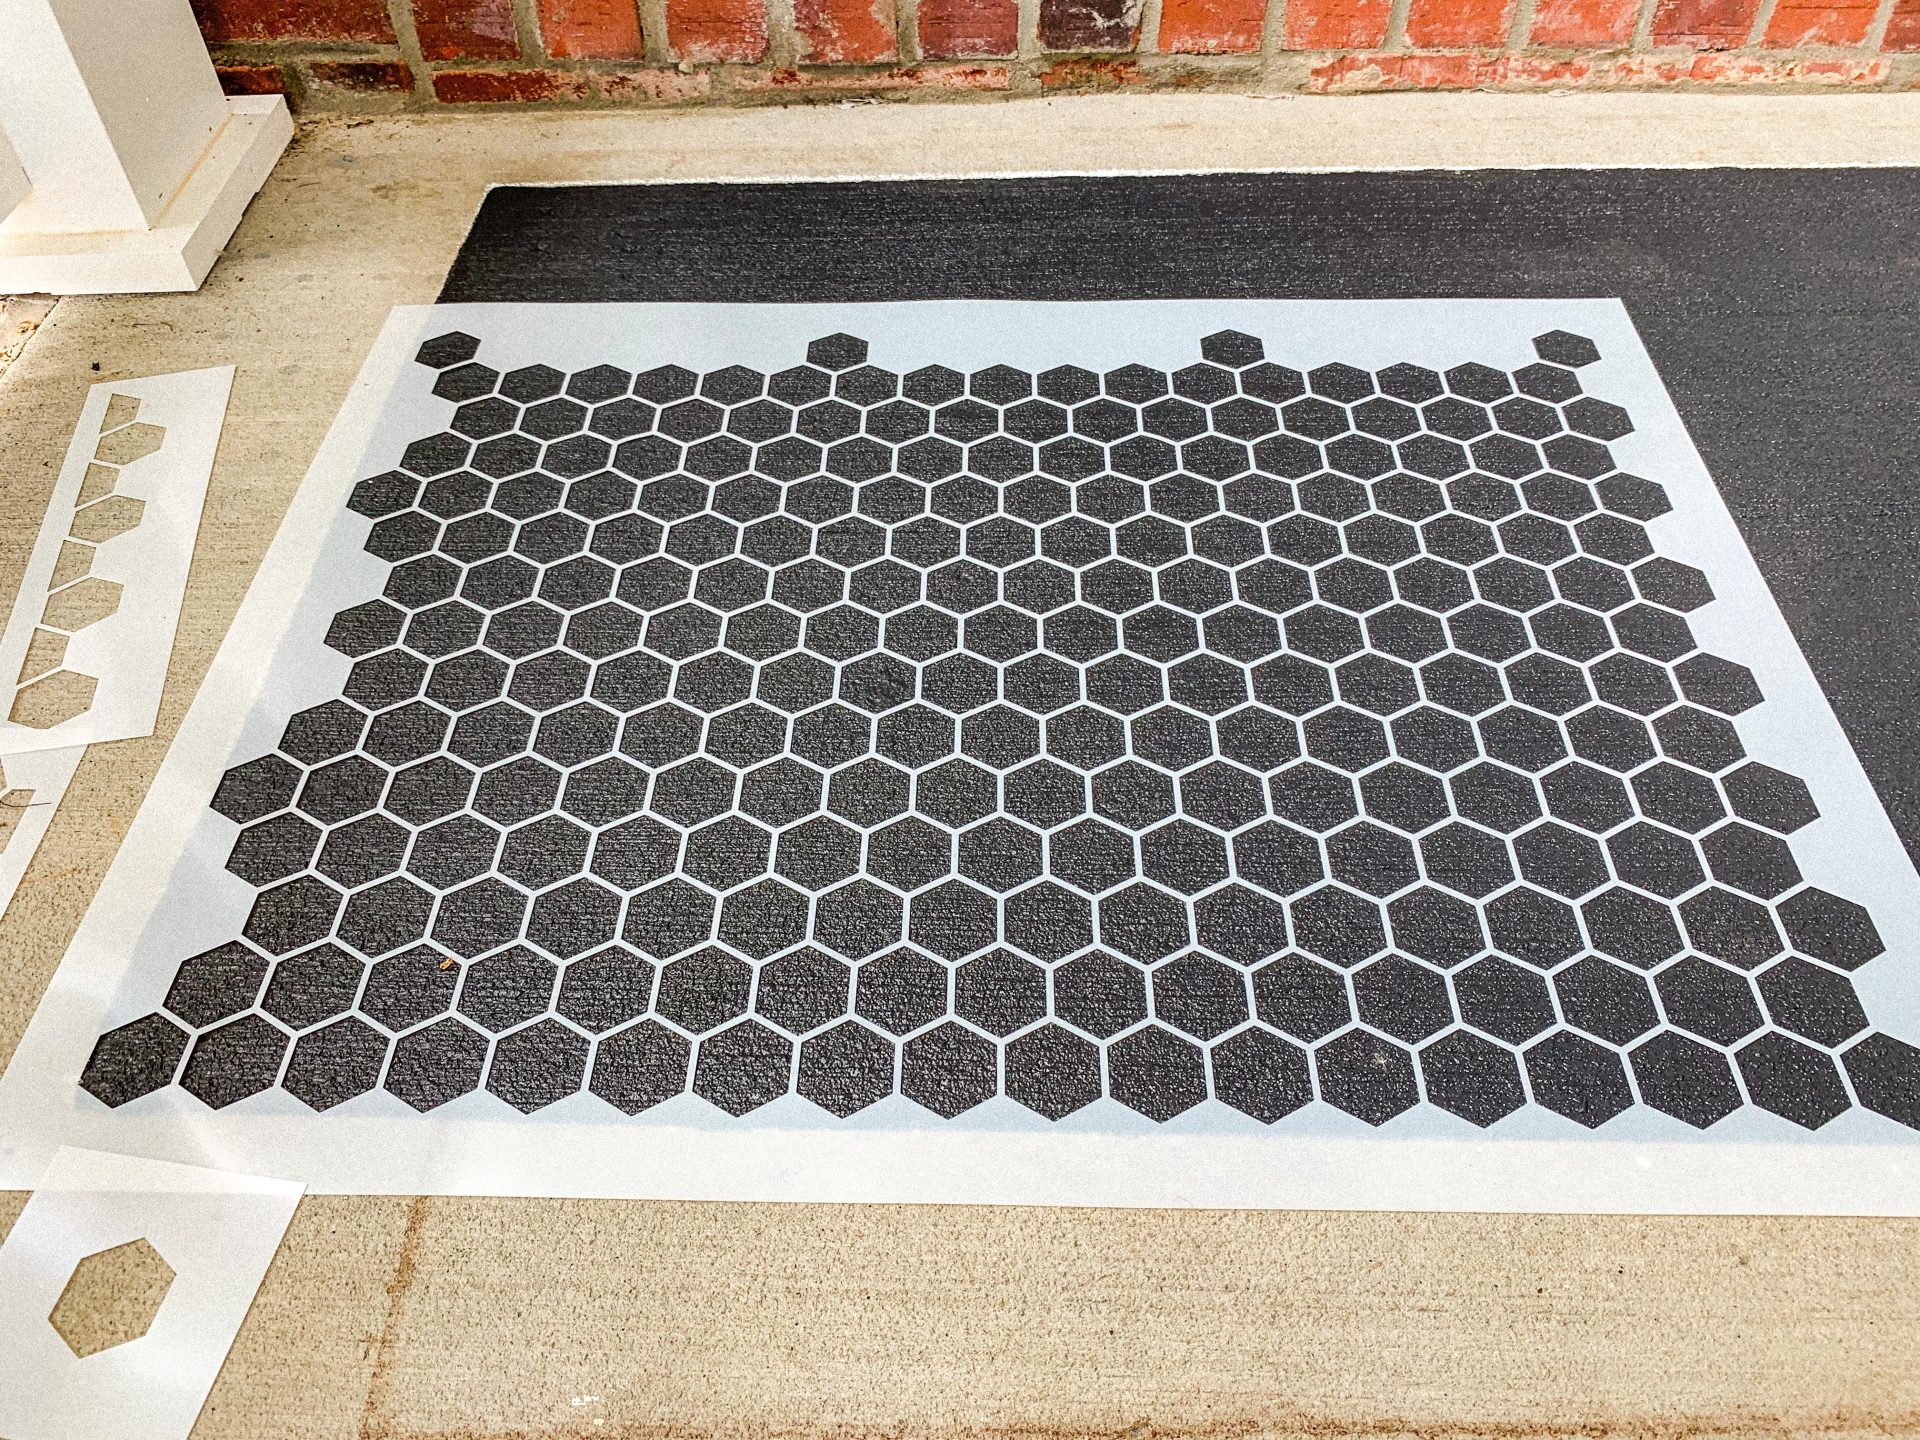
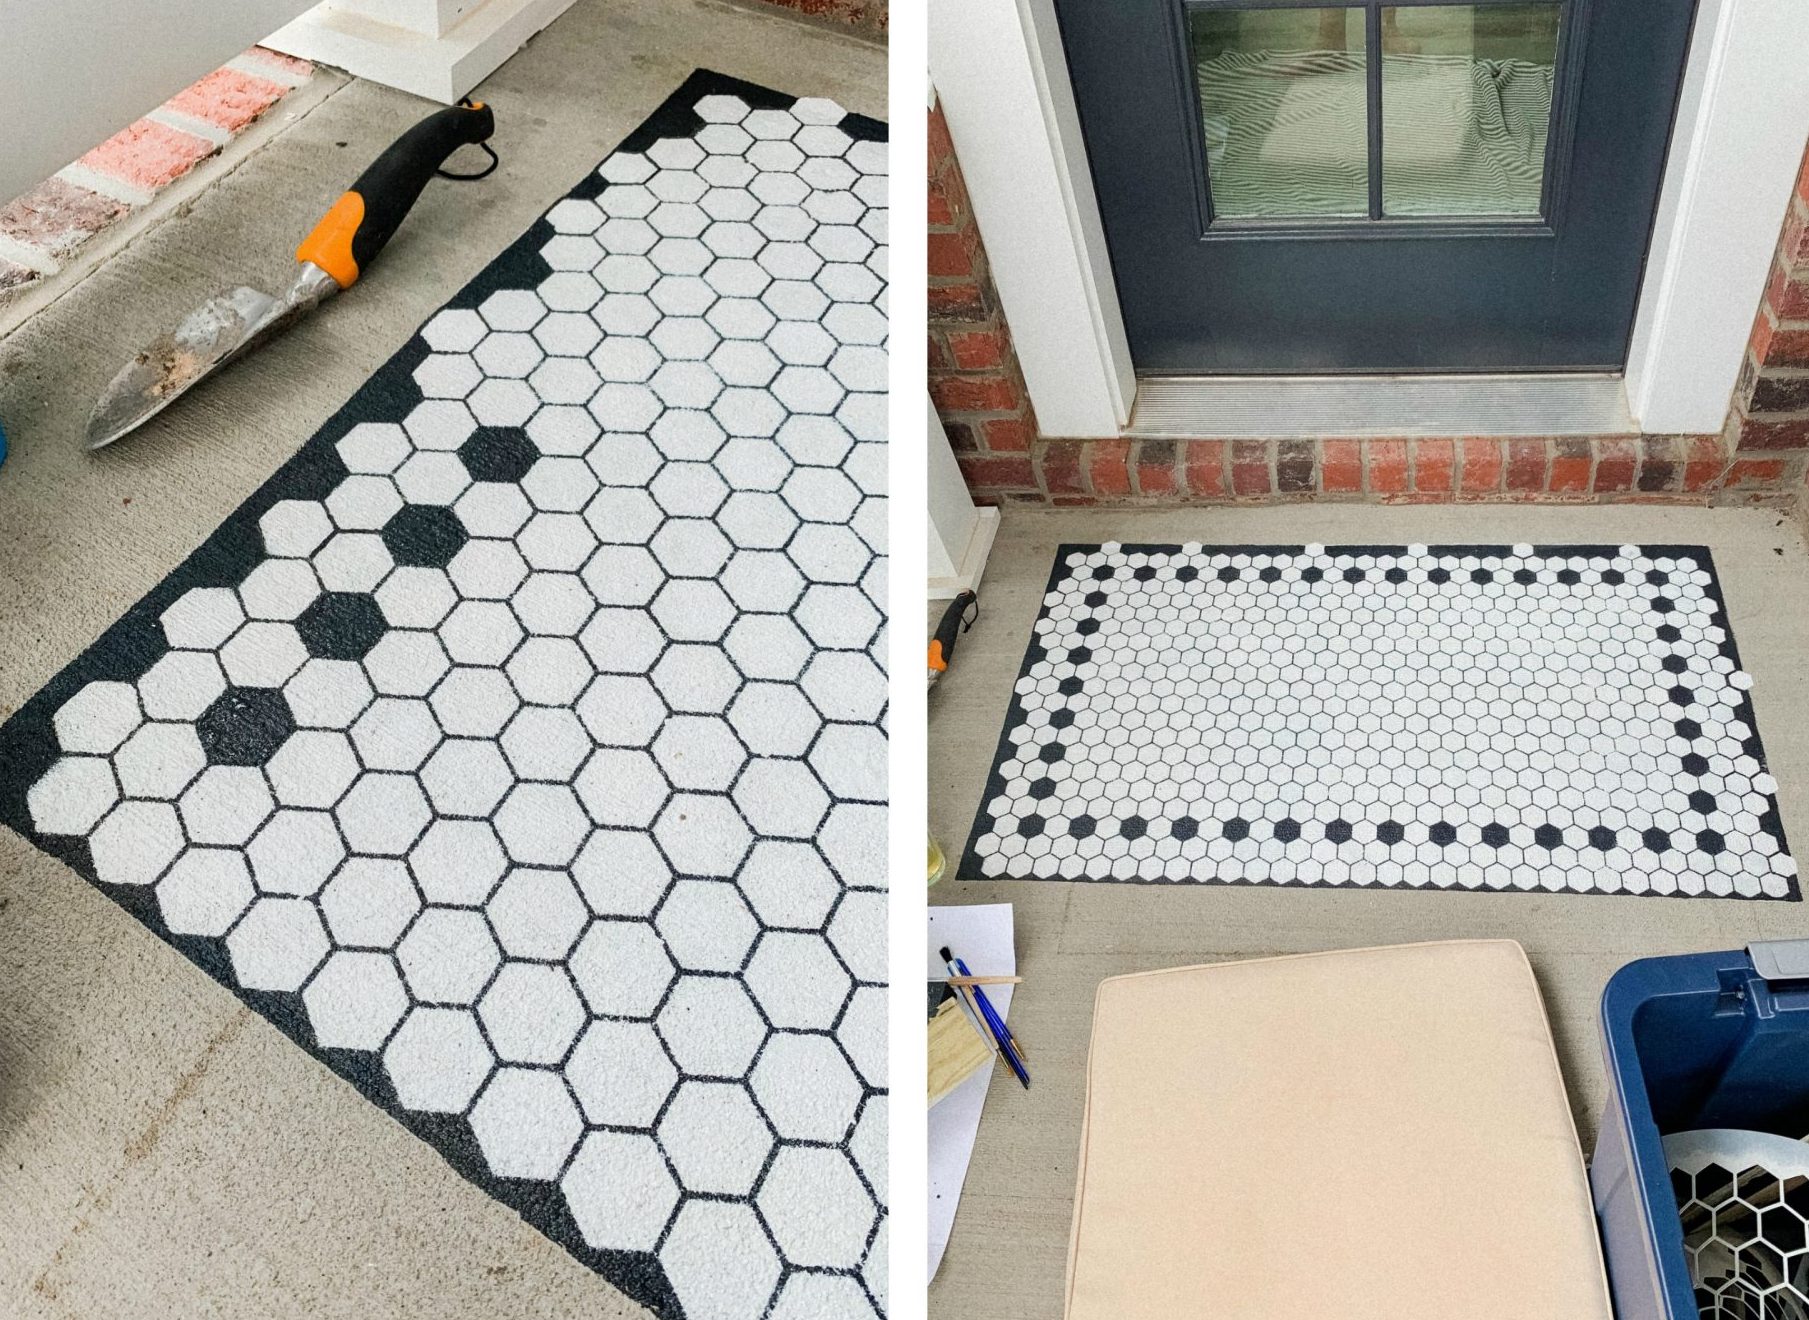
The first thing I did was measure out the area I wanted to have the mat. Our brick area is a bit crooked (ugh) so it does look slanted. After measuring the area, I traced the layout with chalk.
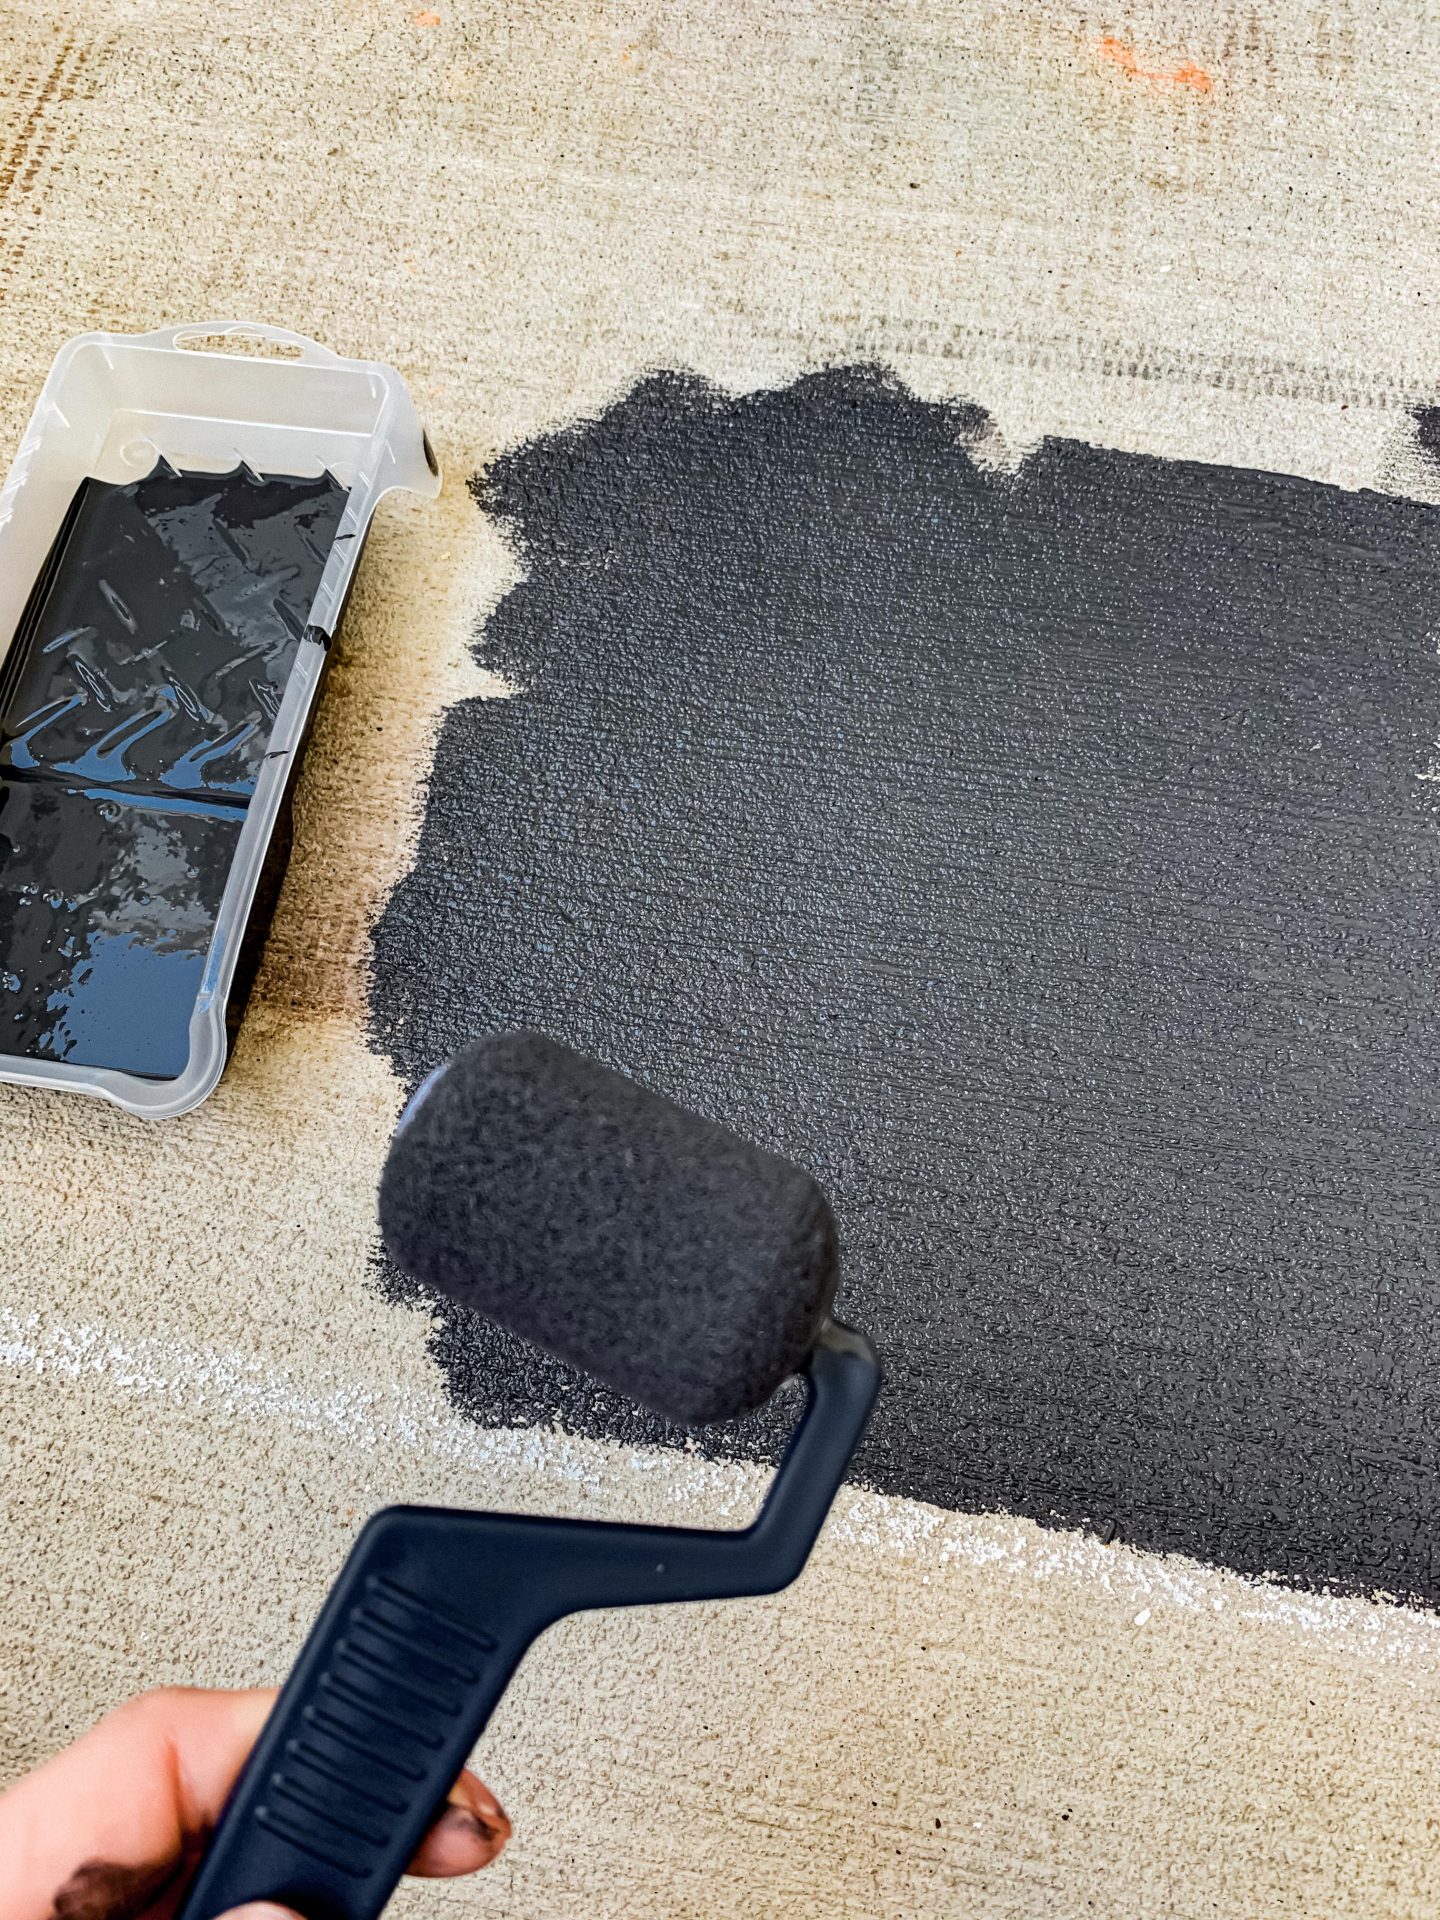
Step two:
After tracing the area, I used a roller to paint the doormat base black. For my fall mat, I’m going to do the white first to make it more dramatic. Luckily, it only needed one coat, and it dried within fifteen minutes.
I used my leftover paint from the door. It’s called Dark Kettle Black by Valspar.
 Step three:
Once the paint dried, I placed the stencil in the bottom corner to start the first round of painting. I used the wood pieces and tape to keep the stencil in place. 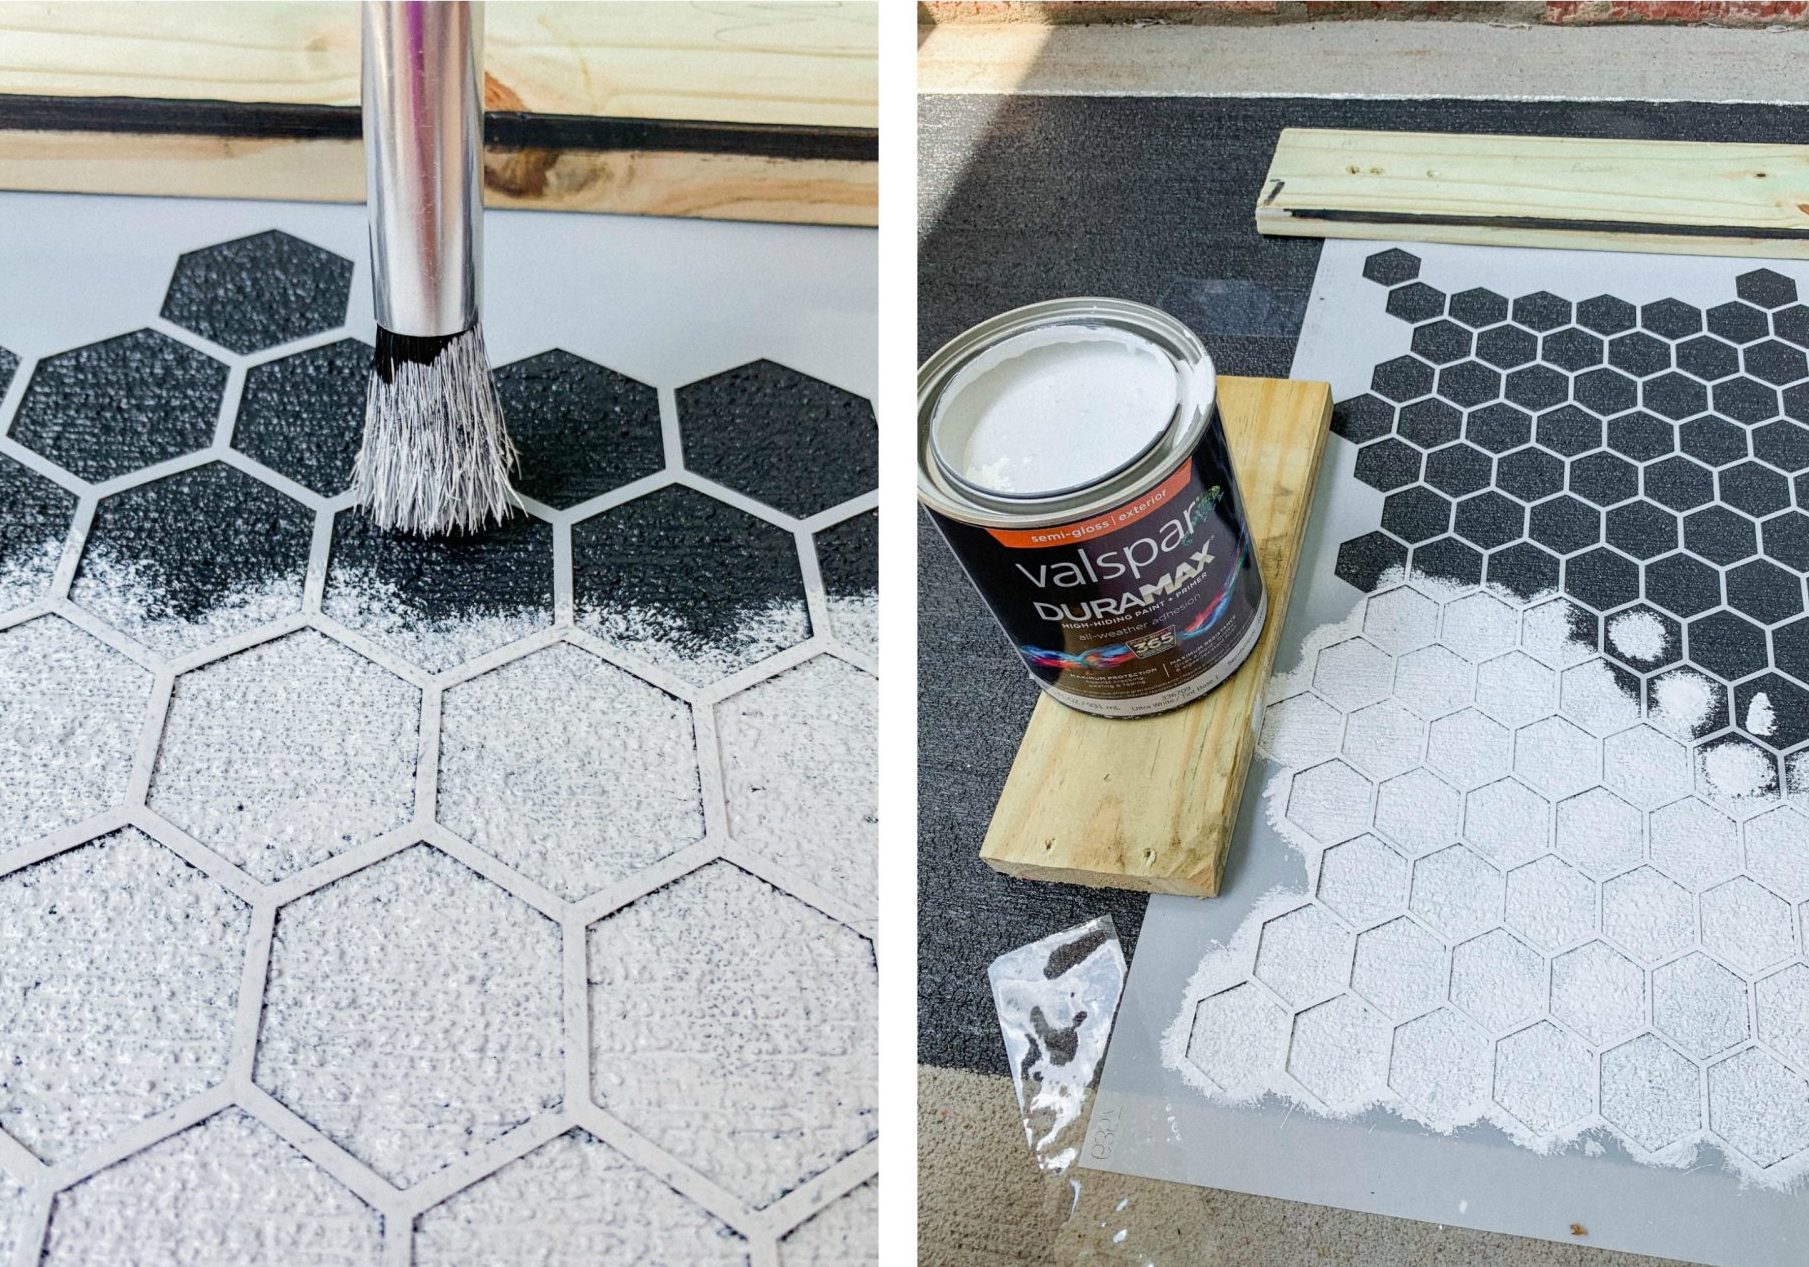
Step four:
I used the stencil brush to dab the white paint over the stencil. It’s important to use less paint to prevent bleeding, but if you do the black layer first, you may need a few coats of the white.

Step five:
Remove the stencil carefully and wash it off. I used the hose outside to wash off the paint and let it sit in the sun for a bit to dry off.
Step six:
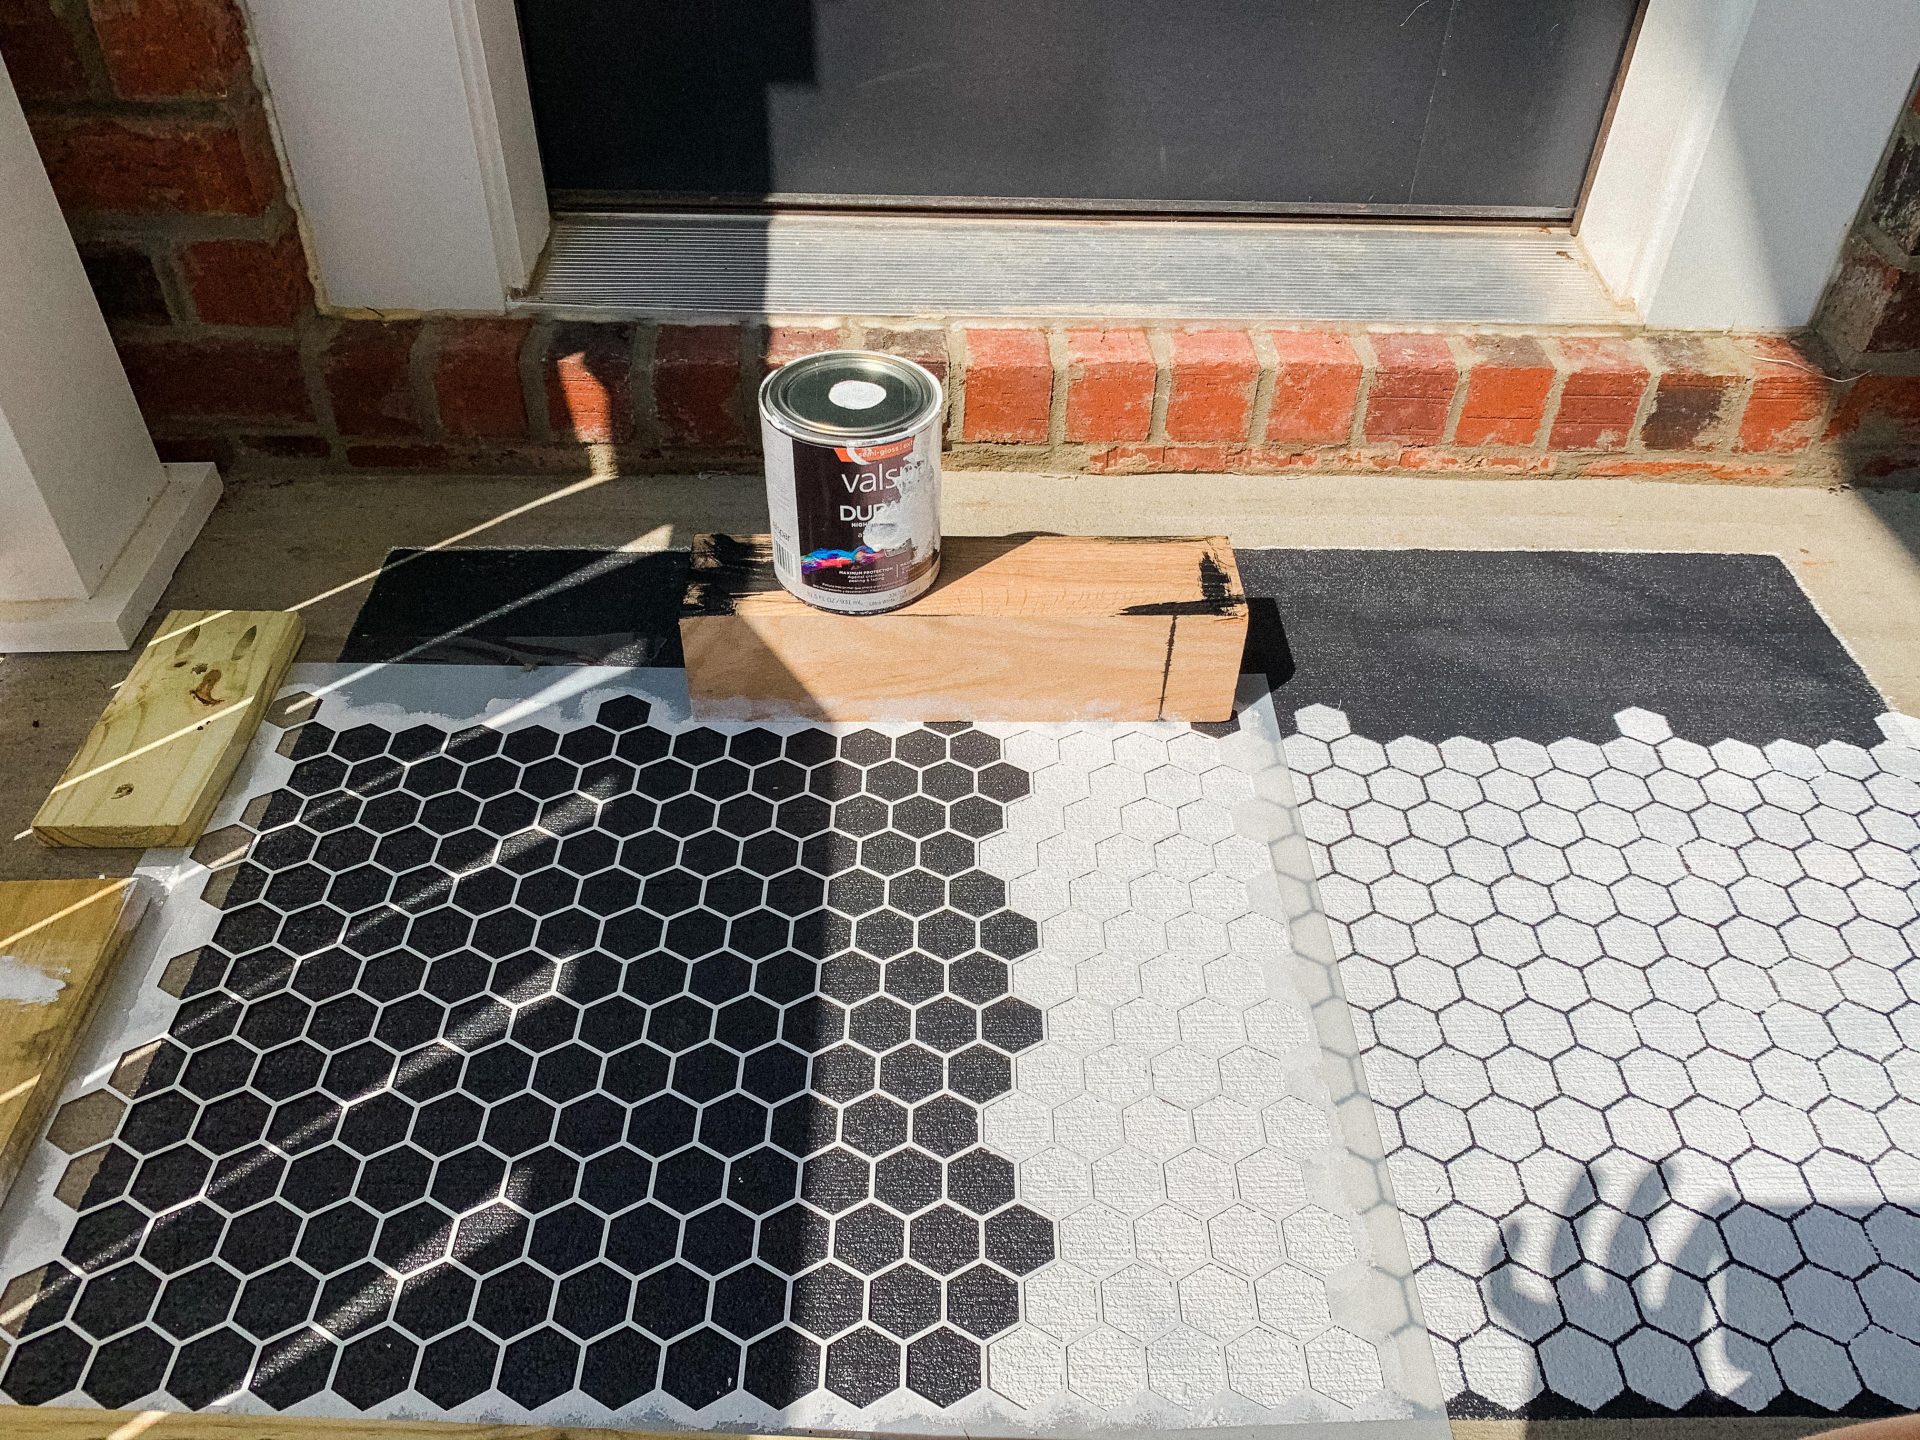
Repeat the pattern until the first layer is fully covered. The stencil comes with smaller stencils to help fill areas you may not be able to line up perfectly (which I was so bad at.) It was always after I finished painting when I noticed where I made a mistake. I know the second time around will be better!
Step seven:
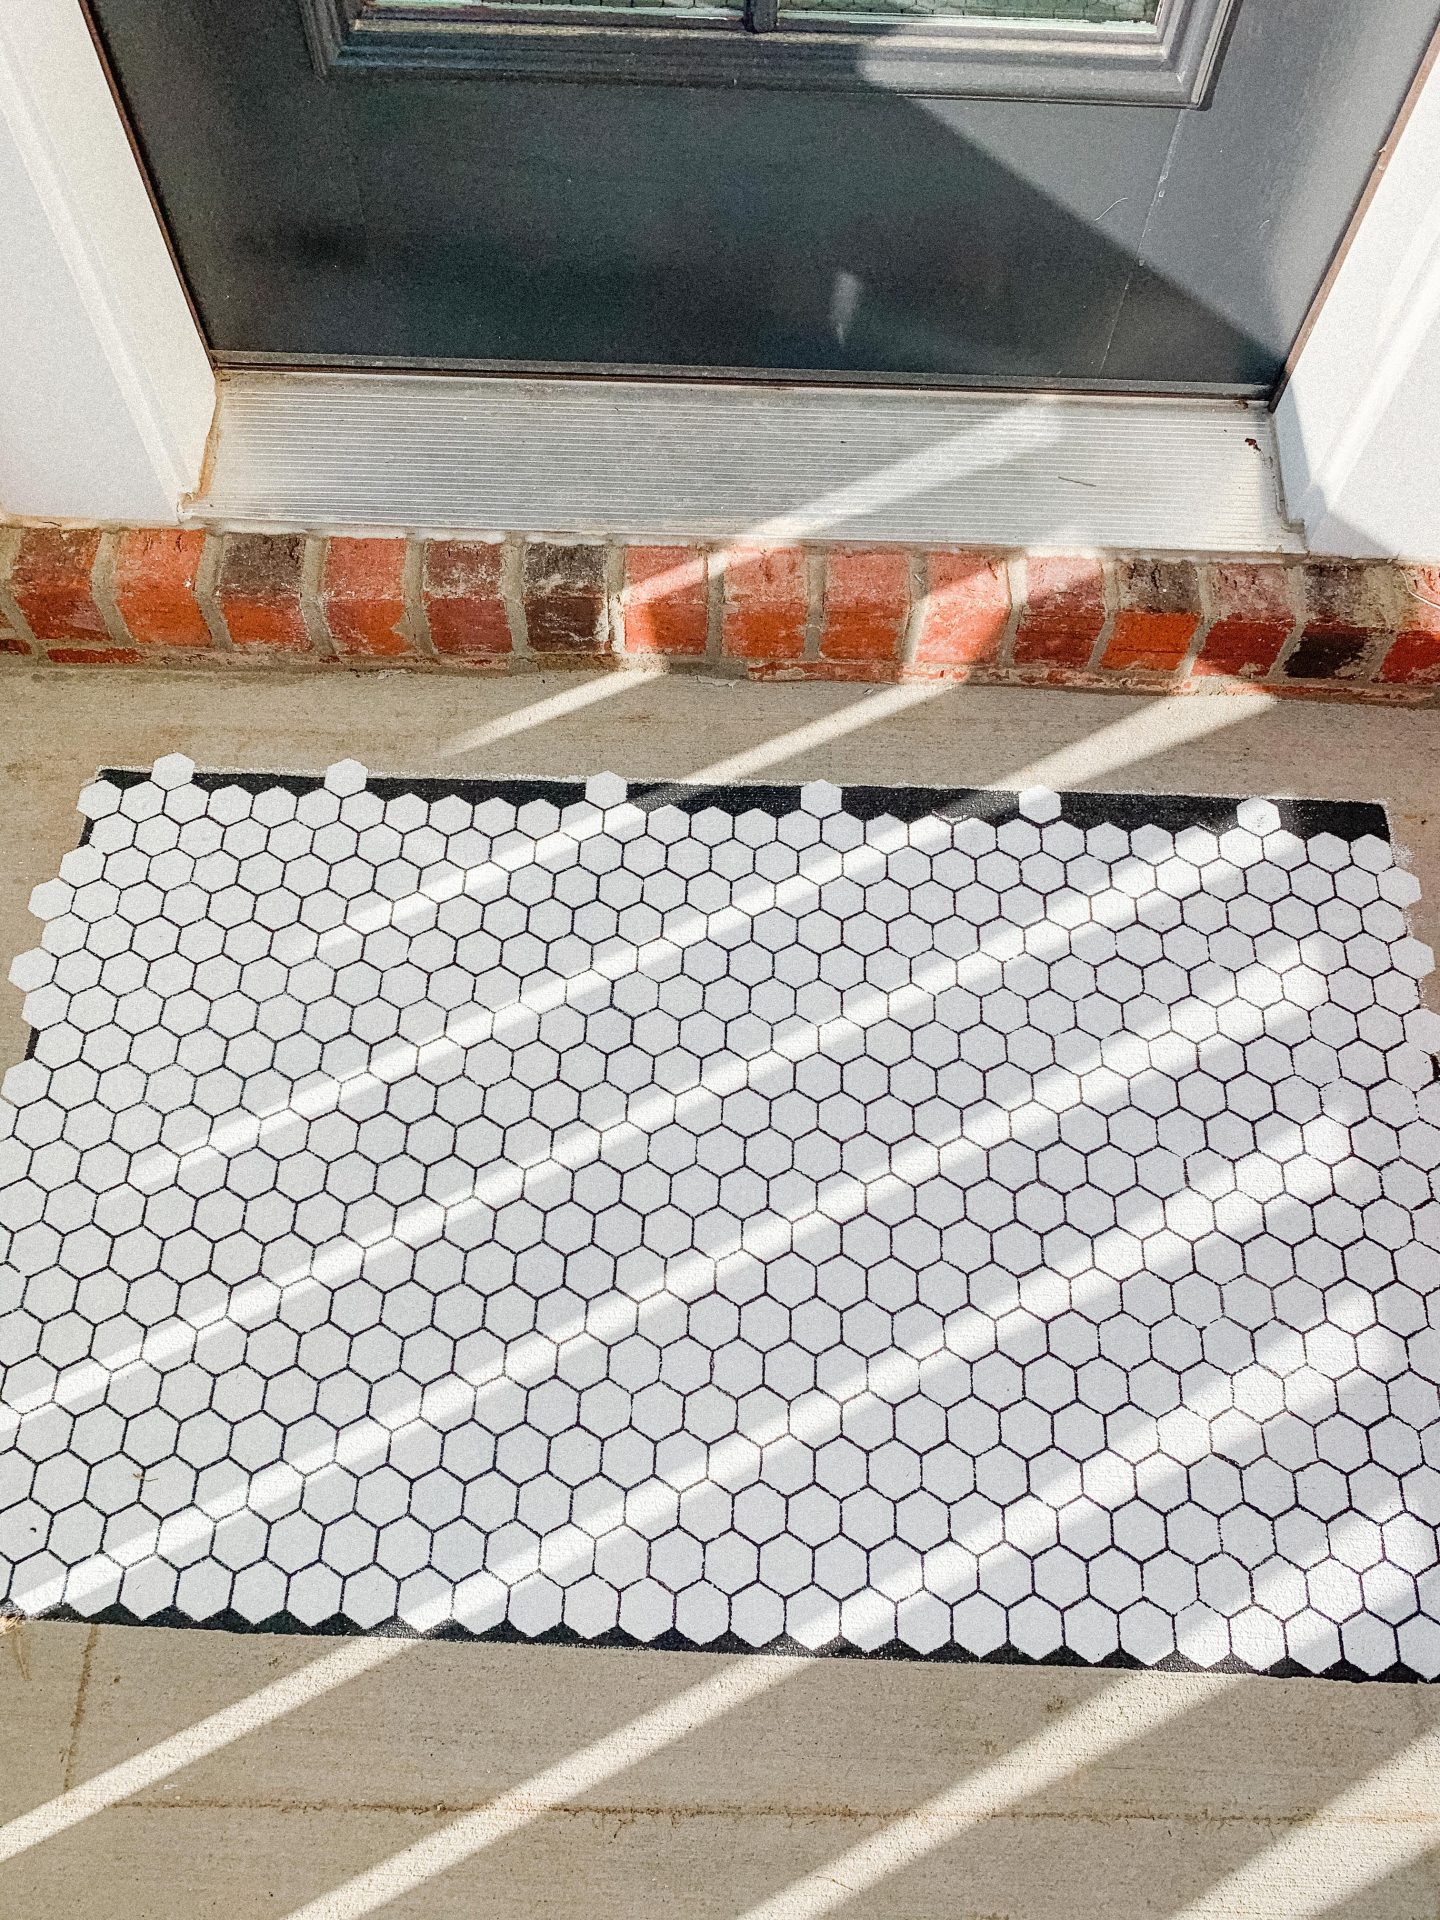
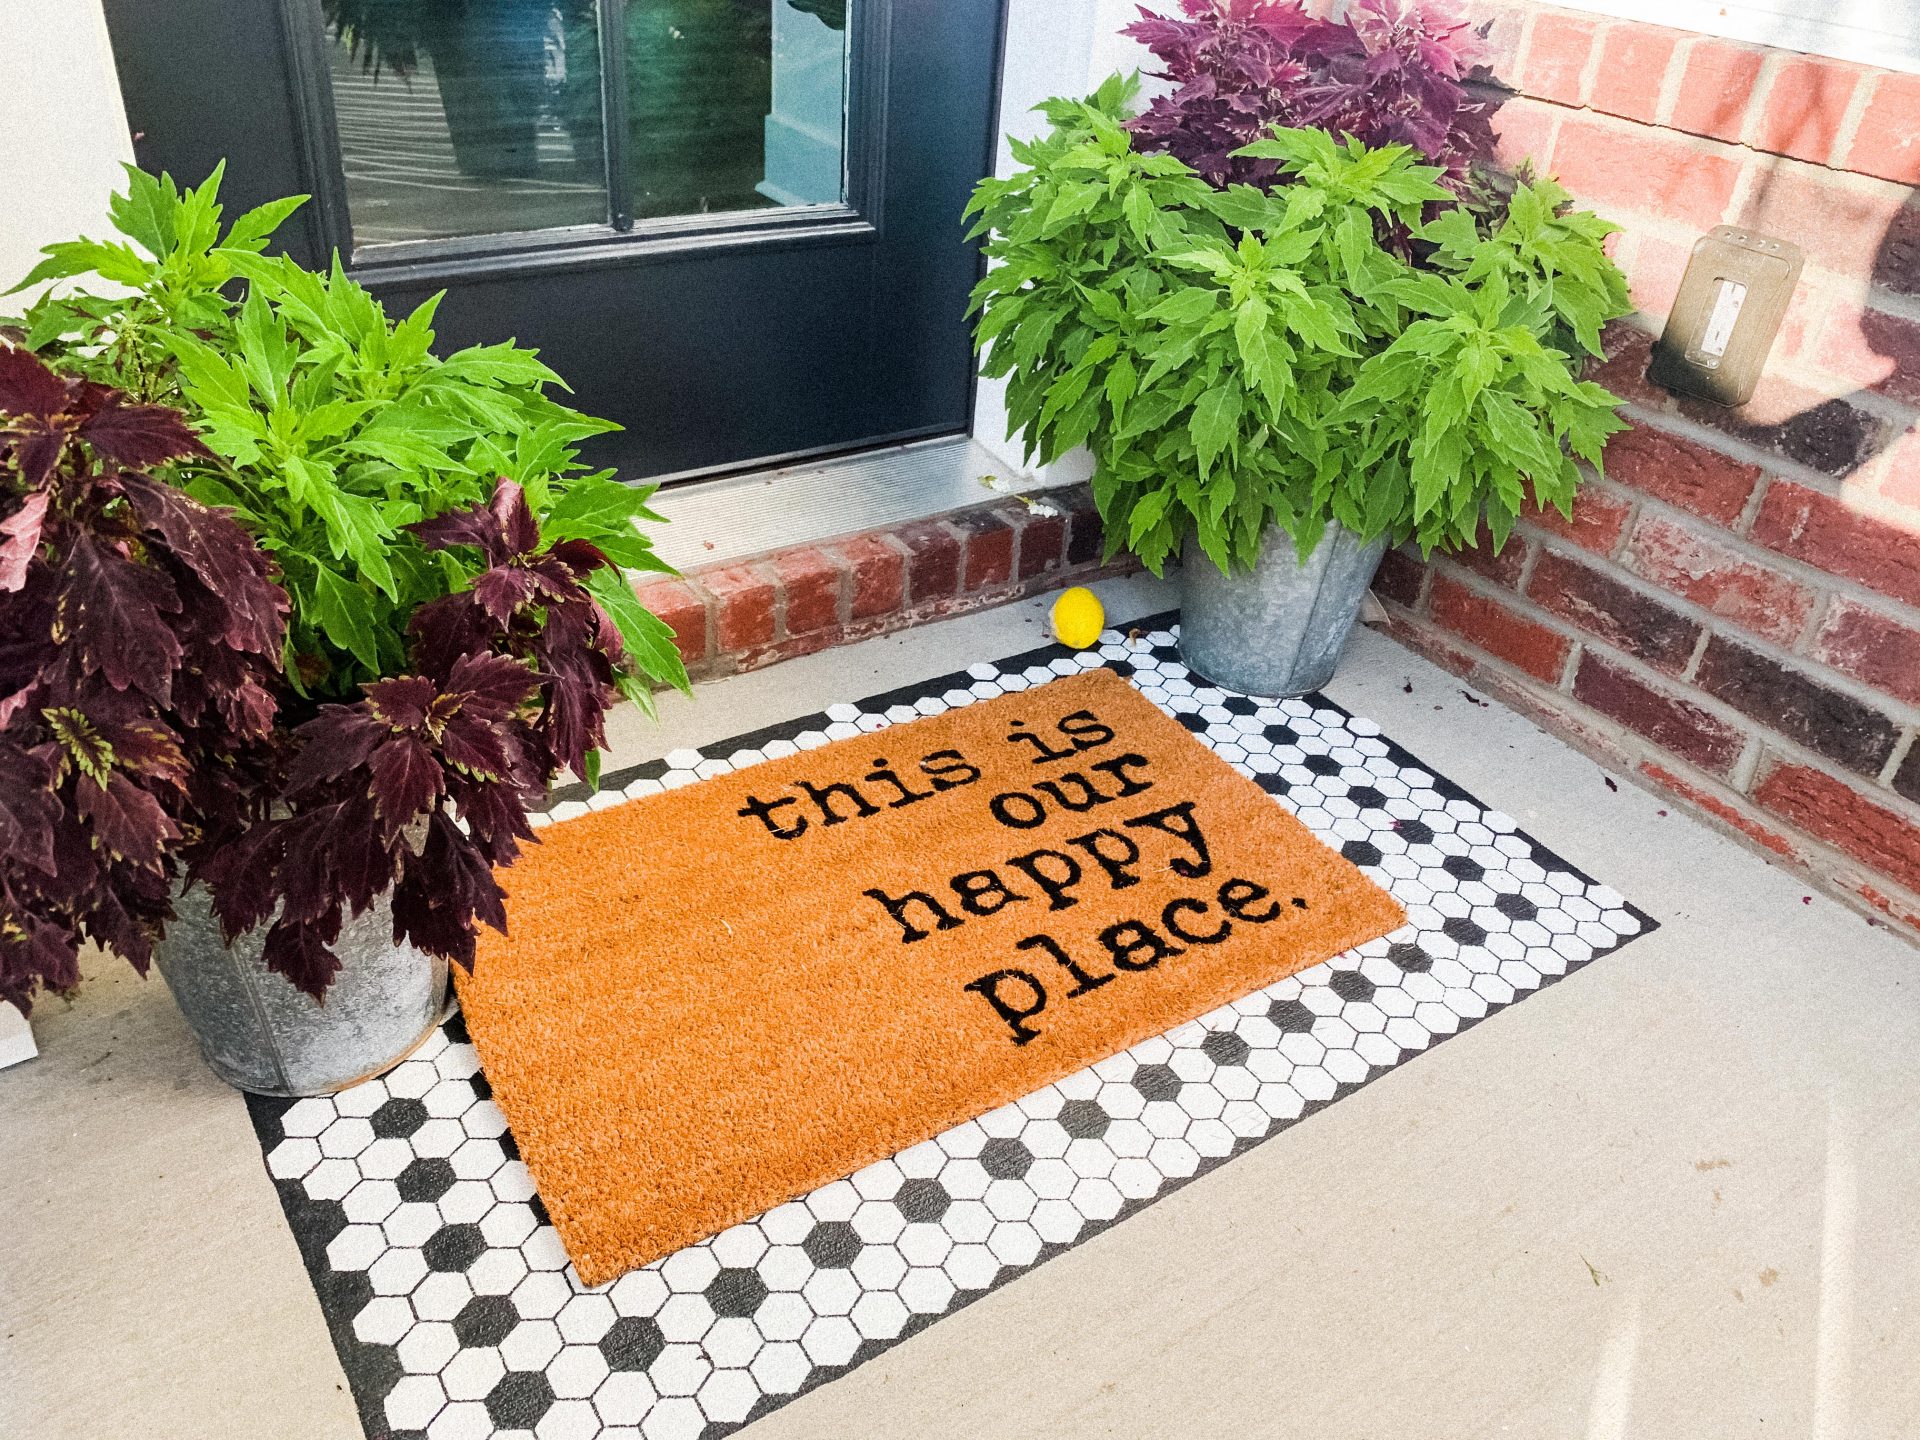
Use a fine touch-up paintbrush to correct the lines and cover up any bleeding. It is not going to be perfect, but it’ll look good enough to where people will think it’s an actual tile rug. I’ve had so many people ask me where I bought it!
 Step Eight:
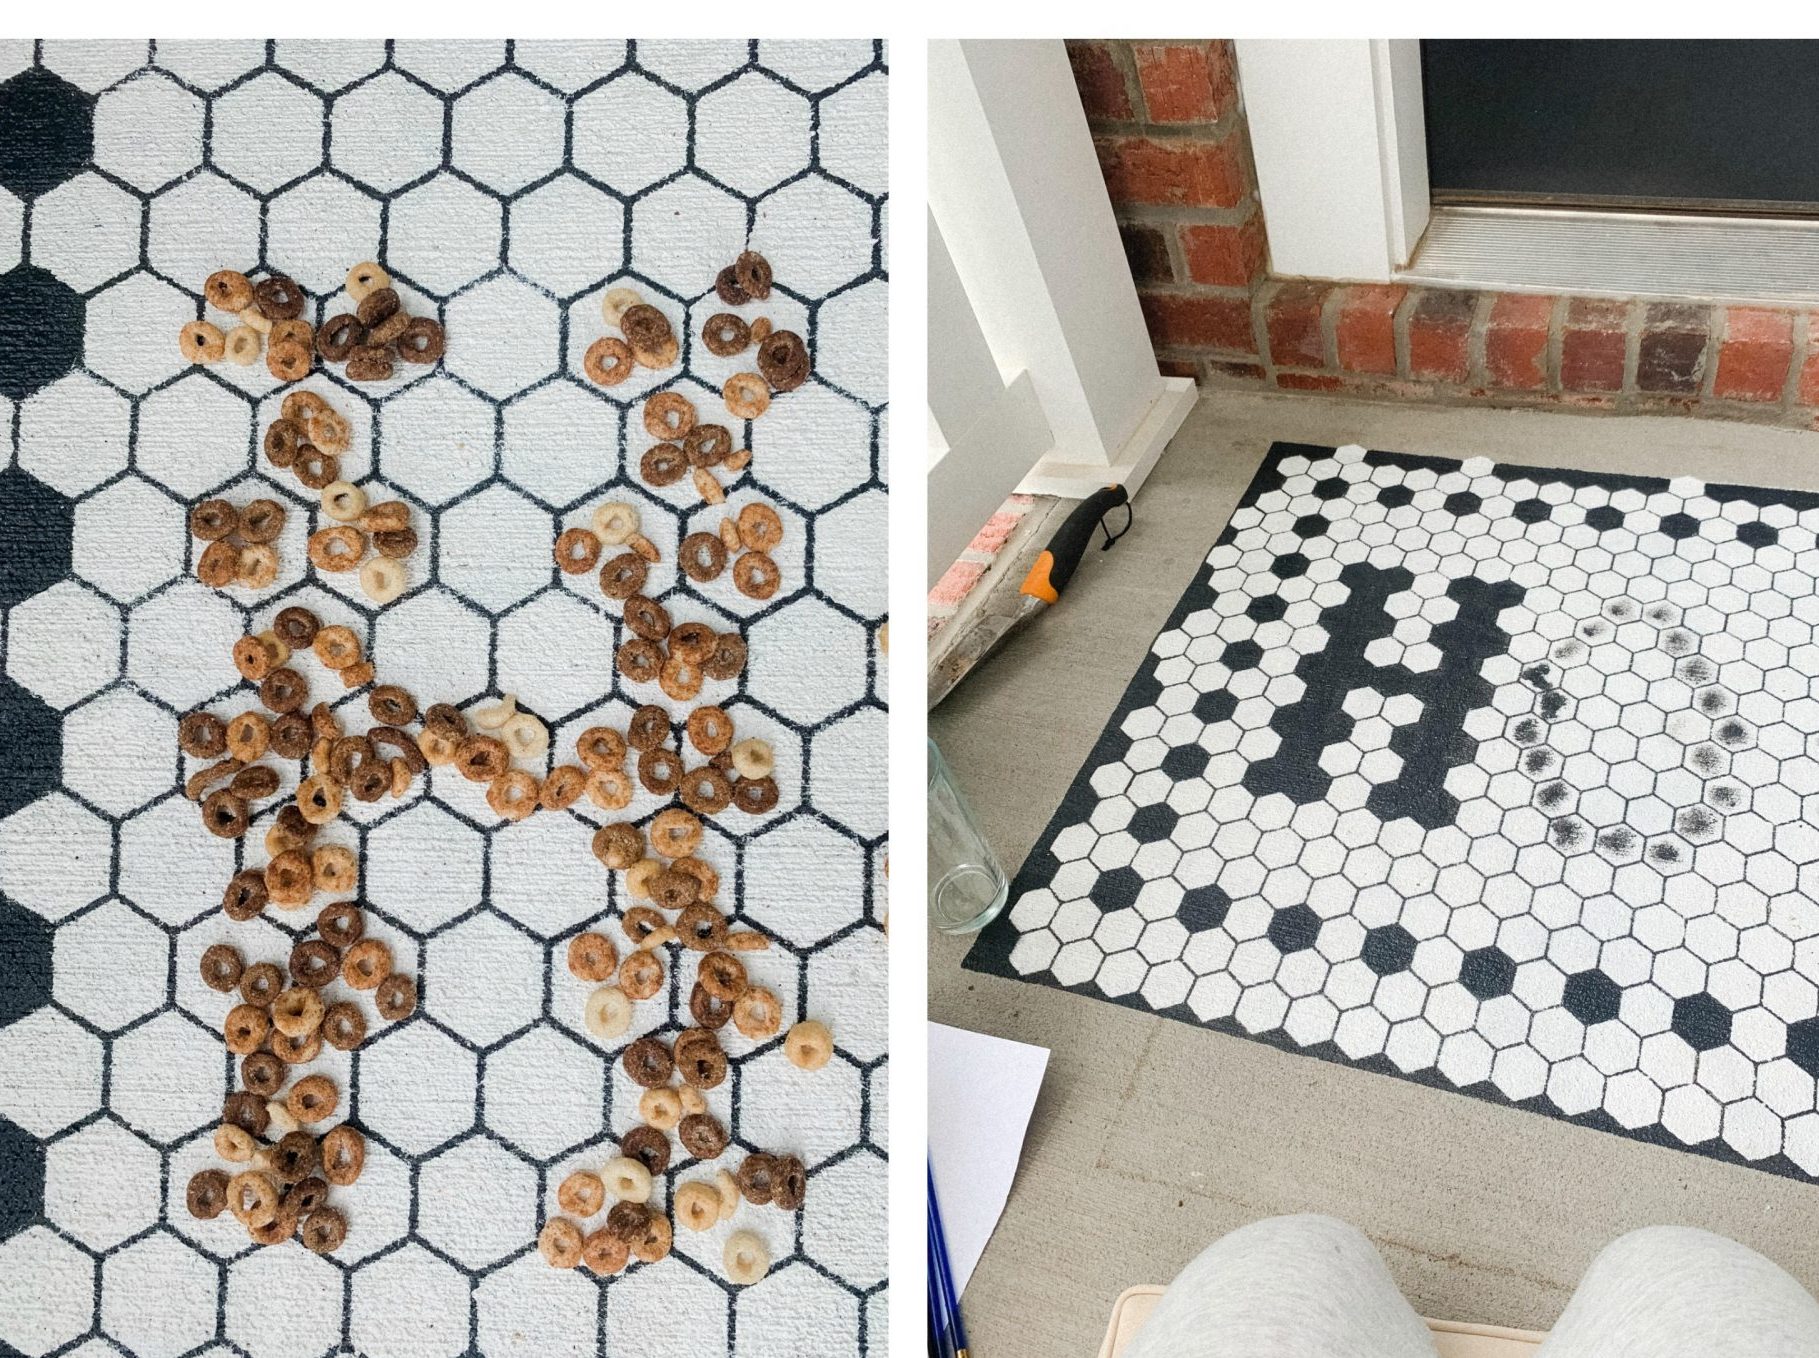
This is the fun part! Decide where you want to add designs and letters to your mat. I used cheerios to play around and see where I should place my lettering. It took me a few tries to line it up.
Use a medium-sized paintbrush to fill in the letters and design.
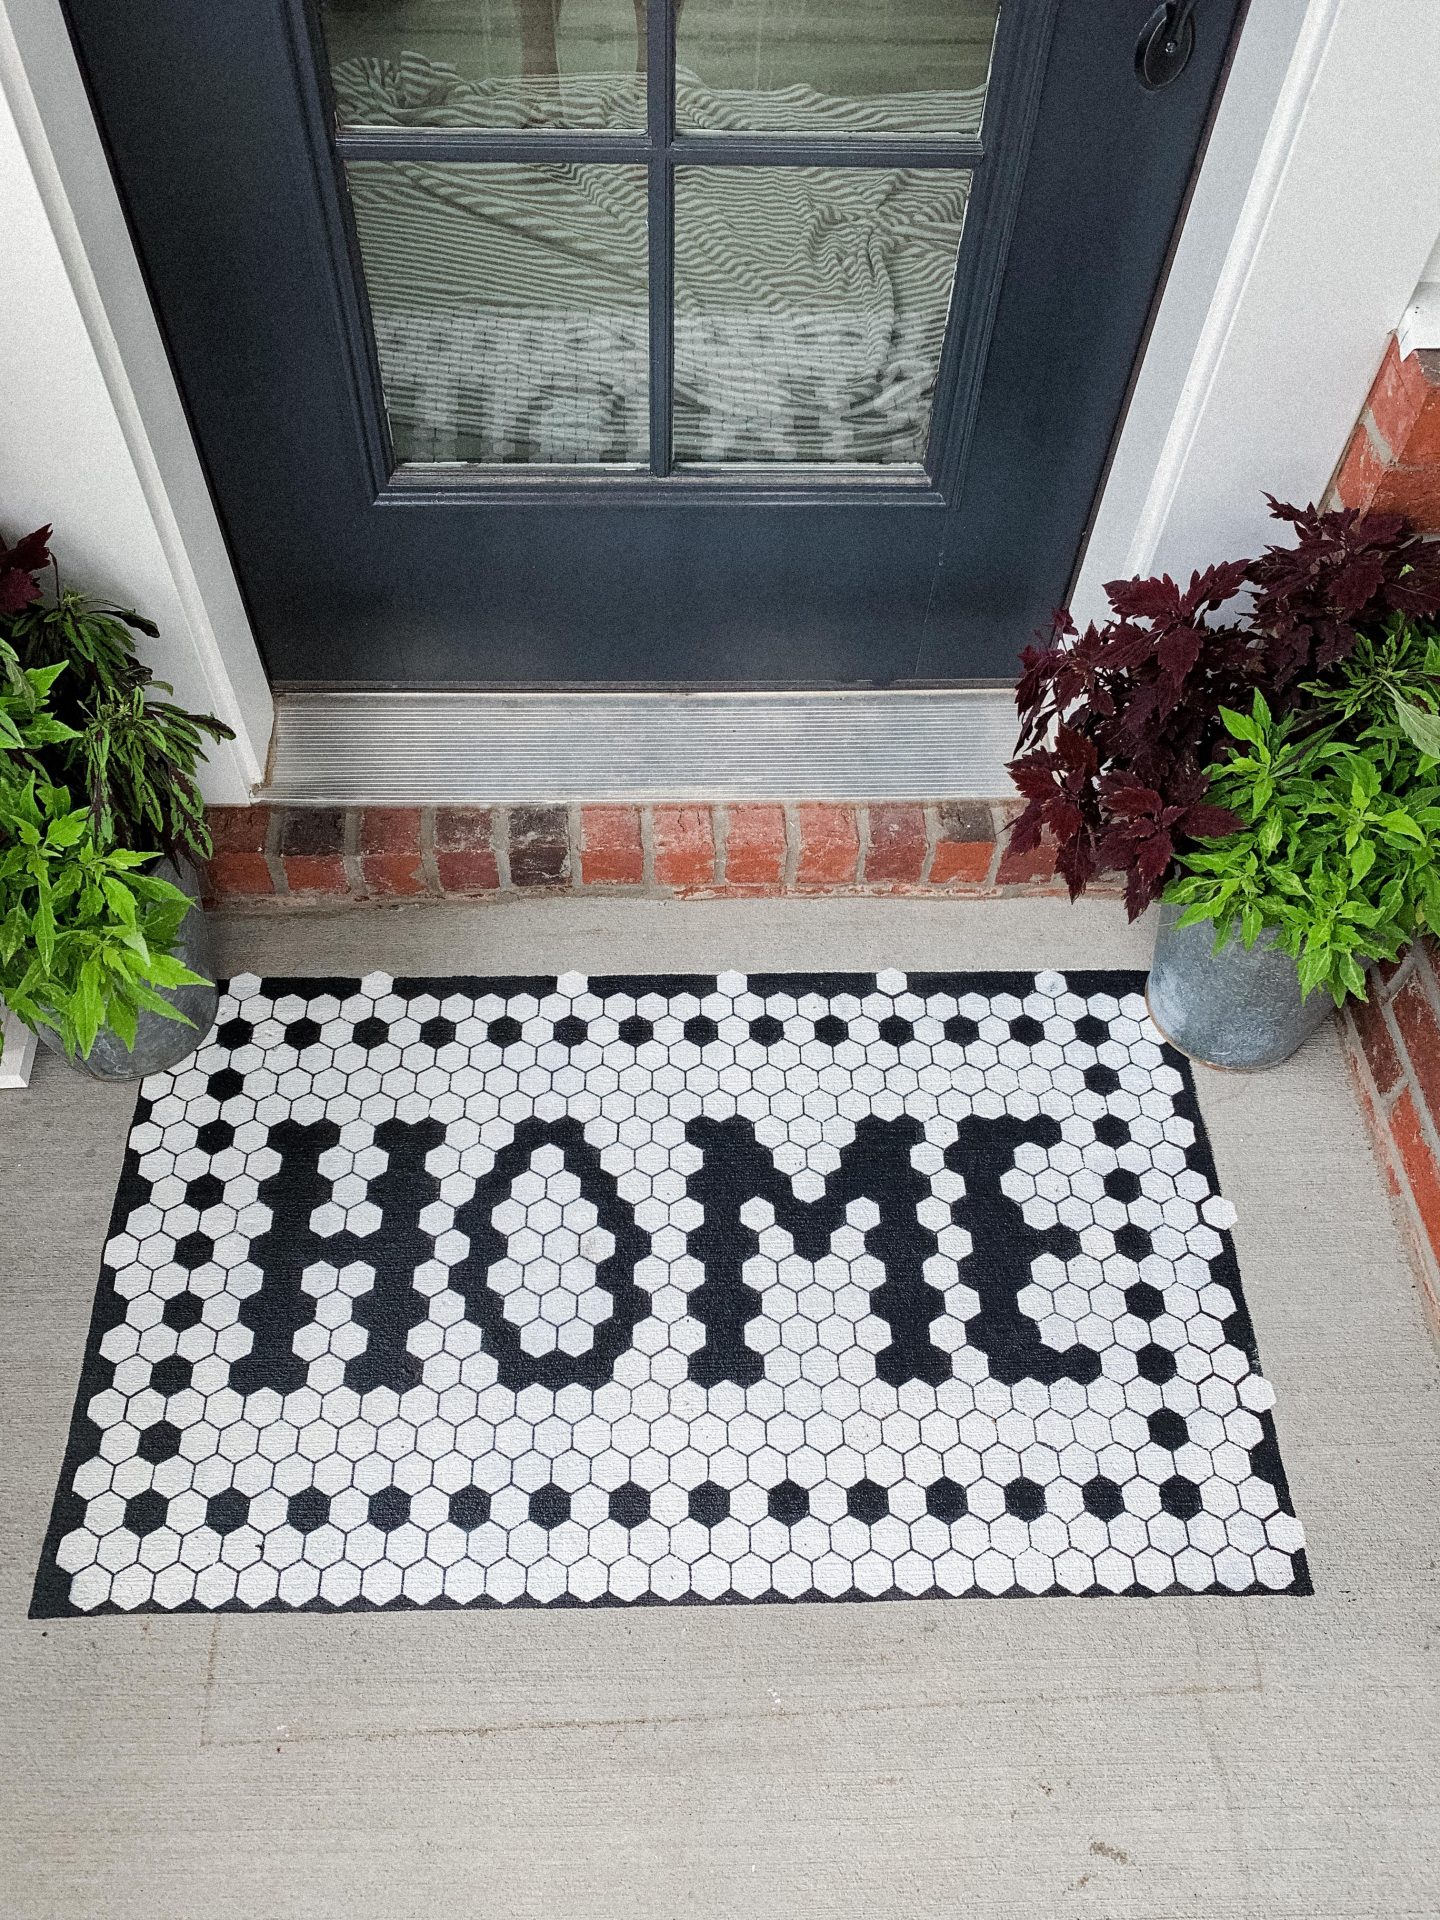
The final job wasn’t perfect, but I look forward to doing it again. I think it’ll be easier the next time. I am really happy with how it looks. It looks like I’m going to have to make a new wreath this month too.
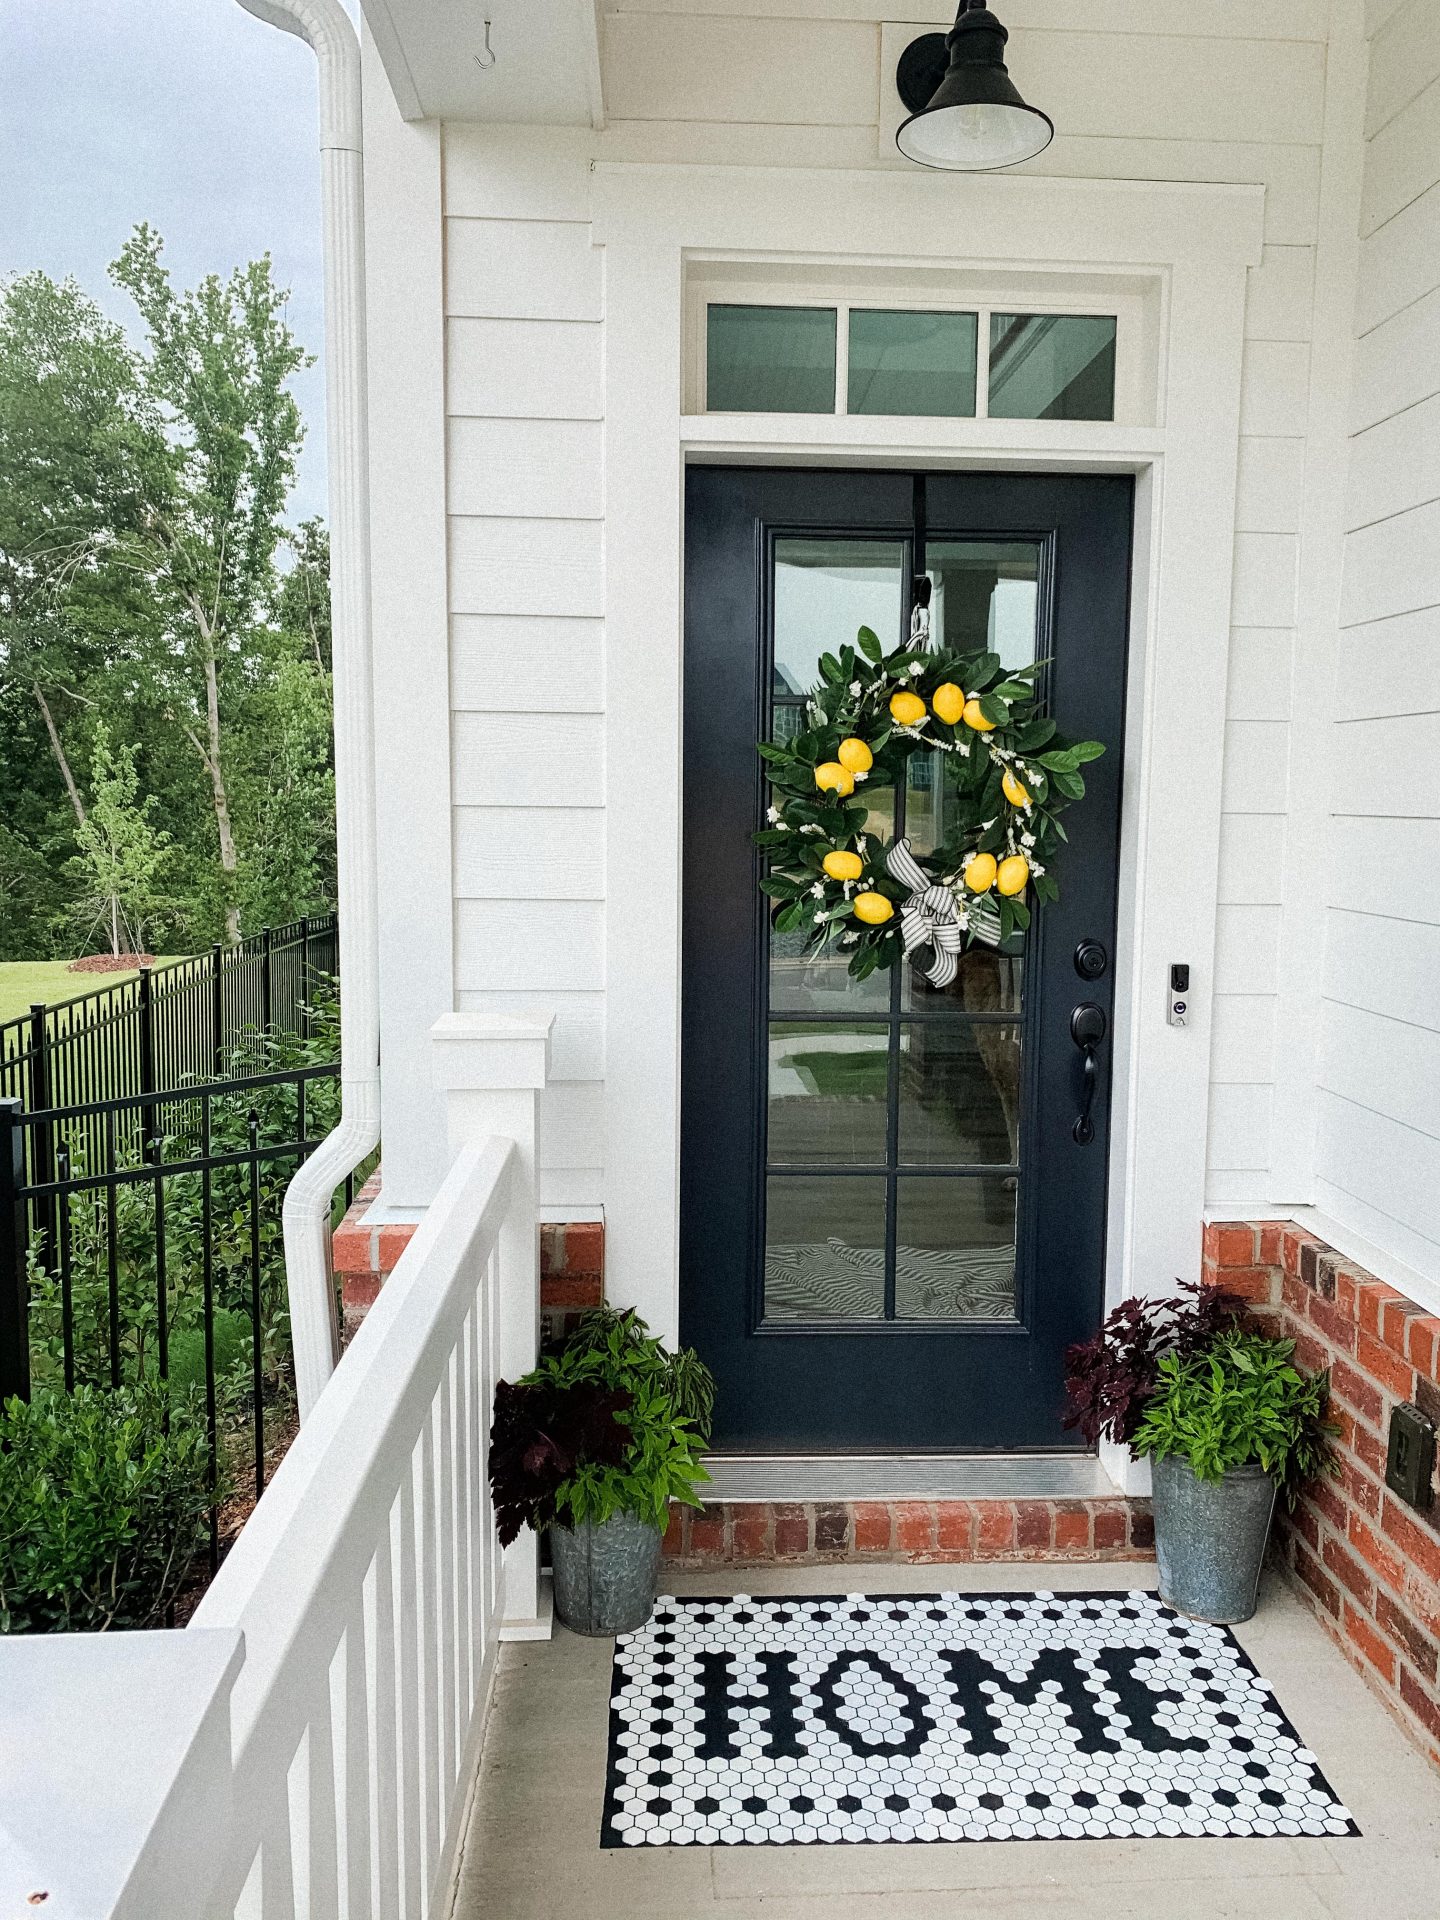 Whenever the front porch is messy after a storm, I use the blower to dust it off and the hose to powerwash it. It’s so nice not having to work around the rug.
The stencil also looks cool as a backdrop if you wanted to add a rug on top. I thought about doing this during Christmas time. We won’t get much rain in December, and it may look cute on top. 
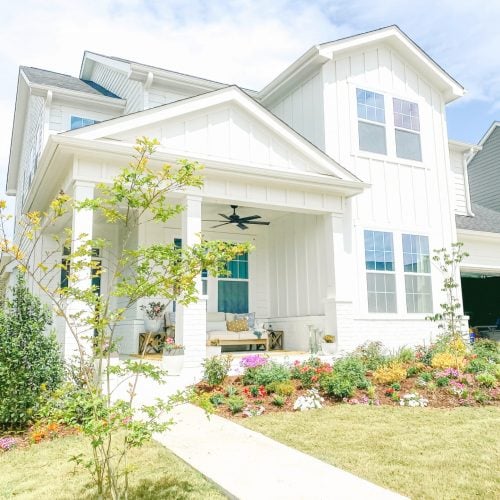
I still need to decorate and choose a porch swing for the other half of my porch, but we hang out in the backyard most of the time. 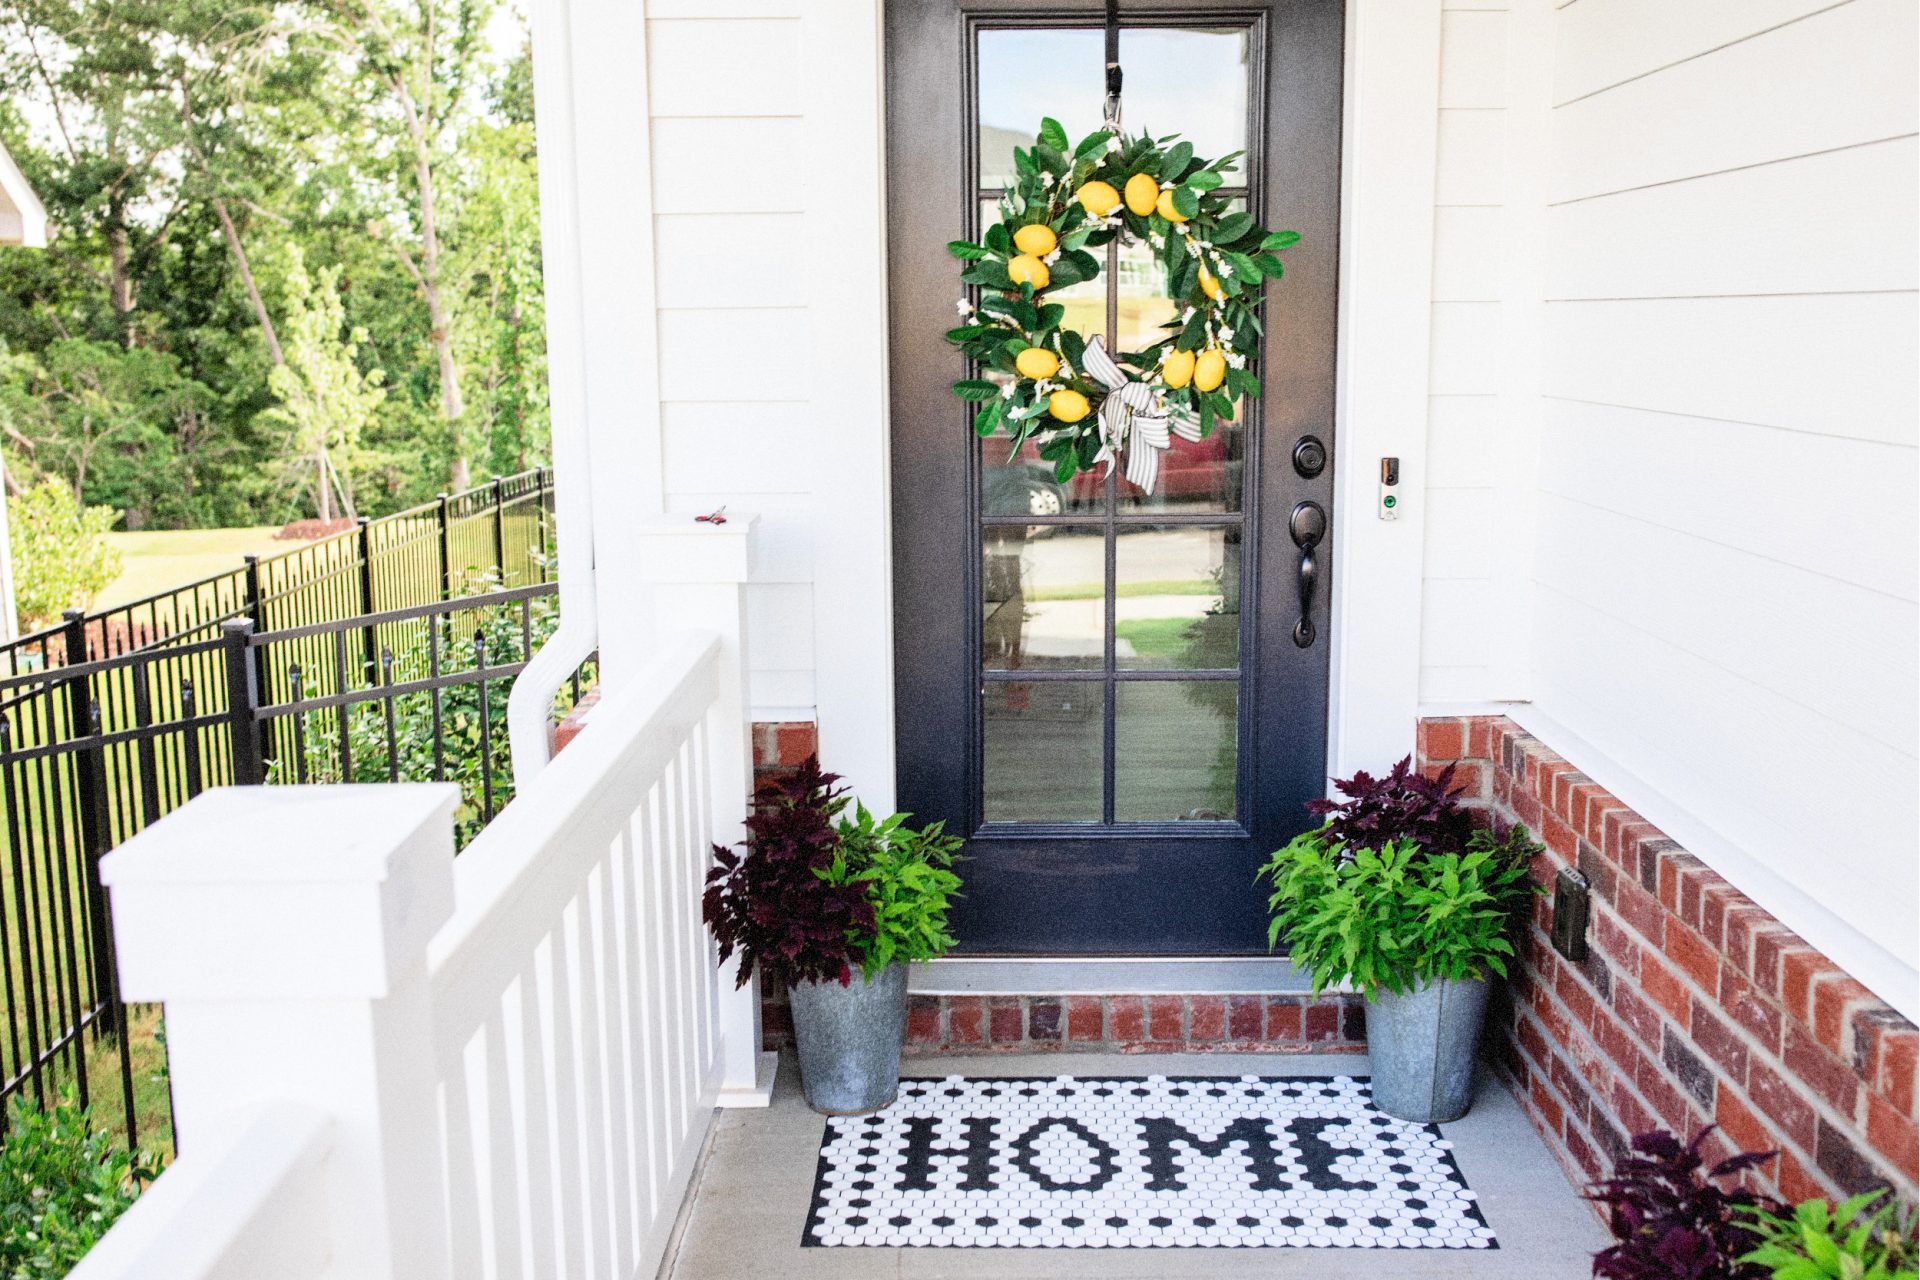
This week, we are working on the office makeover! I can’t wait for you all to see it. 
I hope you all enjoyed this fun little tutorial and if you stencil anything around your house, make sure to tag me so I can see photos!
Questions for you!
- What saying should I stencil for my fall doormat?
- Does your doormat ever get ruined by the rain?
- If you have a doormat, what does it say right now?


I’ve had really good luck with waterhog mats in high rain conditions — Juneau Alaska gets more rain than Forks 😉 — but this is super cute and you did a great job. Just menti0ning it in case you decide to throw a mat over the stencil occasionally like you mentioned.
Thanks, Debbie!
Ahhh just the mention of Alaska gives me chills, especially after reading The Great Alone! I want to visit!!
Hi Taralynn! I would have never thought of this. We’re renting a house for now until my husband is done grad school. I cant wait to do home DIYs like this. How about cozy or autumn? I’m curious about how much you can fit on there… My doormat is a mess with the weather and my dog lol, we really need a new one. It says “Dogs welcome, people tolerated.” I cant wait for fall decor!
Hahaha that is too funny. LOVE that doormat!!
I think if you want more letters, you’ll have to do them smaller and get smaller honeycomb stencils.
Such a fun idea! I love how you’re so creative with your house! ❤️✨
Charmaine Ng | Architecture & Lifestyle Blog
http://charmainenyw.com
Thanks, Charmaine!
Why not just get a rubber doormat if you’re not using it to wipe your shoes. Stained concrete is pretty easy to clean with a pressure washer, much easier than removing paint from concrete.
Because I think the paint is cute! ♥️
So cute! You are too creative, Taralynn!
That’s so funny – I have never had an issue of my doormat getting messed up by the rain, even when I lived in an apartment with no overhang! I currently have one that says “hello” with lemons on it, which I got as a gift from my sister about 4 years ago (side note – love your lemon wreath!). I also have a fall and Christmas doormats that I will swap out during those seasons!
We also have a “no shoes in the house” policy. I used to kick them off outside, but living in the South, I feel like they get kind of gross and humid when it’s hot or rainy (also, I would hate when they got cold in the winter!). We recently got a shoe rack which sits right inside the front door where we (and guests) can put their shoes! Similar to this:
https://tinyurl.com/y2hu2rbn
Thanks, Mary!
That’s an adorable bench! We also have that dropzone by our garage for shoes 😊
I love this idea so much, I am thinking a bout ordering a stencil kit so I can do our front door, because for the same reason as you our mat keeps getting ruined by the rain plus the neighbors cat likes to use it as a scratching pad.
For the fall stencil you could do a pattern with fall colours (burnt orange, tans, browns and yellows etc.) and write “Happy Fall Y’all” or “Hello pumpkin”. The door mat that I have at the moment says “hope you brought wine and dog treats” hoping it lasts longer then a month.
Ohhh love that idea of adding some fall colors to the mat!
That came out amazing!
Thank you! 😊
This came out sooo nice! We have tile on both our front and back entrances so I don’t think this would work for us – but I wish it did! Currently I have a couple layered mats but my front door needs some serious updating!
We are thinking of doing the patio tile on our back porch!
It’s almost fall, which is my favorite time to update the porch!
I am painting the tree of life on my coffee table this weekend .
I love this idea . I want to stencil my welcome mat on now too . I think you should do fall leaves or something next .
Have fun with your coffee table project!!